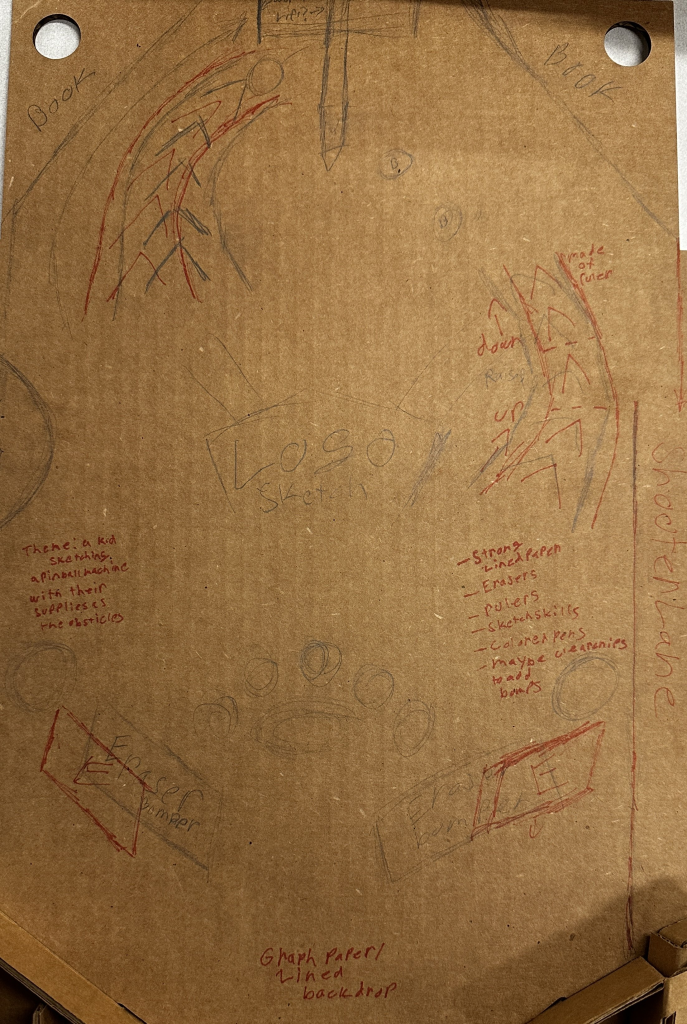
Initial Design Ideas
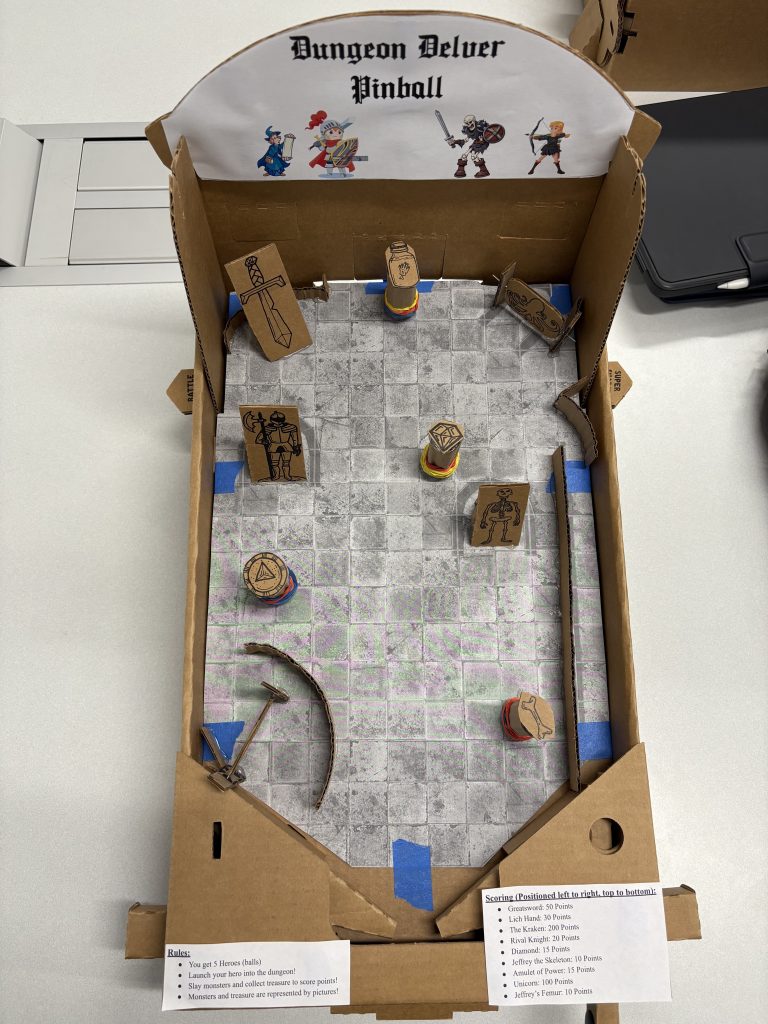
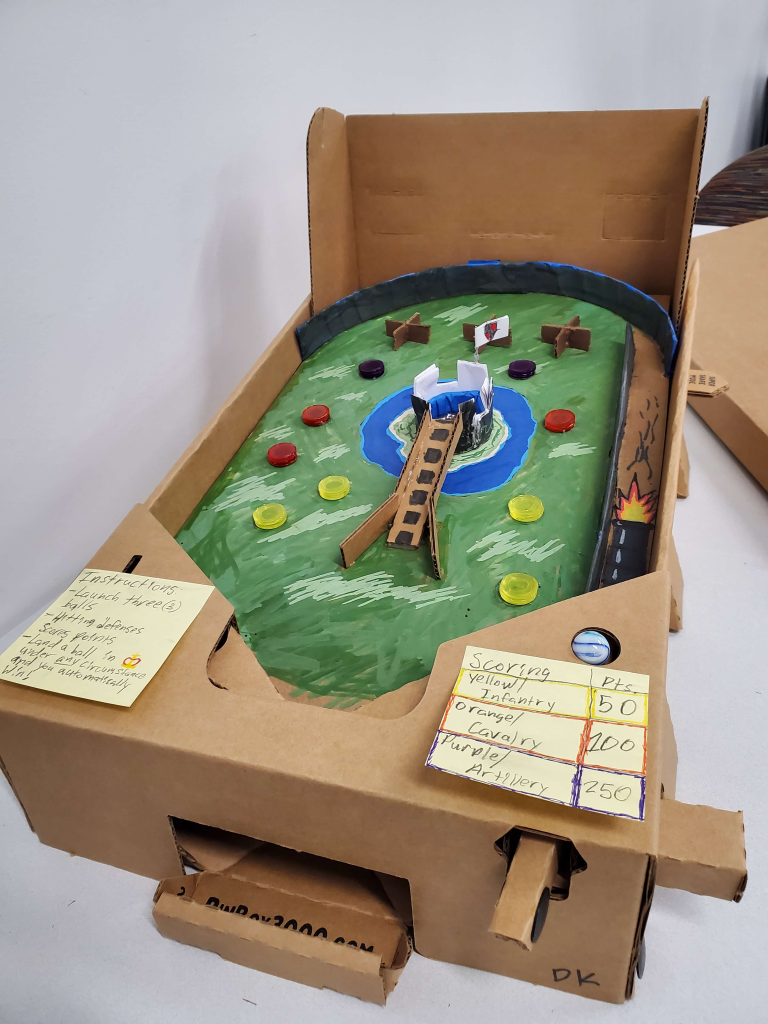
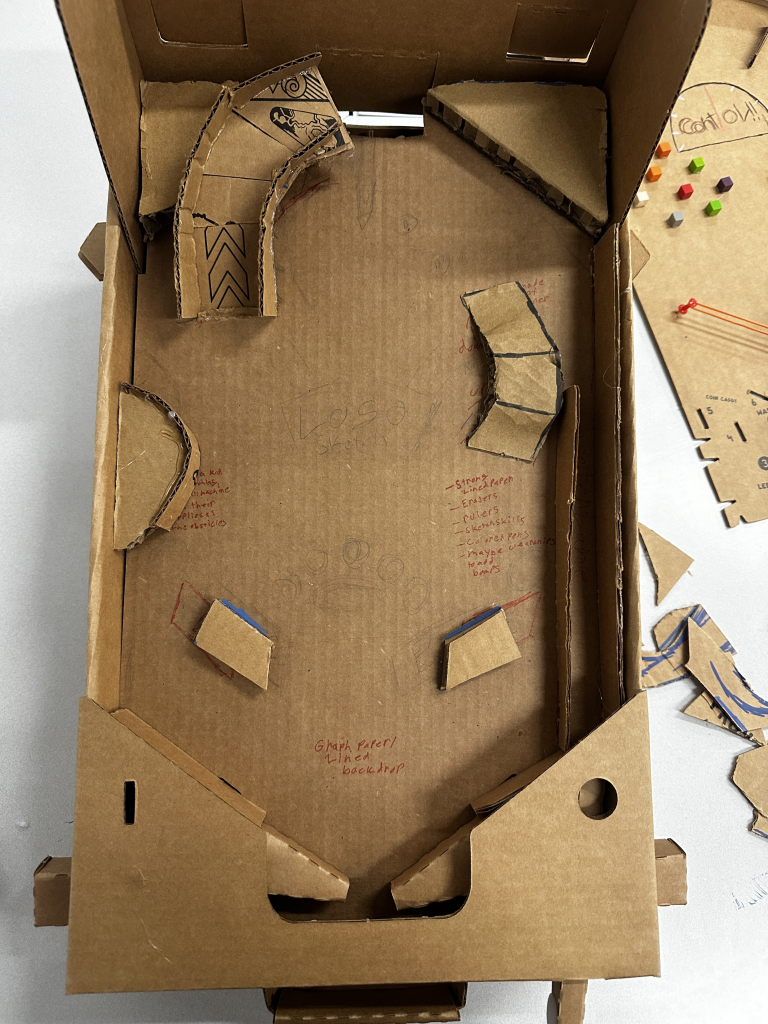
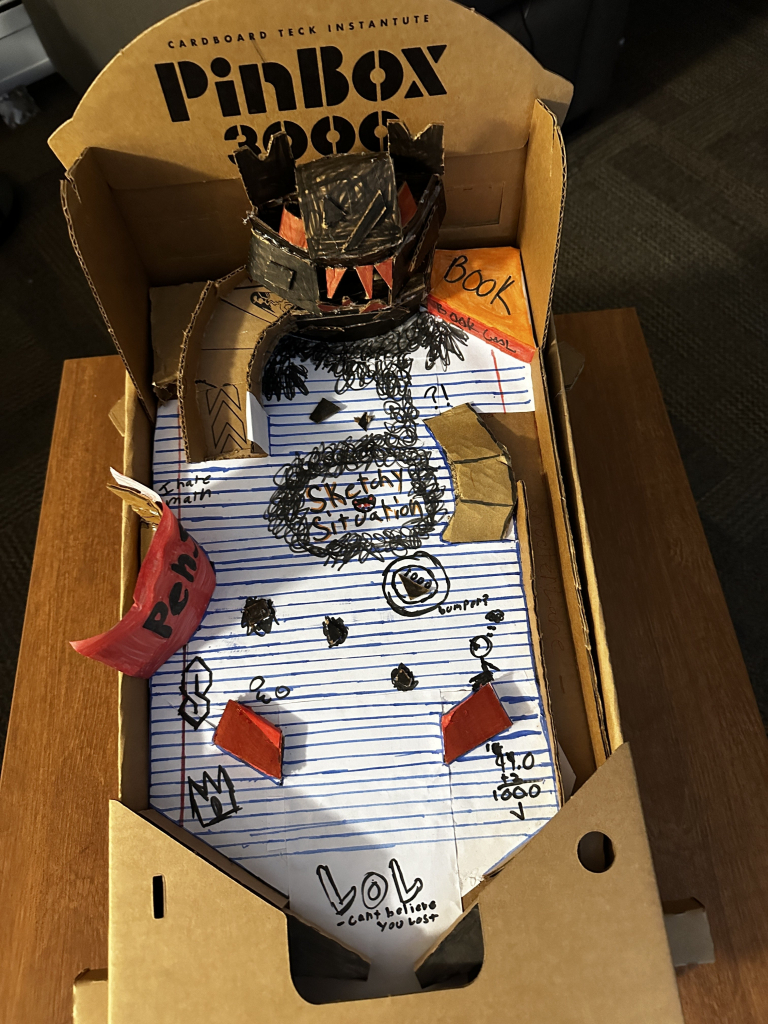
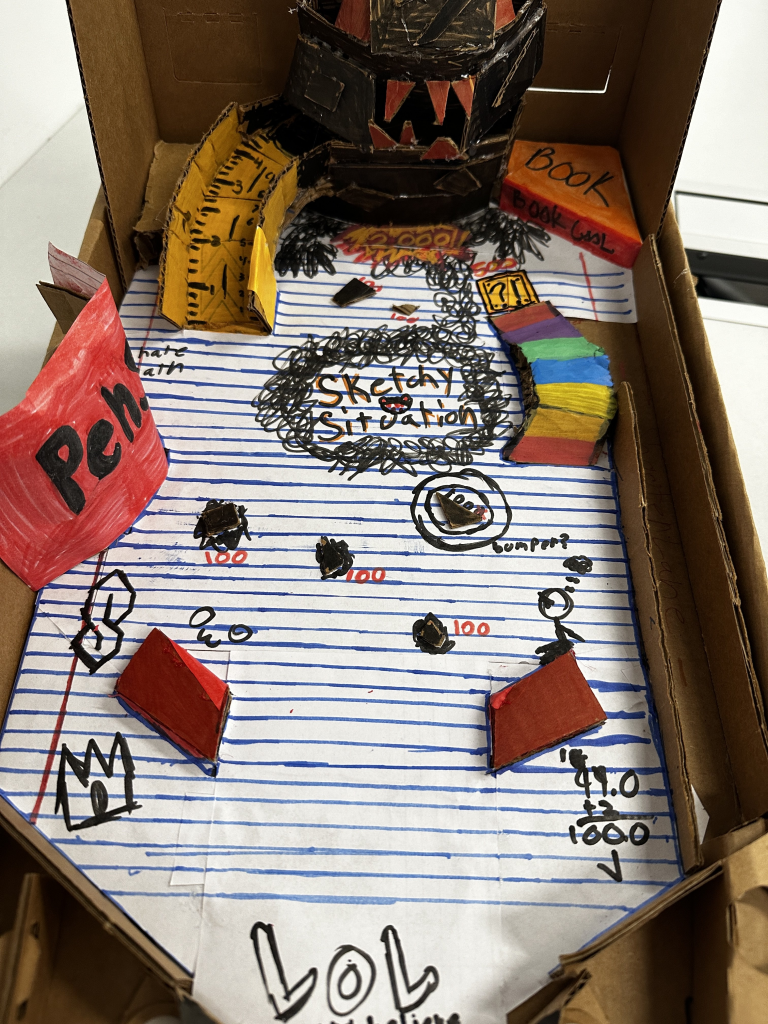
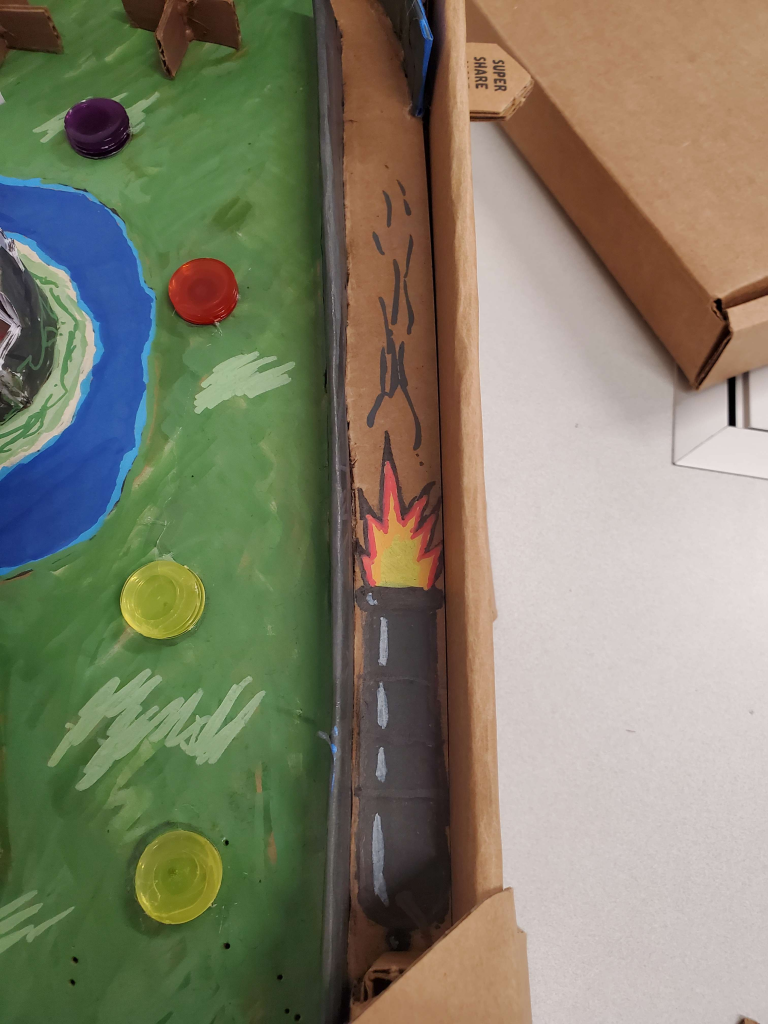
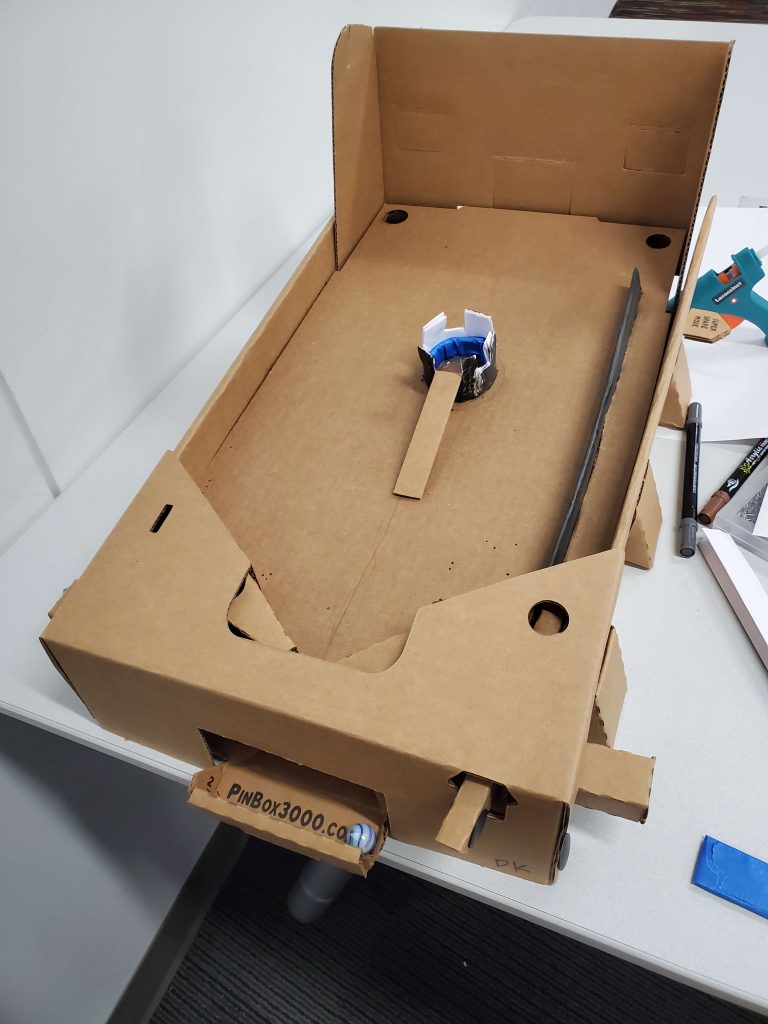
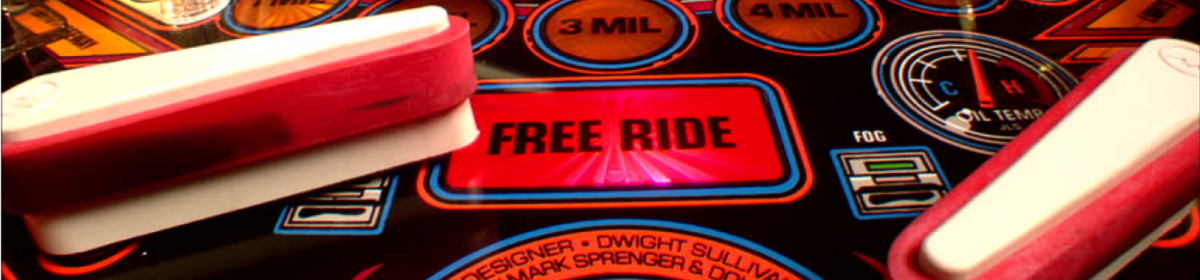
After creating the physical rendition of Pin-8-Ball using the cardboard PinBox 3000, I decided that I wanted to digitally recreate it using Visual Pinball X.
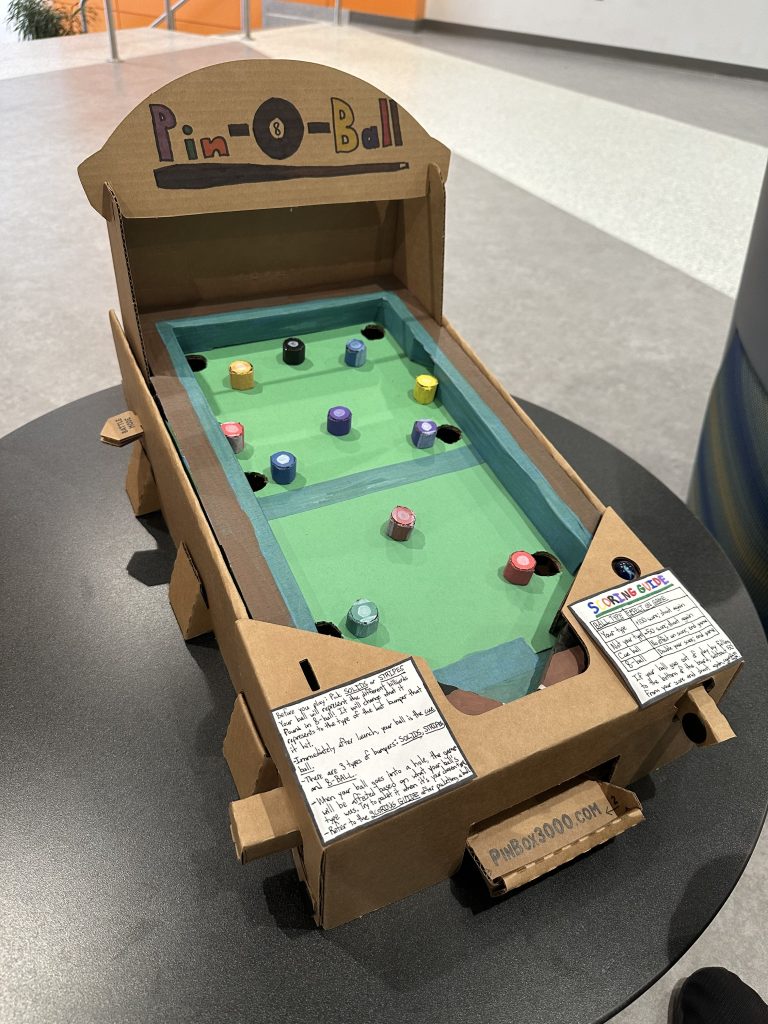
As with the physical version, I wanted the virtual version of Pin-8-Ball to strongly resemble a tradition pool table. In order to accomplish this, I planned to carry the following features over from the physical version to the digital version:
- Bumpers that represent different billiards
- Holes that represent the pockets in a pool table
- Flippers that resemble pool cues
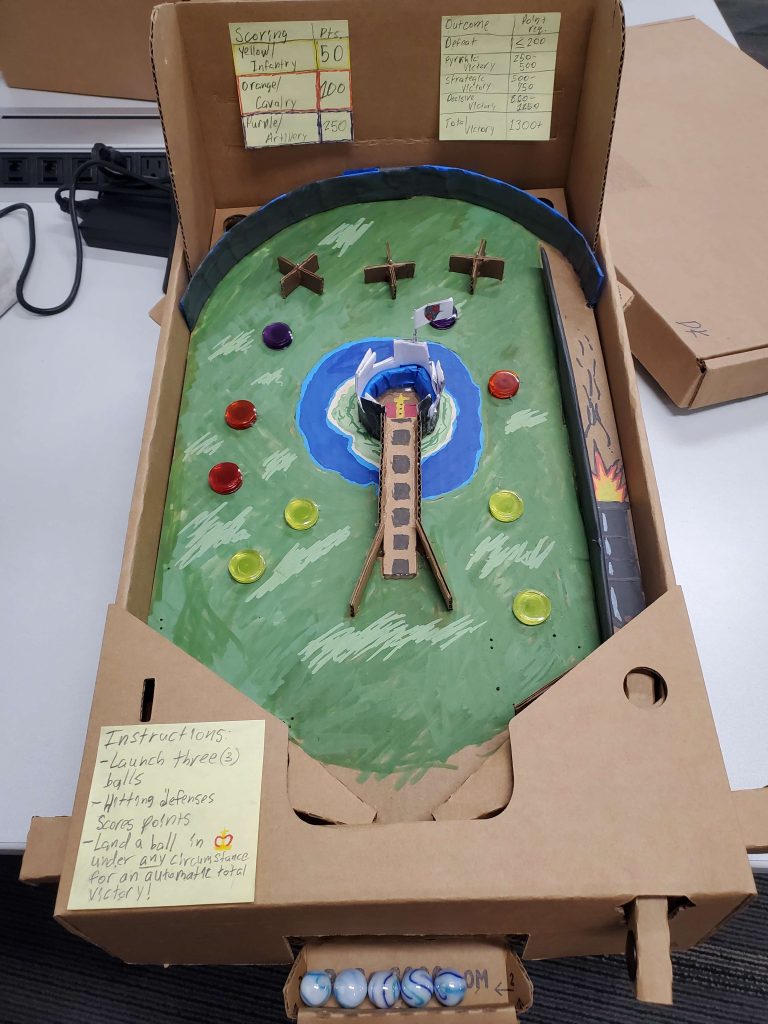
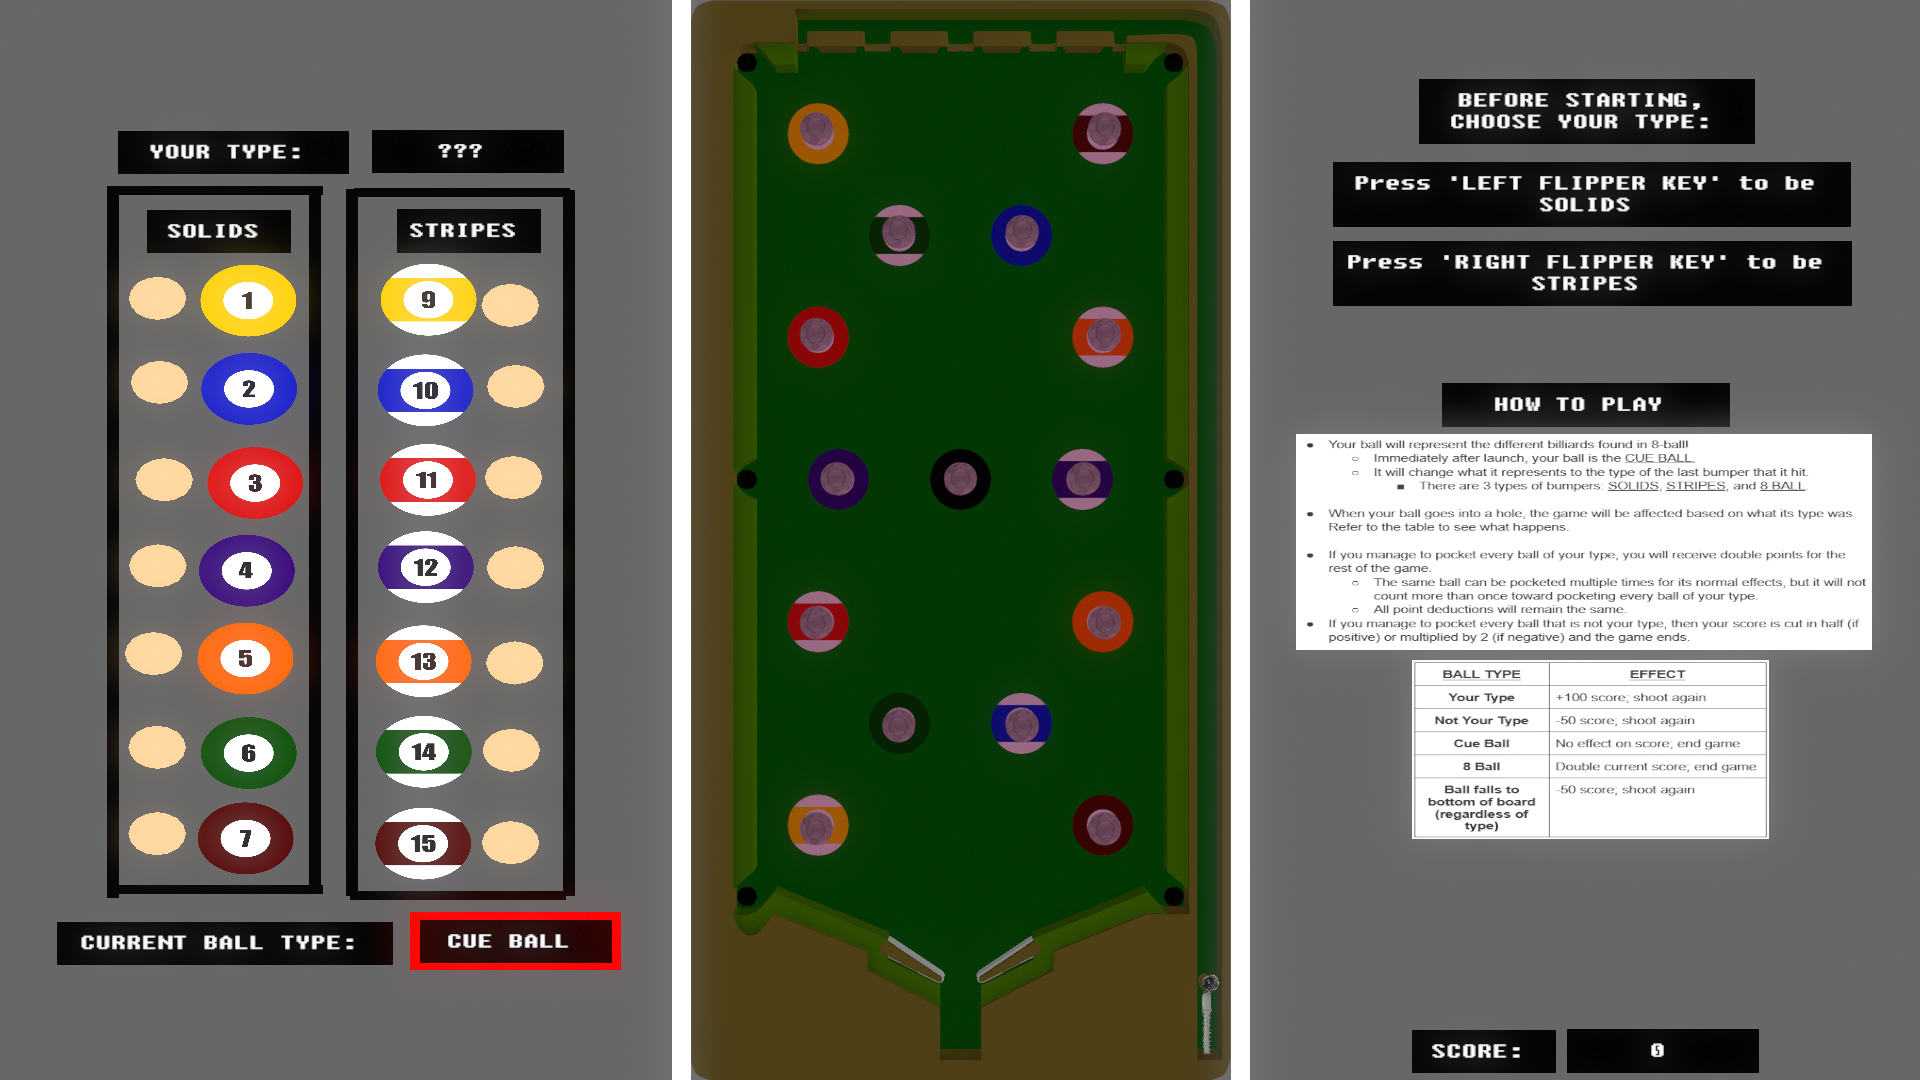
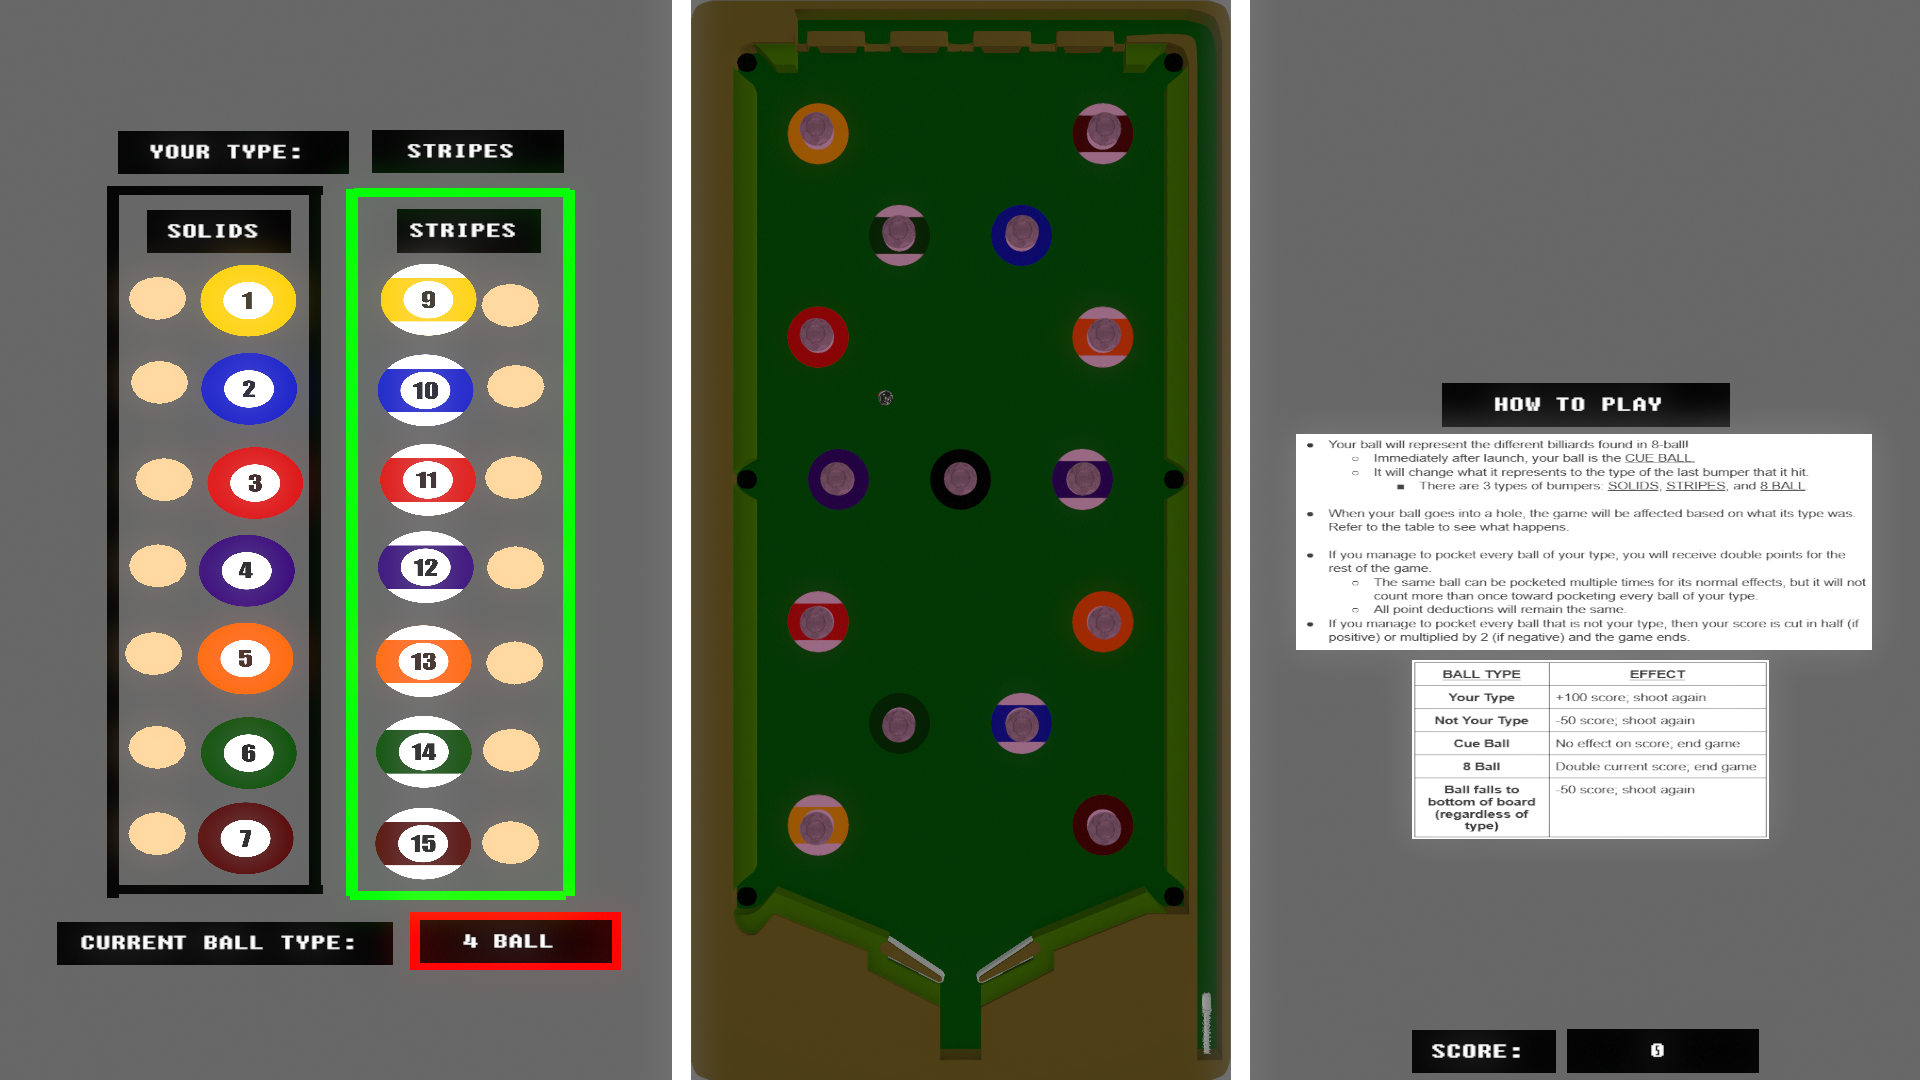
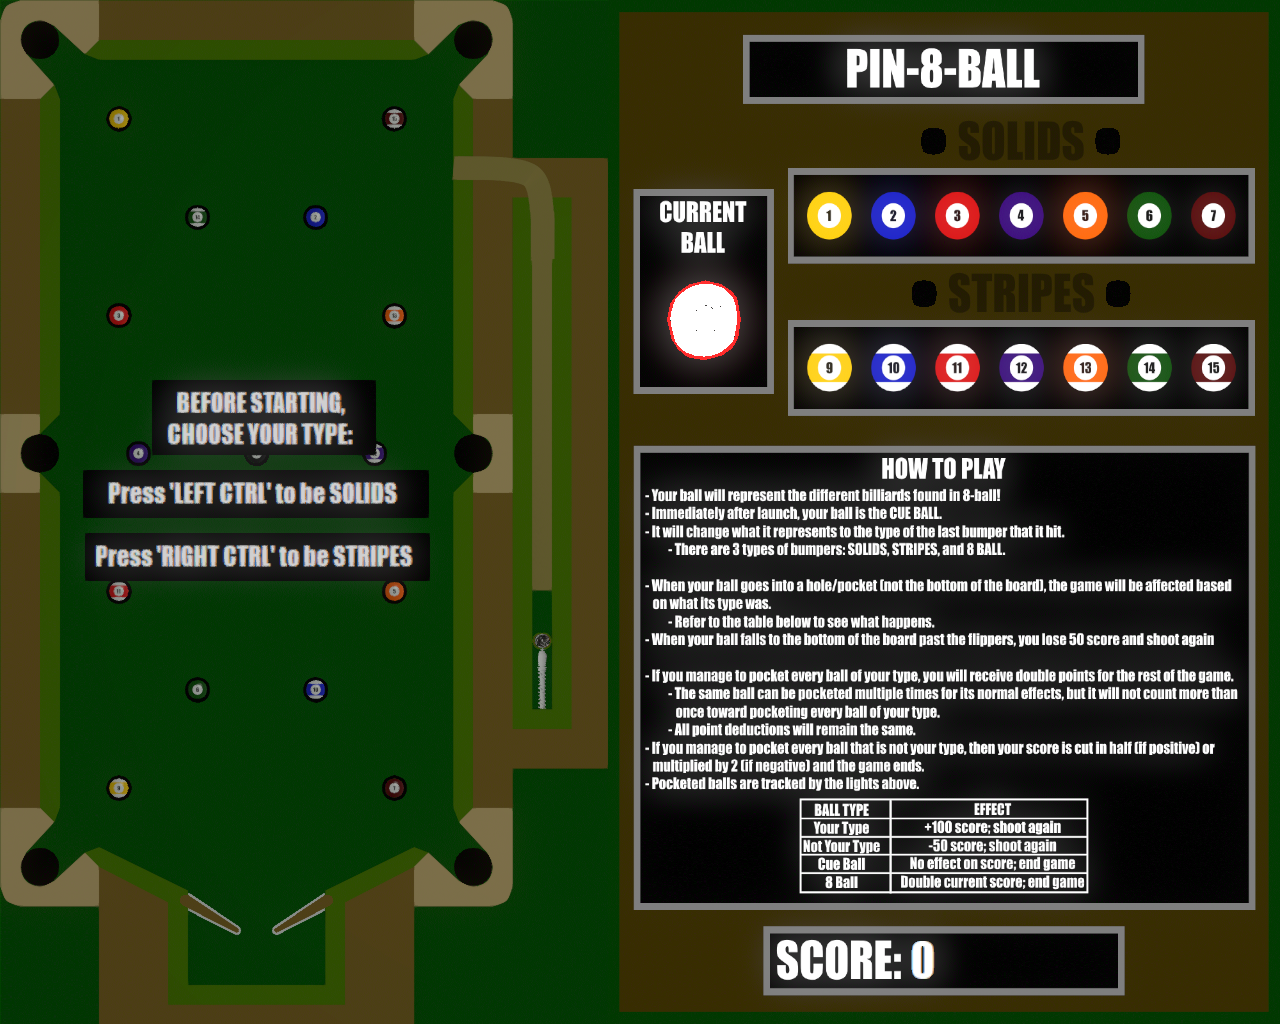
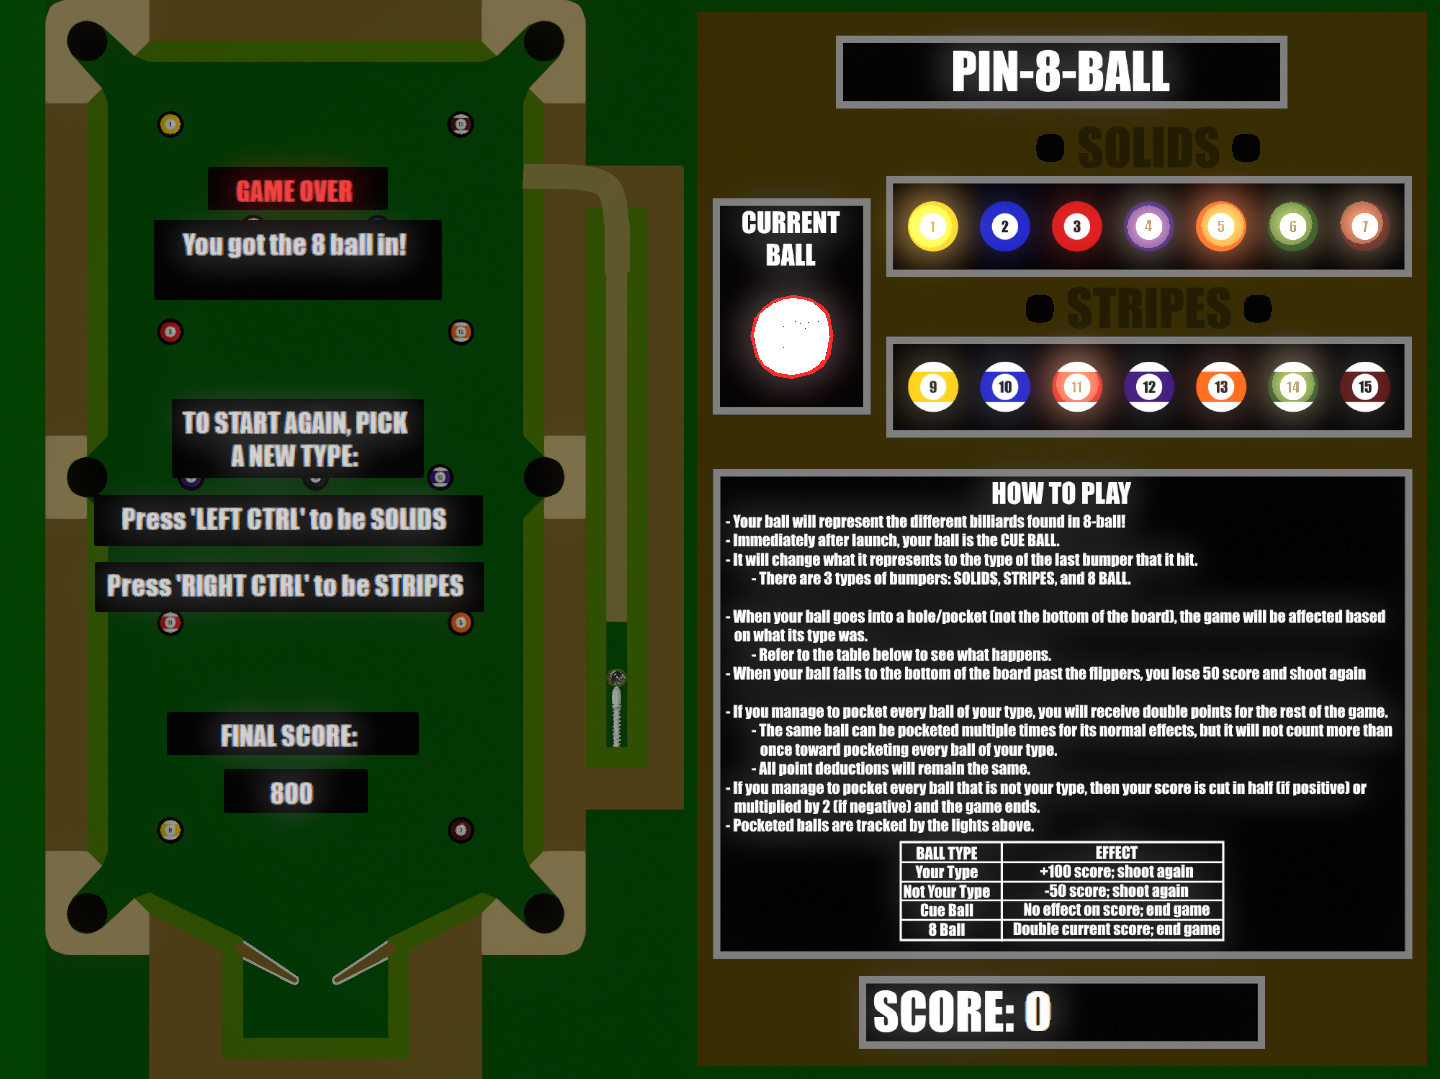
After playtesting the physical version of Pin-8-Ball enough, I made the determination that while its rules are fun and unique, they required the player to keep track of too much information while playing the game. Thankfully, however, I knew that they would translate over to a virtual medium that could automatically track it for the player very well. As a result, I decided to keep the rules the same as the were in the PinBox 3000 edition of Pin-8-Ball. Following in the steps of its cardboard predecessor, I planned for the virtual version of Pin-8-Ball to feature a single ball in play at a time that held onto an ever-changing identity throughout the game. The identity would once again represent the different billiards that could be found on a pool table, and each bumper also had an identity which corresponded with one of the numbered billiards. After starting as the cue ball after launch, when the player’s ball would hit one of the bumpers, its identity would change to become that of the bumper. Before the start of the game, the player would choose either stripes or solids to determine the type of ball that they would be aiming to “pocket” for the rest of the game. Then, whenever the ball would go into one of the six “pockets” that were on the perimeter of the table, depending on the identity of the ball, the game would be affected. The effects were as follows:
- Player’s Type: +100 score; shoot again
- Not Player’s Type: -50 score; shoot again
- Cue Ball: No effect on score; end game
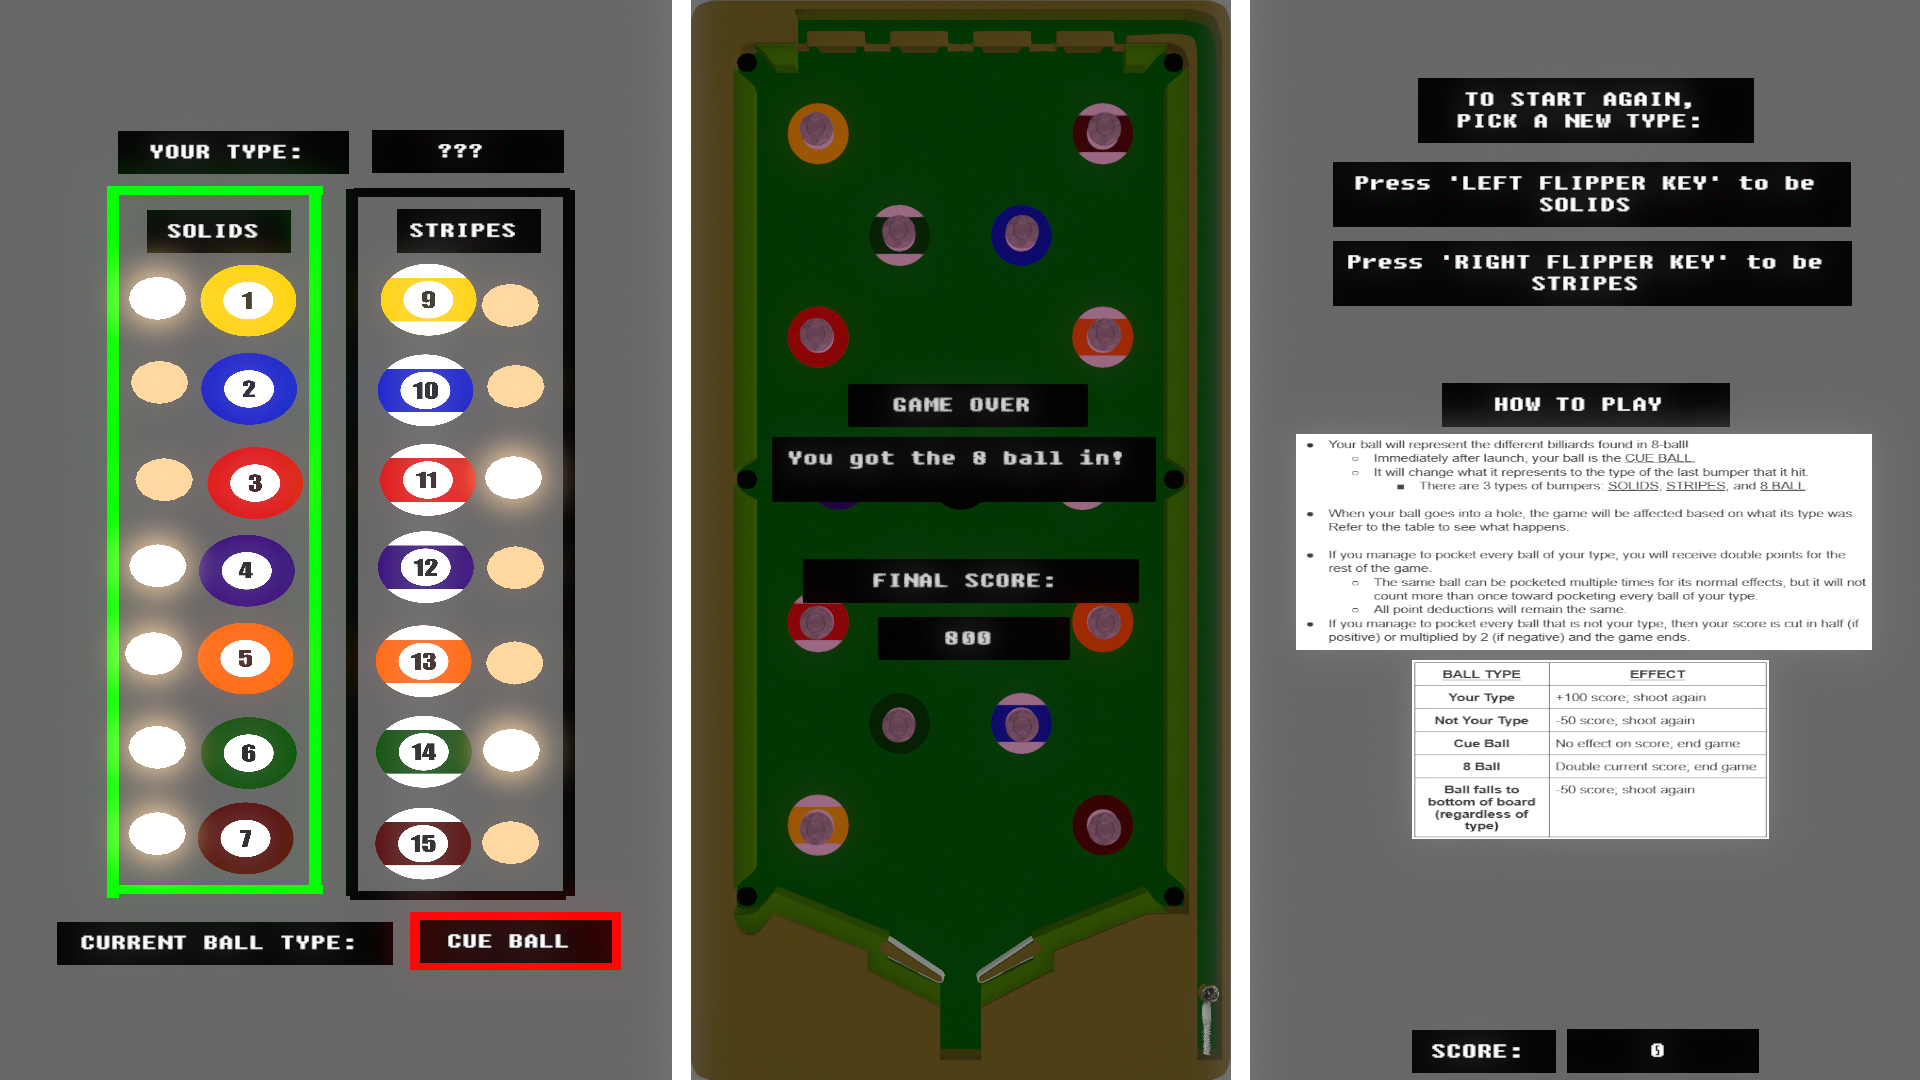
- 8 Ball: Double current score; end game
- Ball falls to bottom of board (regardless of type): -50 score; shoot again
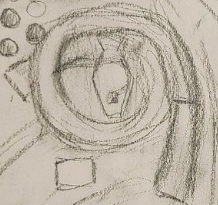
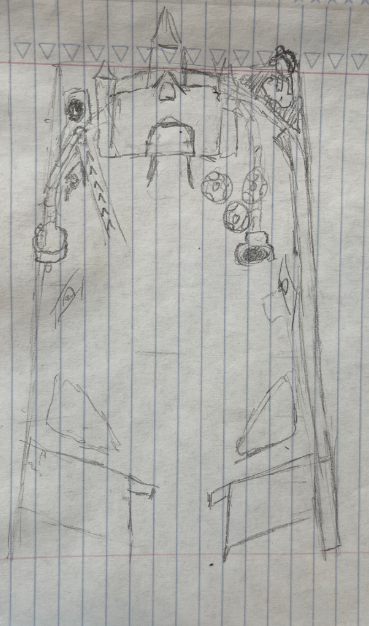
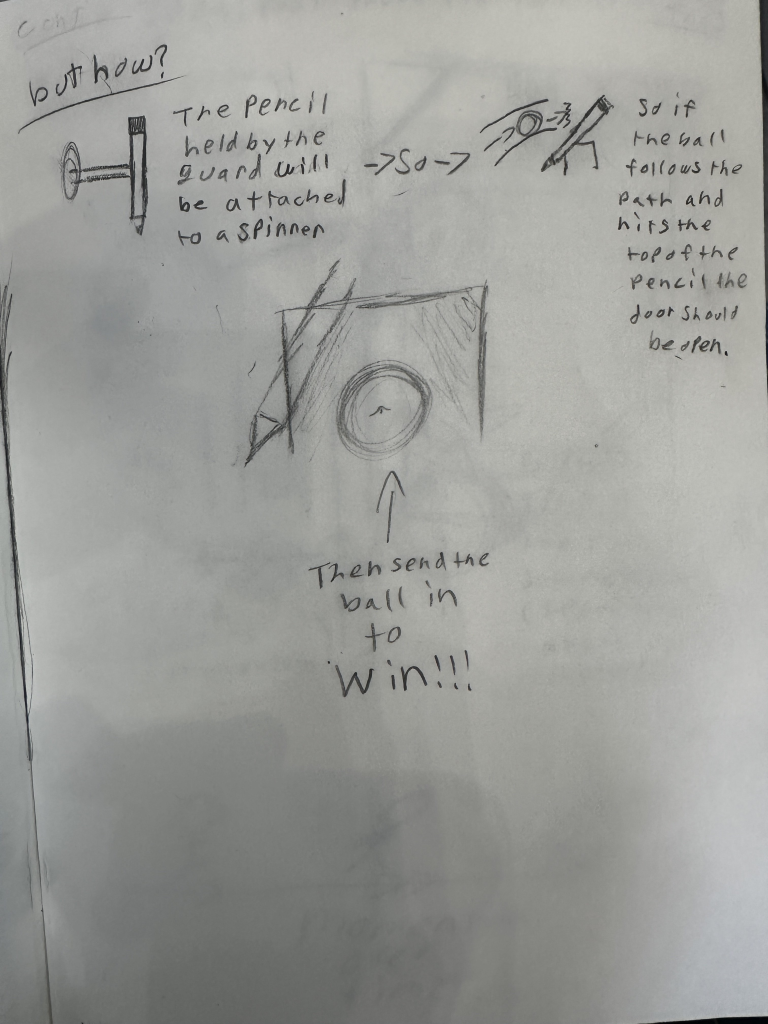
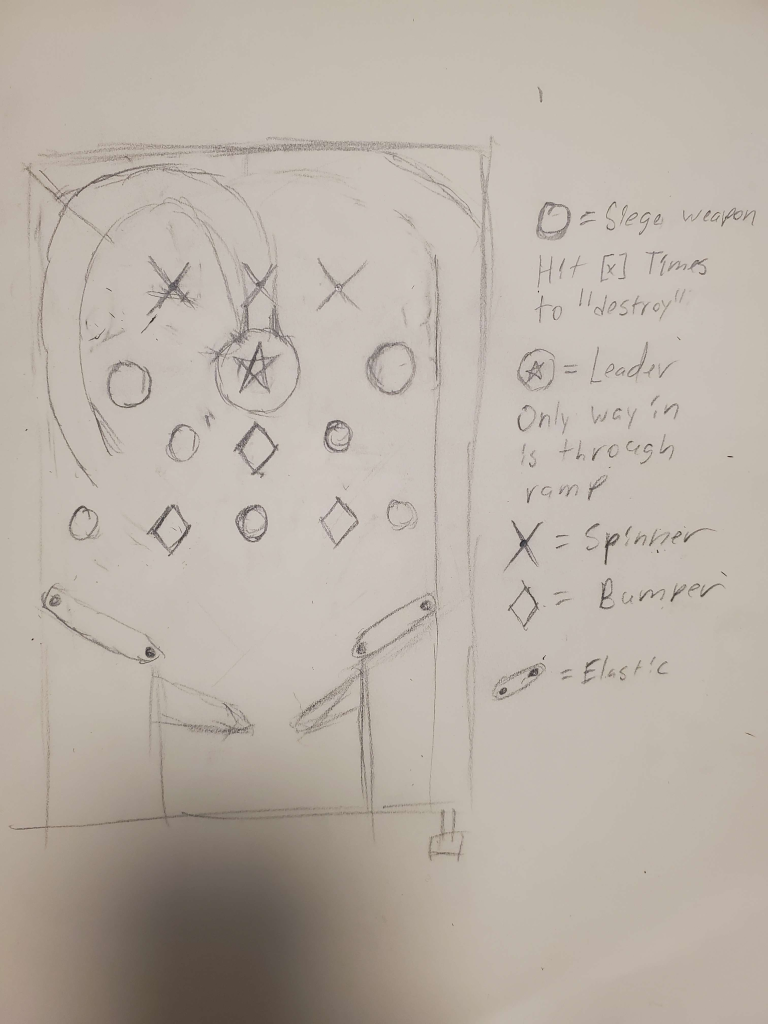
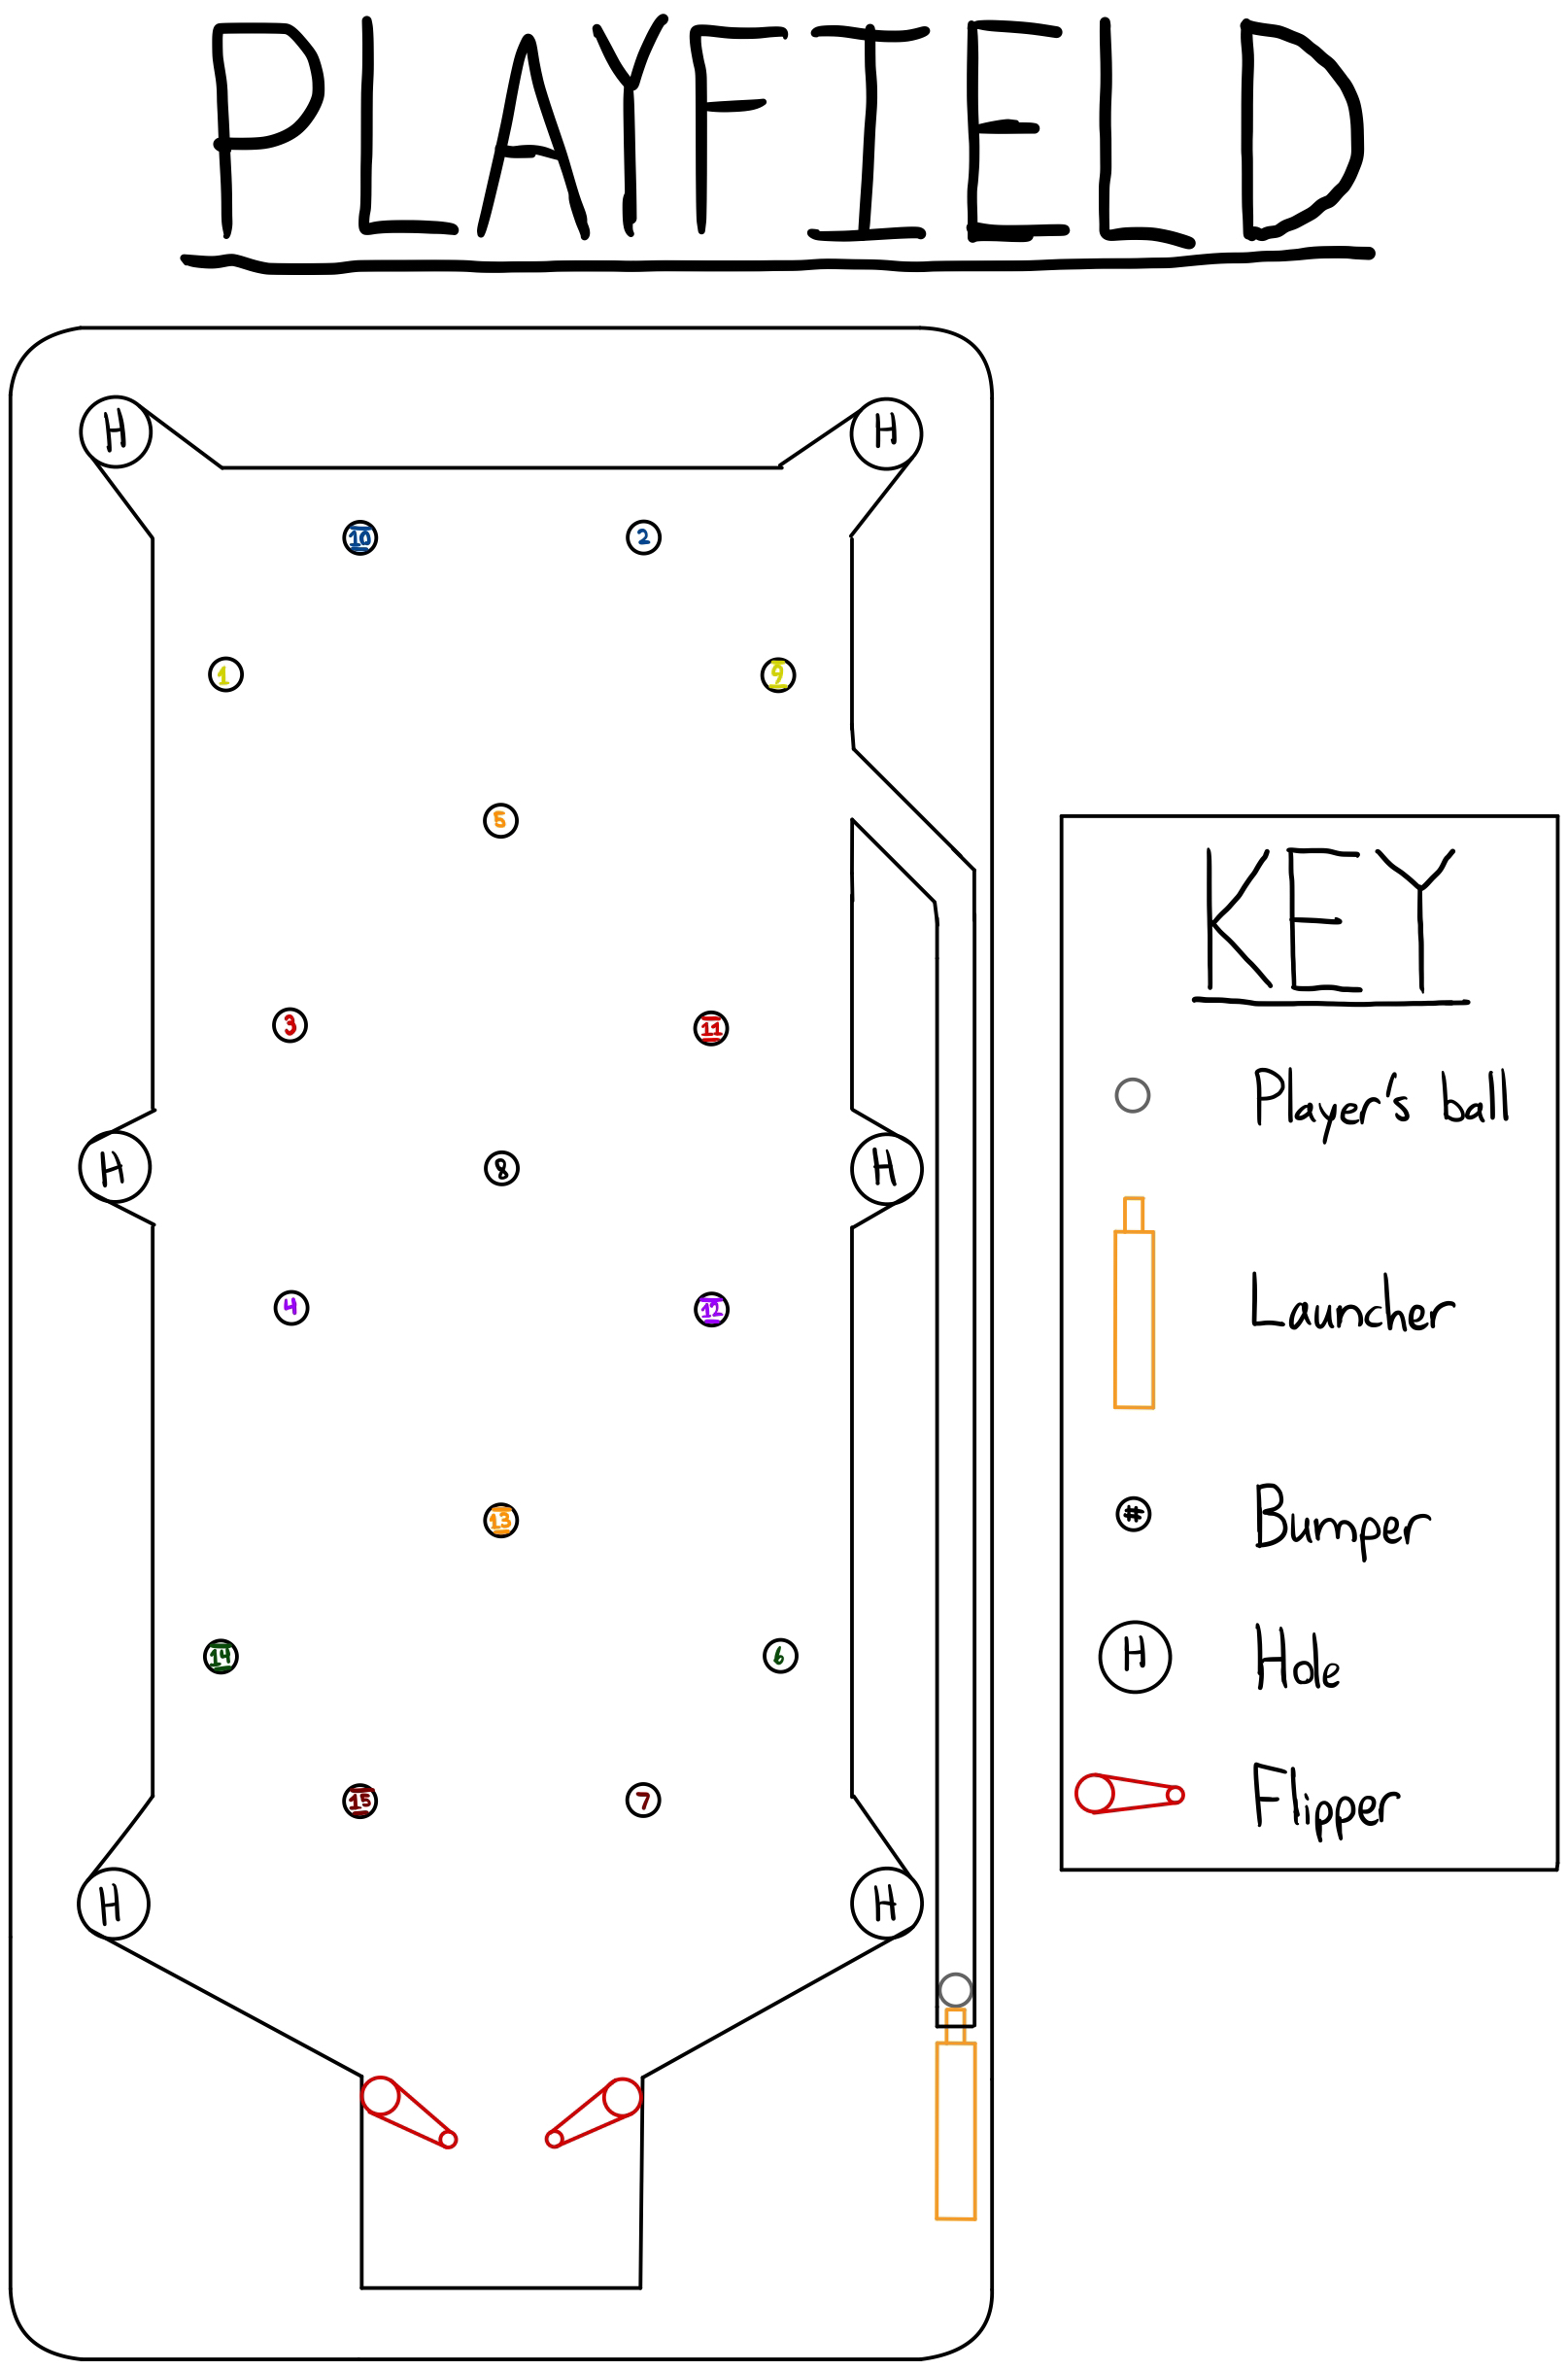
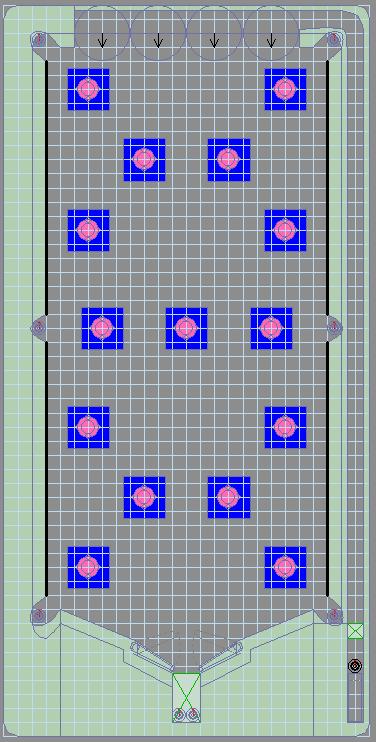
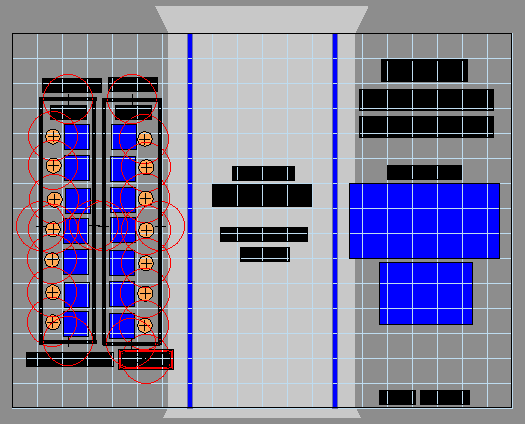
Because Visual Pinball X offers far more opportunities and flexibility in its editor than a physical cardboard kit, I decided that I wanted the proportions of everything in game to be consistent with that of a real pool table as well. Therefore, I drew a sketch that based the size and shape of all of the game elements off of the size of the player’s ball. This also enabled me to plan on incorporating all 15 numbered balls as bumpers in the game due to their decreased size in proportion to the playfield.
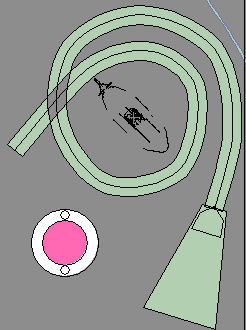
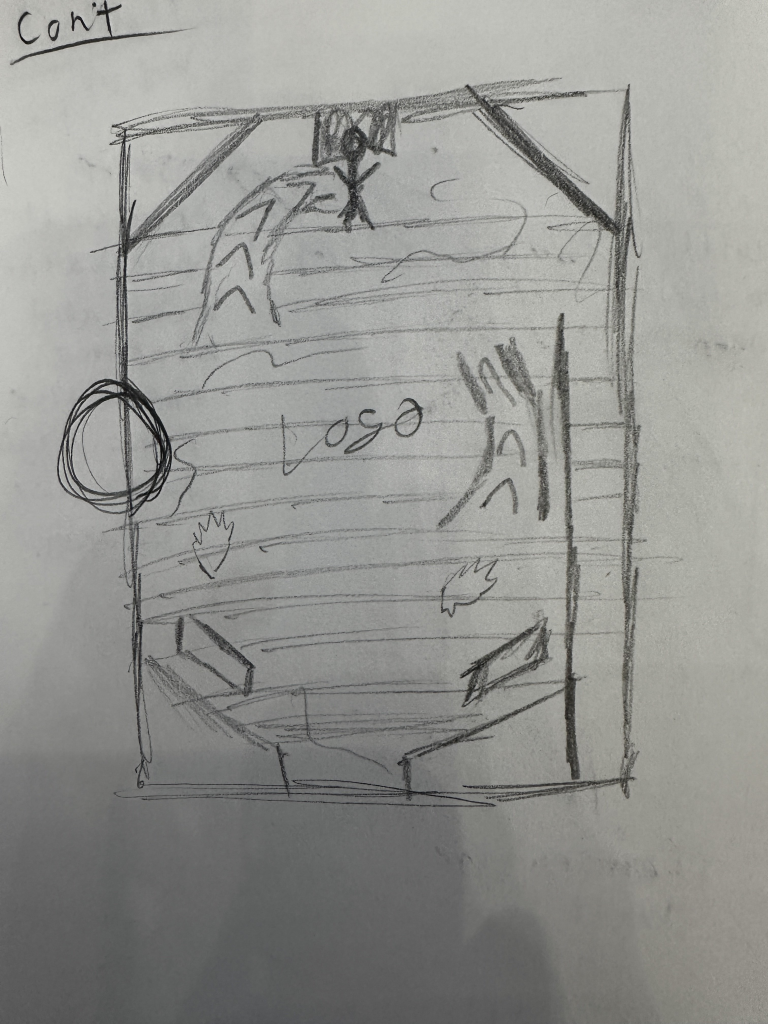
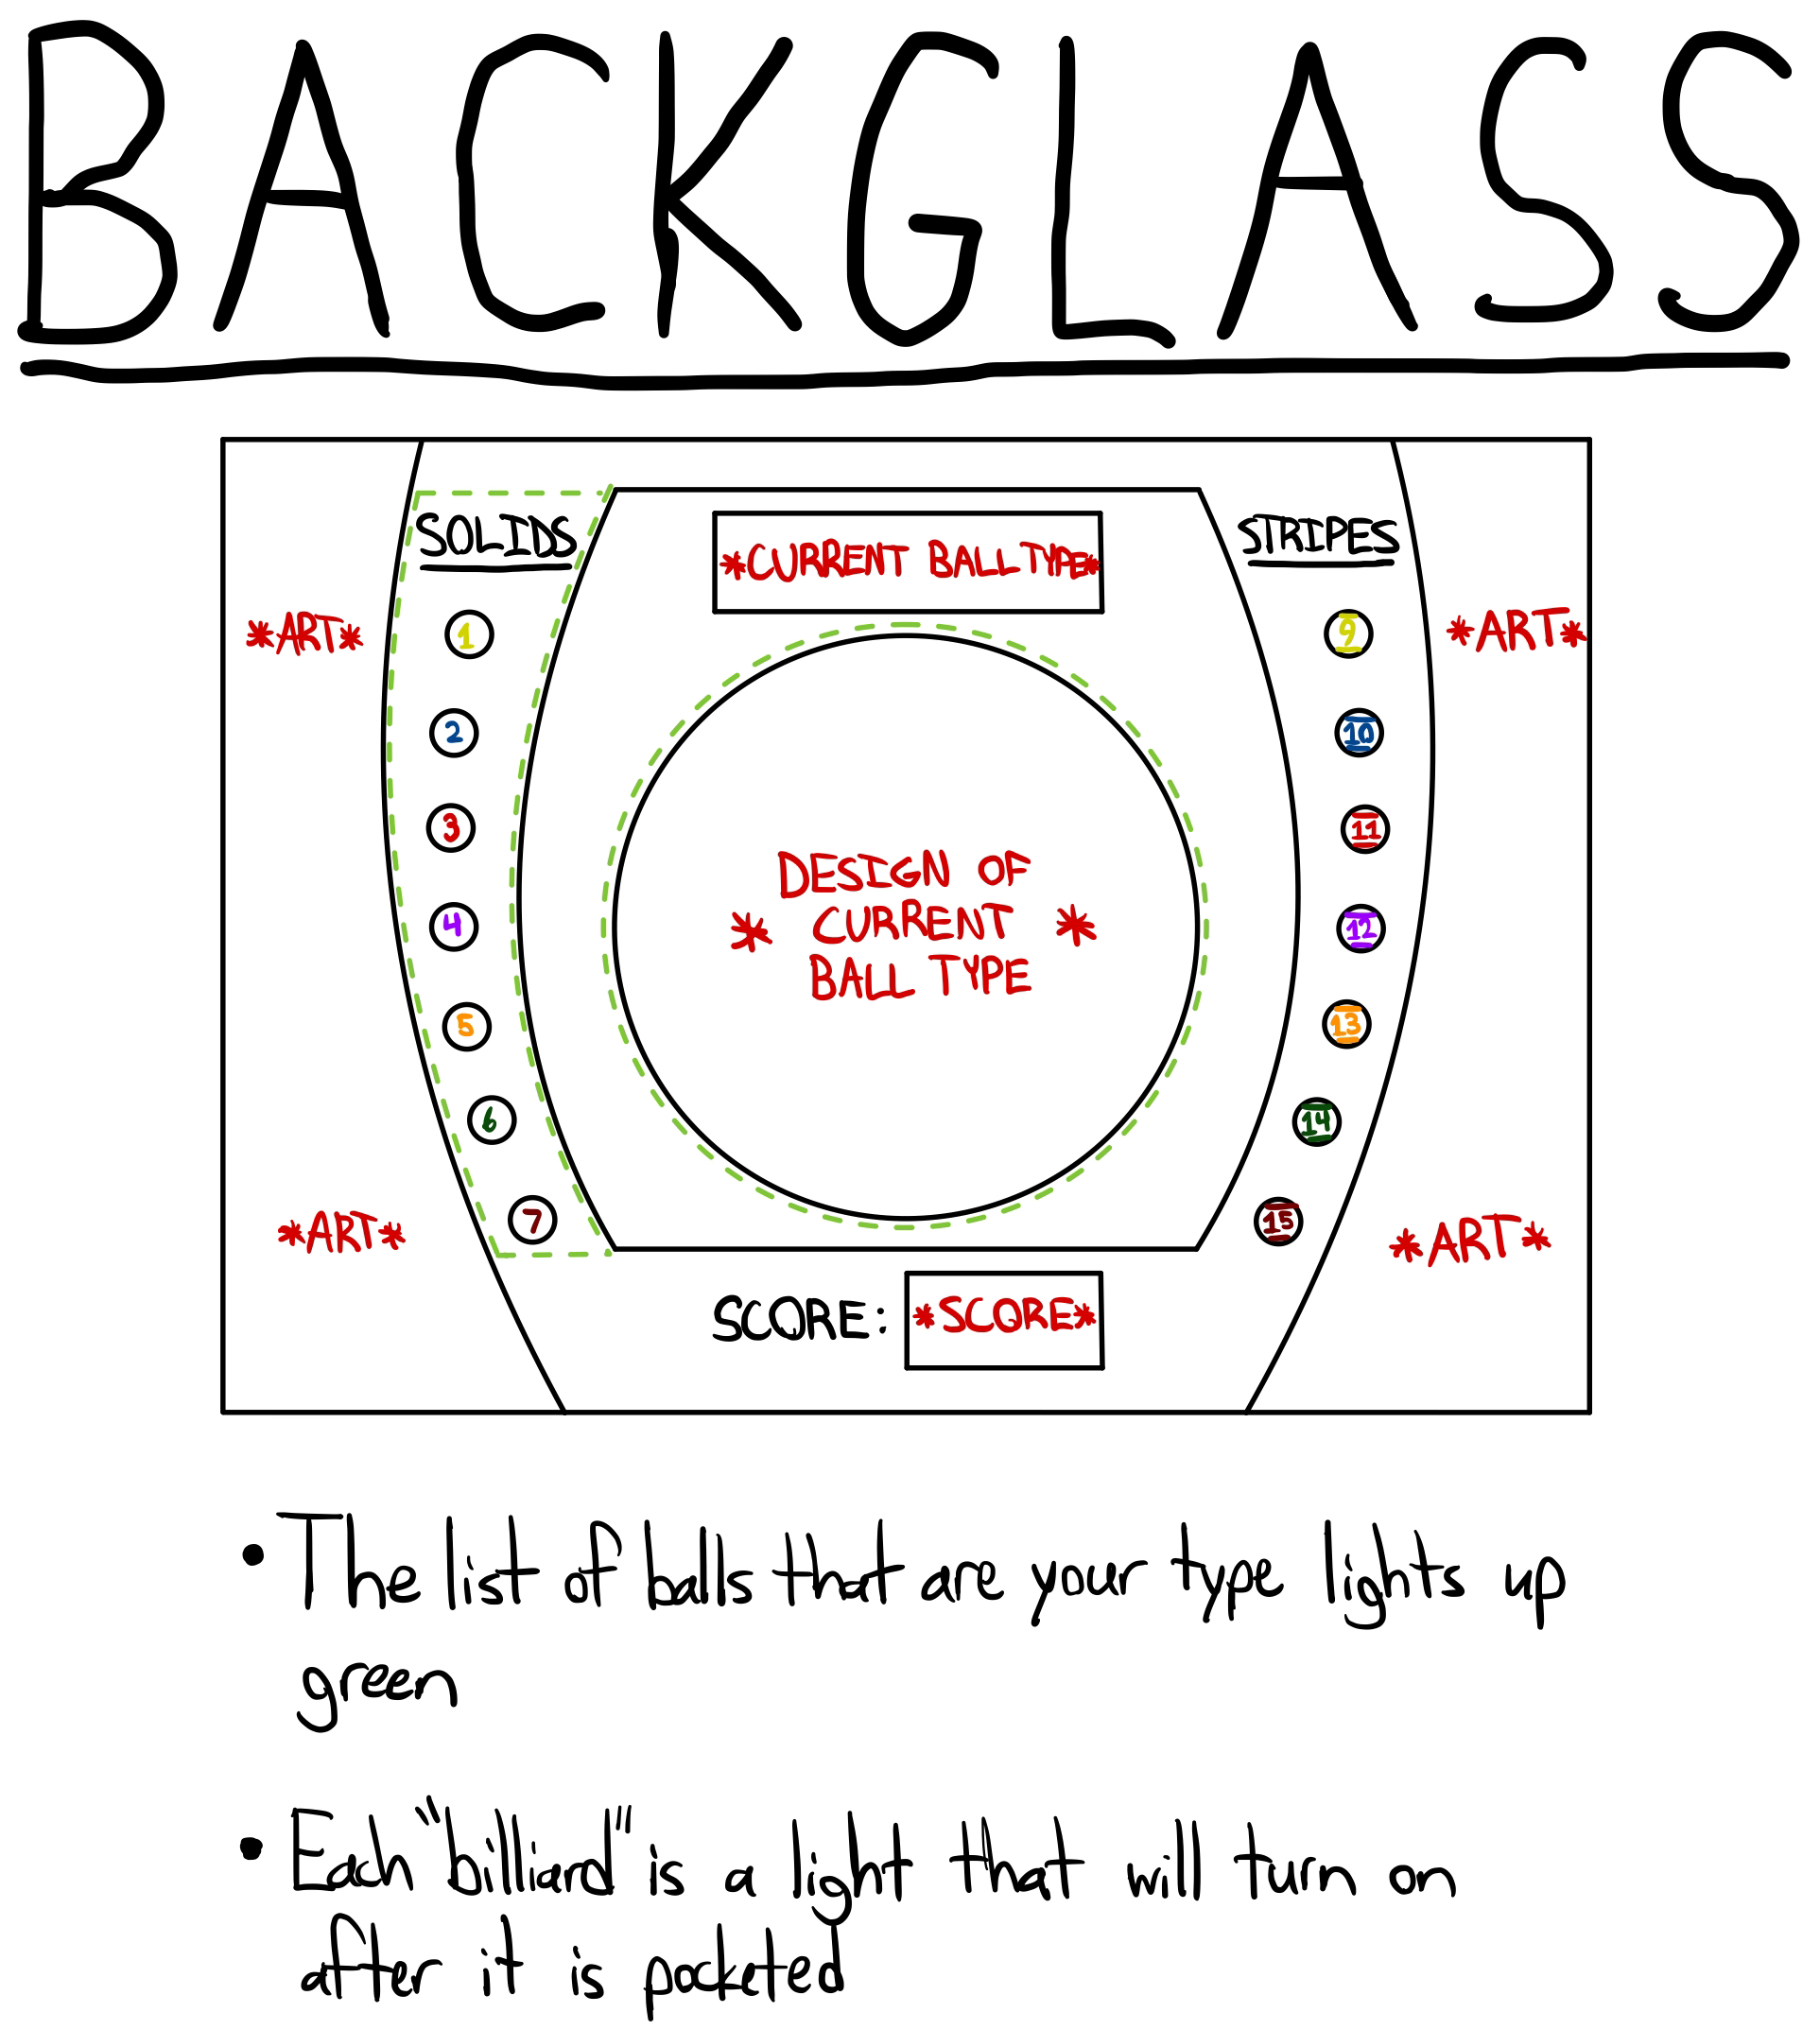
Additionally, Visual Pinball X offers the capability of pairing your game with a backglass, which I planned to do as well. I wanted my backglass to display all of the information required to keep track of the game in a convenient, easy to understand manner. As a result, I drew up a sketch of a backglass concept as well.
Finally, I also decided to add a new mechanic to the rules that involved tracking which individual billiards had been pocketed. If a player were to pocket all of the billiards of their own type, then they would receive double the score for the rest of that game. In turn, if the player were to pocket all of the billiards that weren’t their type, then the game would instantly end and their score was negatively impacted depending on one of two circumstances. If the player’s score was positive when this happened, then it was divided by 2, and if it was negative, then it was multiplied by 2.
Initial Design
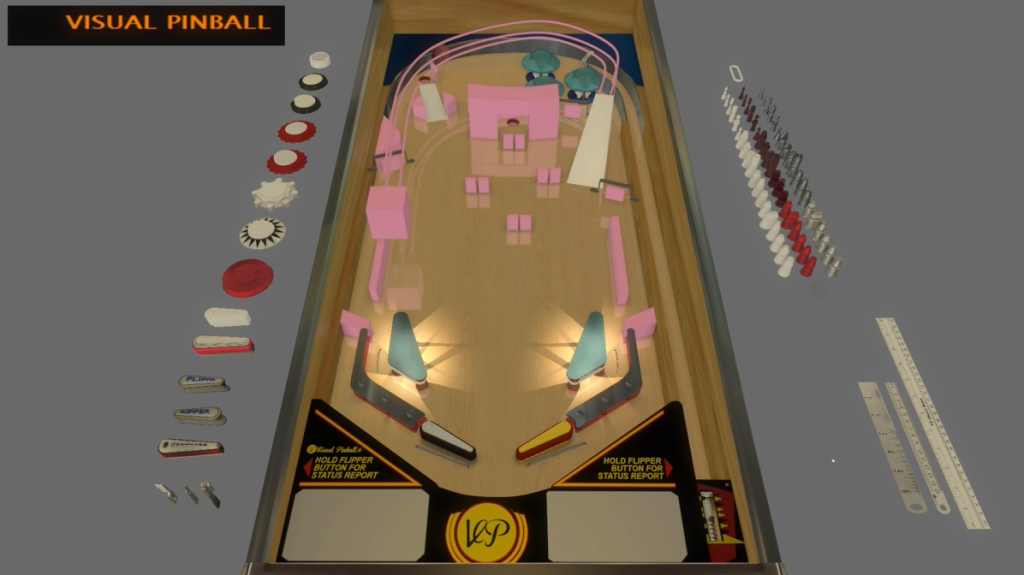
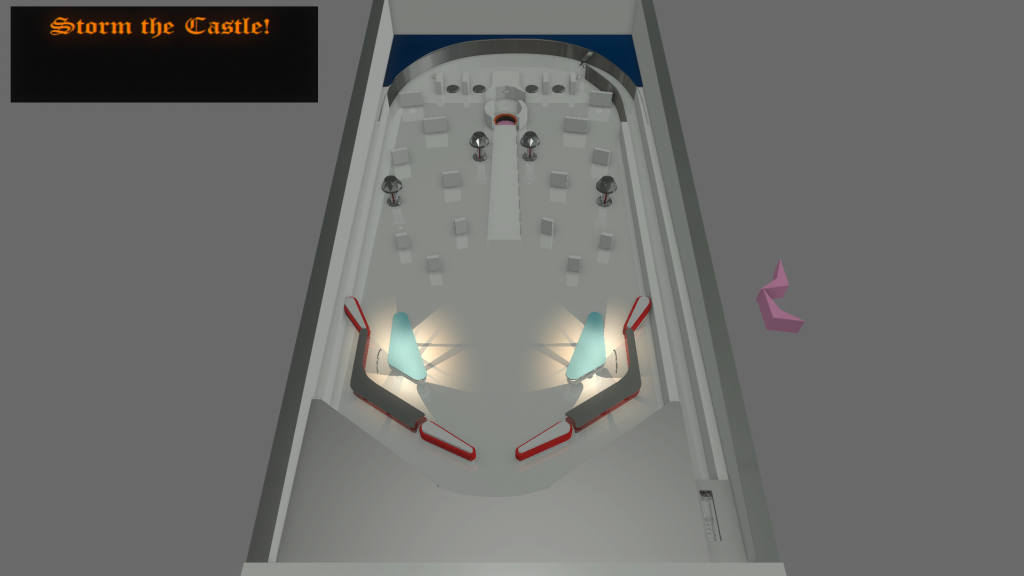
Unfortunately, I learned pretty quickly that although there were far more capabilities to create the virtual version of Pin-8-Ball with using Visual Pinball X, its editor still had lots of limitations.
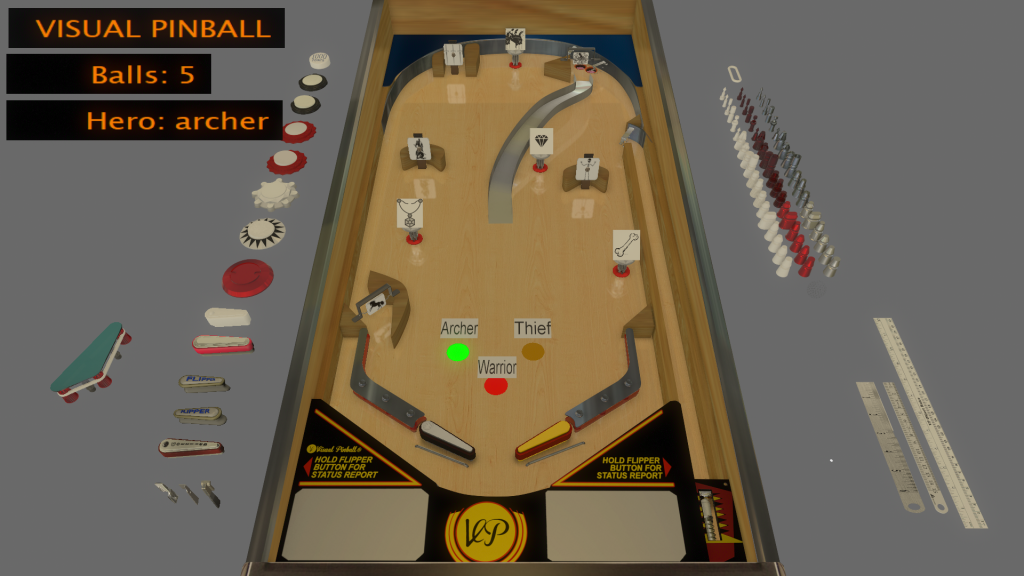
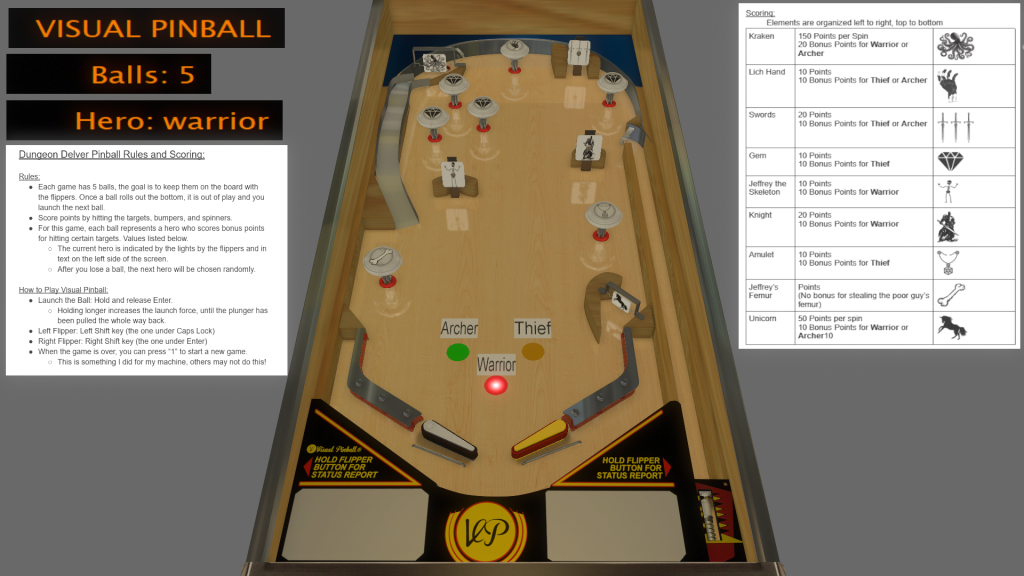
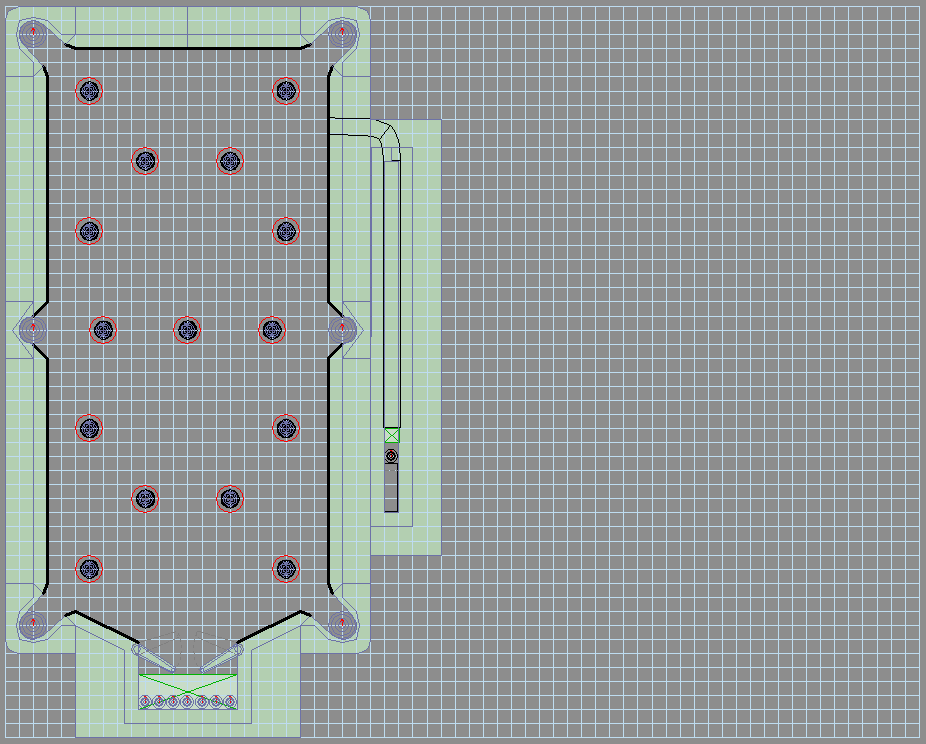
First and foremost was its lack of documentation and explanation. As a result of this, my use of the editor was significantly hindered as I had to learn how to use it through practice and research of great lengths. Additionally, due to the nature of Pin-8-Ball‘s gameplay flow, it was crucial that I ensured that the playfield was adjusted perfectly to maintain it a balanced experience. Because Visual Pinball X lacks a grid-snapping feature, I had to spend a lot of time manually typing in and lining up the coordinates of each element of my playfield. This ultimately led me to have to temporarily scrap the idea of including a backglass to go along with my initial design because I did not have enough time to learn about how to set it up. Instead, I opted to use the backglass editor to create a user interface for the table that displayed the crucial information, because by default, elements on the backglass editor would appear over the playfield in gameplay.
As a result of another limitation, I also had to designate which bumper corresponded to which billiard using decals, because the bumpers themselves could not be properly configured to display my custom-made billiard graphics.
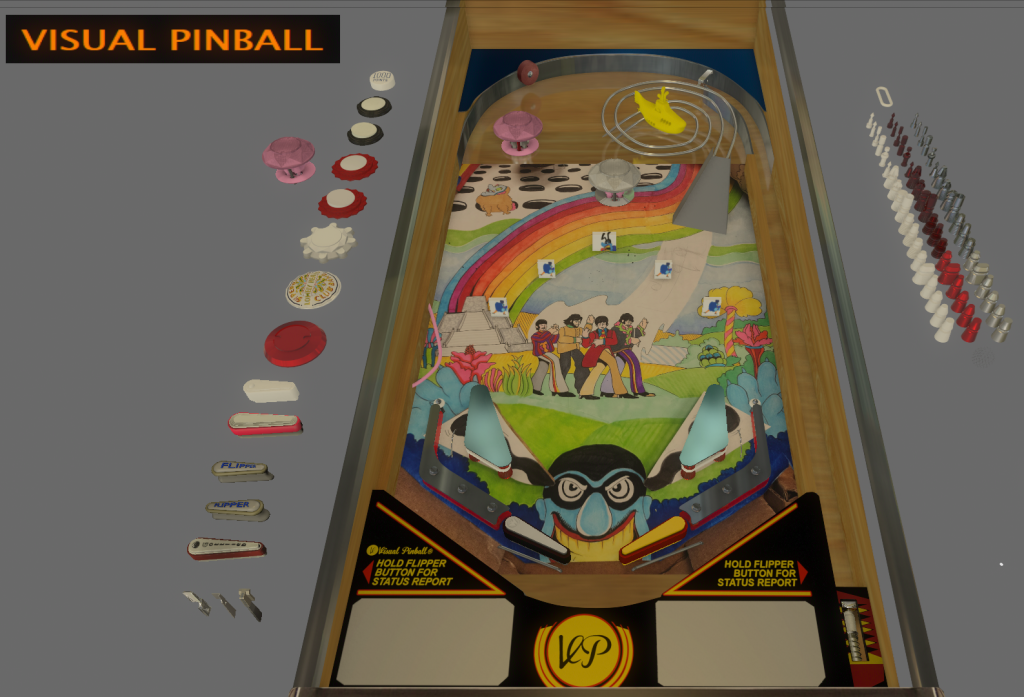
Aside from these limitations, however, I was able to encapsulate my original vision for the game very well in its initial prototype.

Playtest Results
Due to a misconception regarding our class schedule, there was not much of an opportunity for Pin-8-Ball – Visual Pinball X Edition to receive playtesting. I did gain some valuable feedback from what little amount of playtesting there was, however.
Overall, playertesters had fun with the game and enjoyed it, but universally agreed on 1 thing: that I should increase the size of the pockets. By pure coincidence, I had just previously realized that I measured the proportions of these holes in accordance with the ball incorrectly, so I already planned to increase the size of the them. The playtesters also supported another idea that I had which involved adding more flippers to the playfield in order to produce more engagement because they’d sometimes have to wait a long time for the ball to reach the flippers again.
Final Design
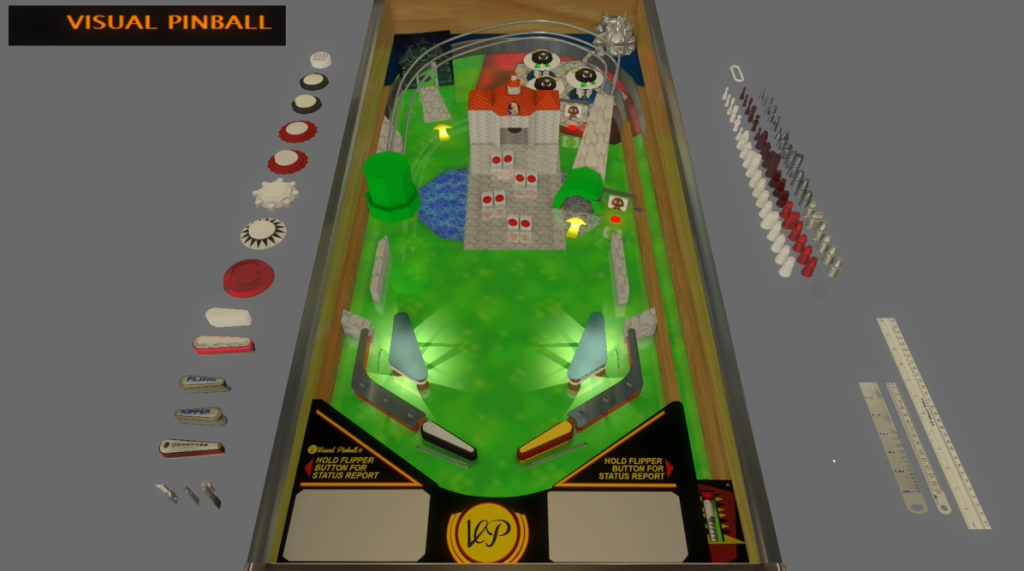
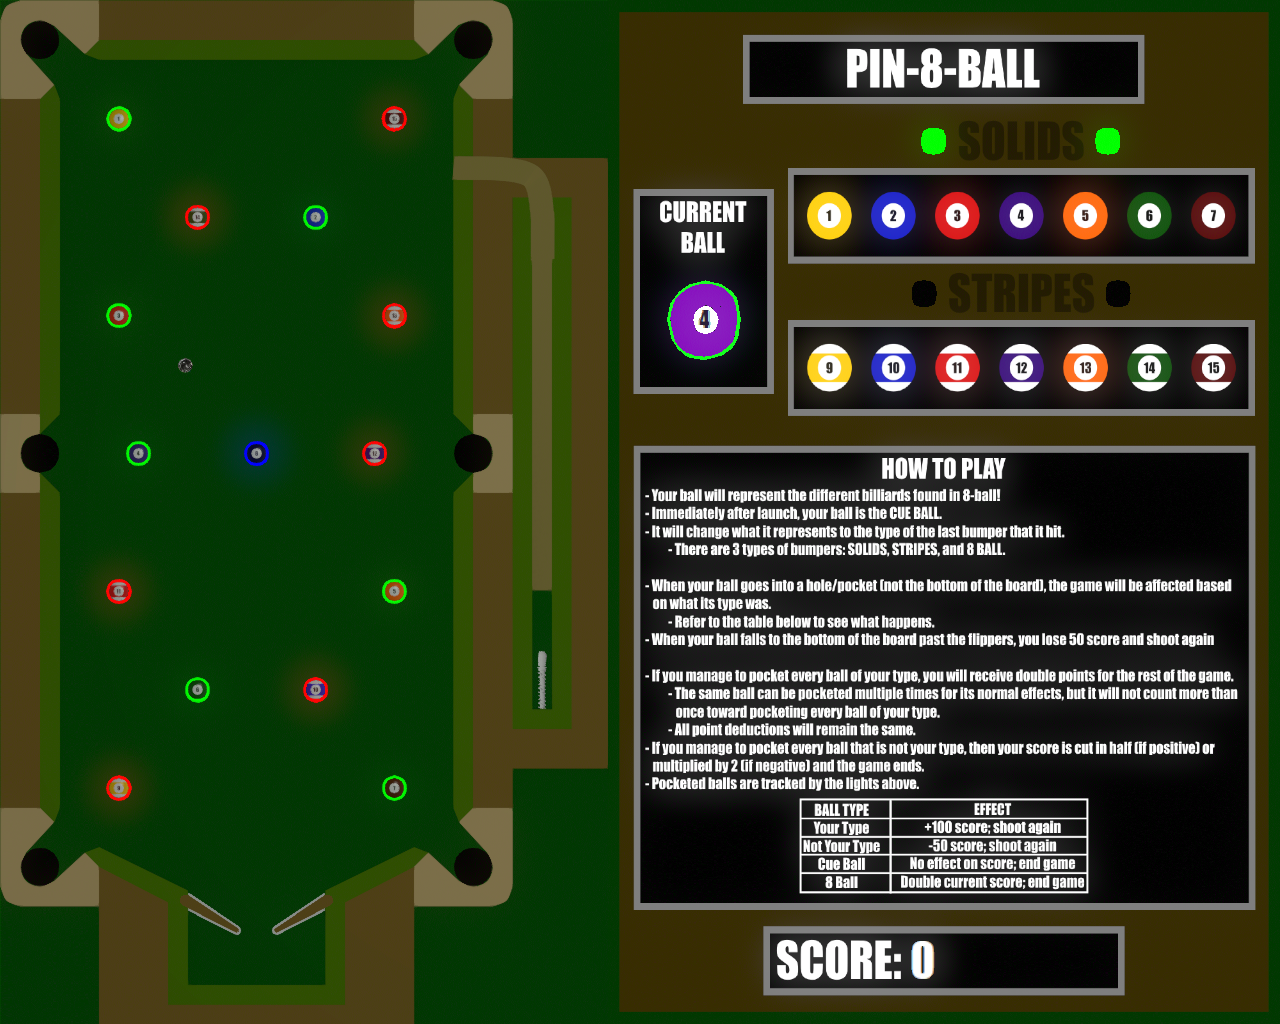
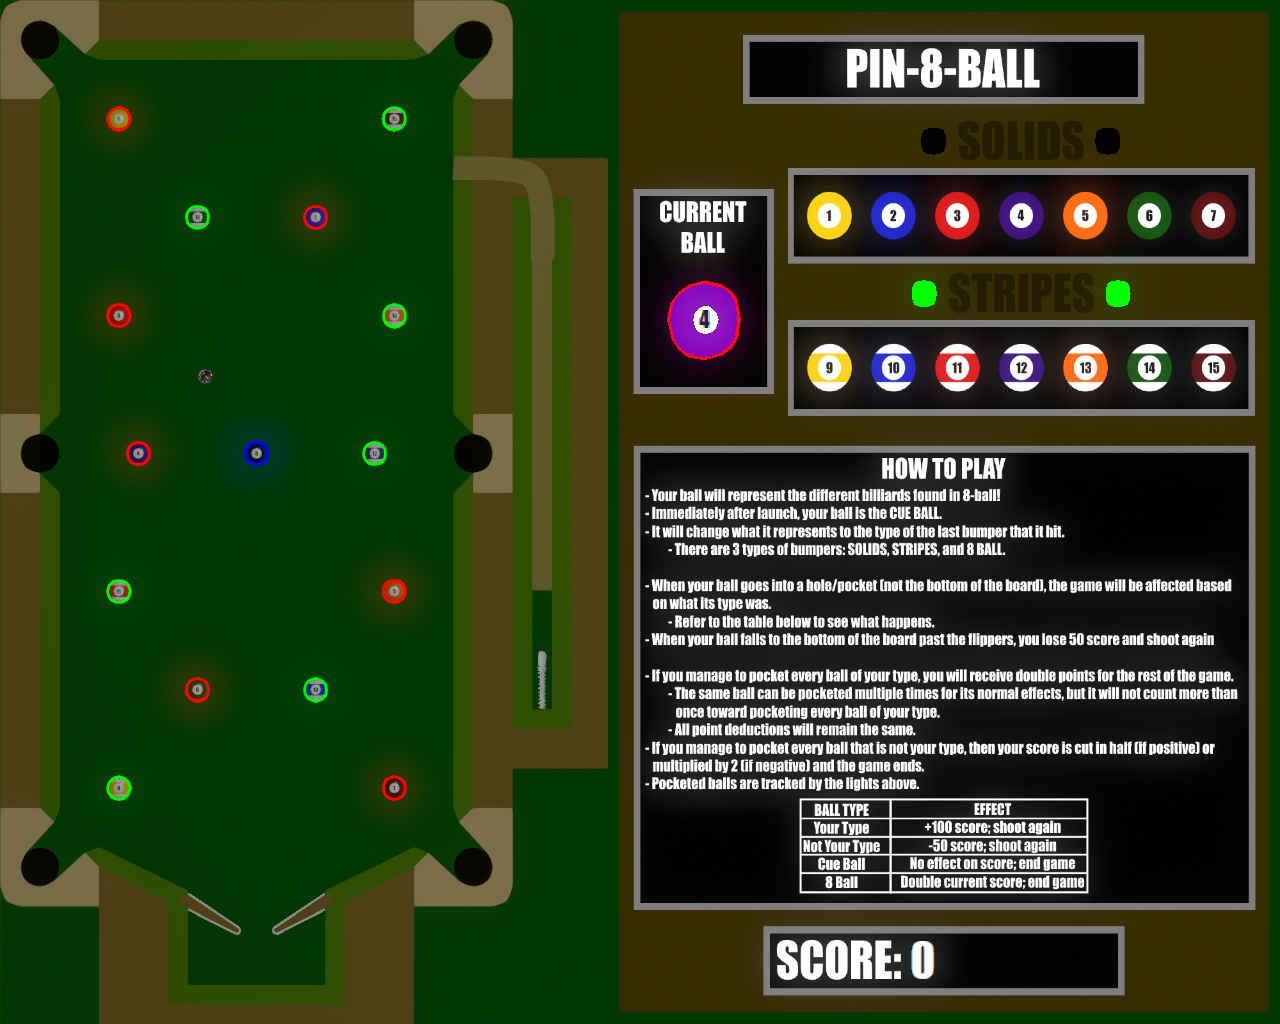
As a result of the playtesting and my own realization, I began work on resizing the pockets for the final version of Pin-8-Ball – Visual Pinball X Edition.
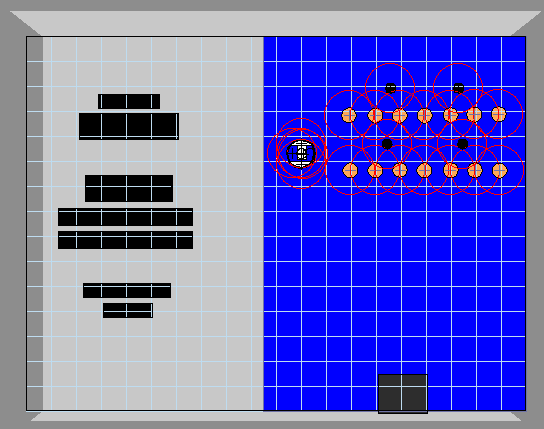
In order to increase the size of the pockets, I had to reshape the walls of the table and reconfigure how launching the ball worked. There was no longer any space for the ball to travel from the plunger, through the wall, and out the top of the table to enter play, so I added a ramp to it to travel over the wall with instead. I also added more decorative elements to the outer edges of the table to make it resemble a real pool table more closely.
In order to address the issue of waiting for the ball to reach the flippers, I decided against adding more of them to the playfield. I could devise a way to implement them in which it wouldn’t look or feel awkward, so I approached this problem another way instead. Rather than adding more flippers, I made the playfield more open by repositioning some of the bumpers and decreasing their radius to actually match that of the ball.
Thanks to the help of a fellow peer, I also discovered the existence of bumper caps, only accessible through copy and pasting from a separate template table. These bumper caps were capable of supporting my billiard graphics, so I replaced the decals on the playfield with them to give the bumpers a much more polished appearance.
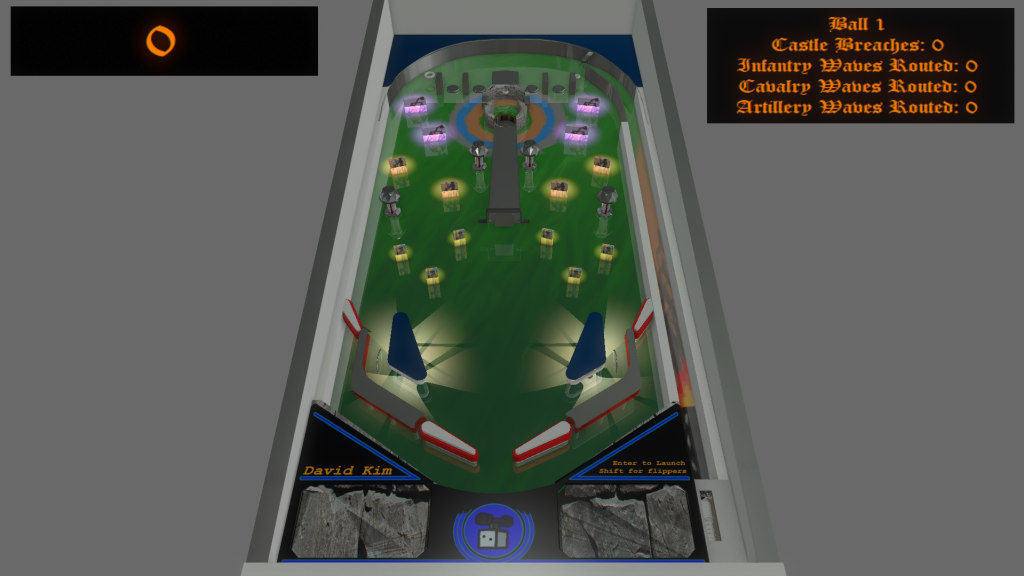
After struggling to get the backglass feature to work properly for an excessive amount of time, I made the unfortunate decision to scrap the idea altogether in favor of a refined user interface. I bundled relevant information together, established a consistent theme throughout it, and programmed it to supply information to the player in the most feasible way possible. Instead of the playfield being in the middle of the screen, I shifted it all the way to the left side, and dedicated the right side to the user interface. I also changed the aspect ratio of the table during gameplay so that it’d display my graphics correctly.
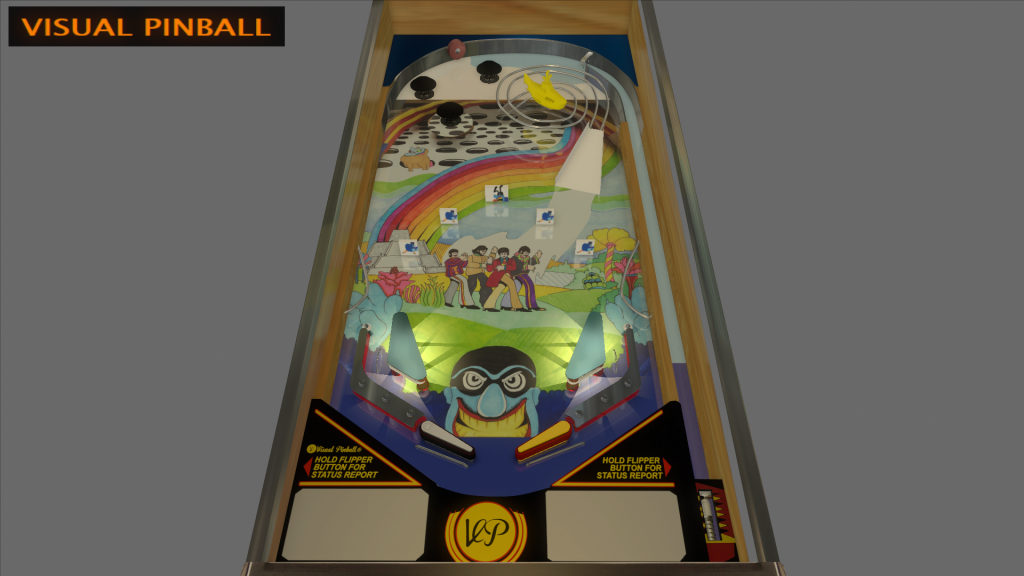
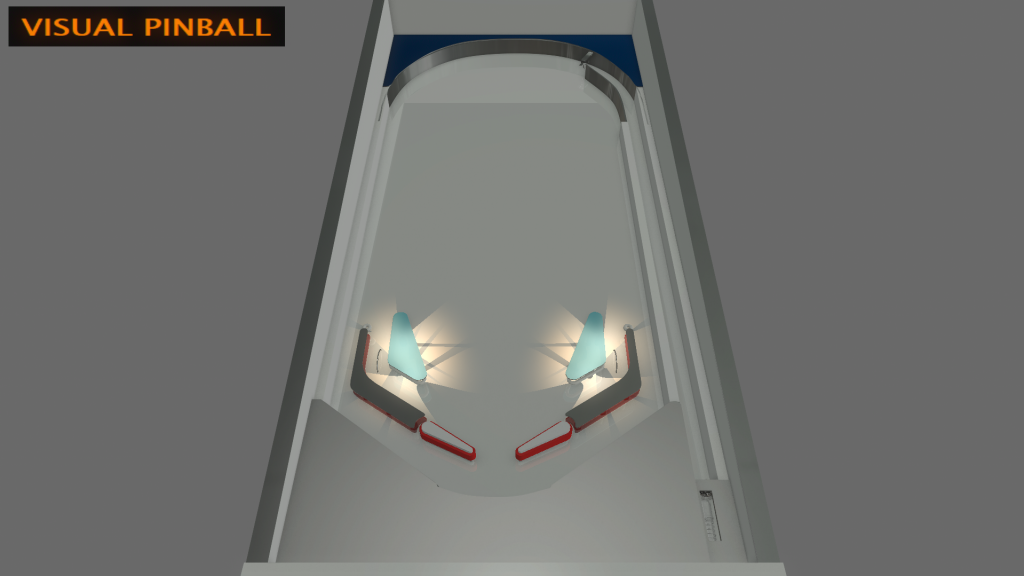
Finally, I changed the point of view of Pin-8-Ball – Visual Pinball X Edition to be top-down and orthographic. I made this choice for two reasons. Firstly, it made it easier to see where the ball was on the playfield because of its large size. Secondly, Visual Pinball X has a rendering error that causes the kickers that I use as the pockets to render on top of walls. By making the camera view top-down and orthographic, I was able to work around both of these issues.
Final Thoughts
Overall, translating Pin-8-Ball from the real world into a computer was certainly an interesting experience. I’m happy with how it turned out, though, and I like the changes that I made along the path of its development. With the likes of Skitelle and Pin-8-Ball – PinBox 3000 Edition, I am very proud of this project!