Demo Days – Daniel Pisetzner

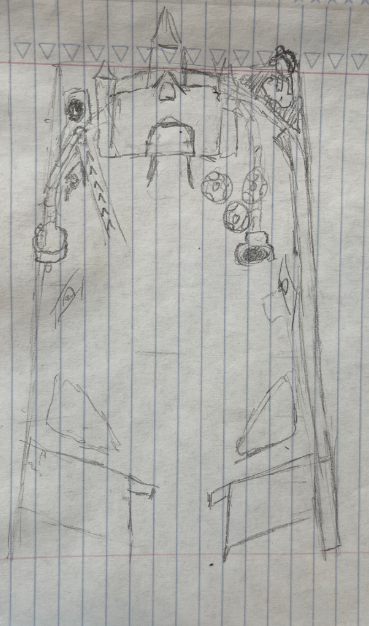
Hole18 Disc Golf Pinball and Mario Pinball

Imagine

Playtesting Hole18 Pinball on the Left

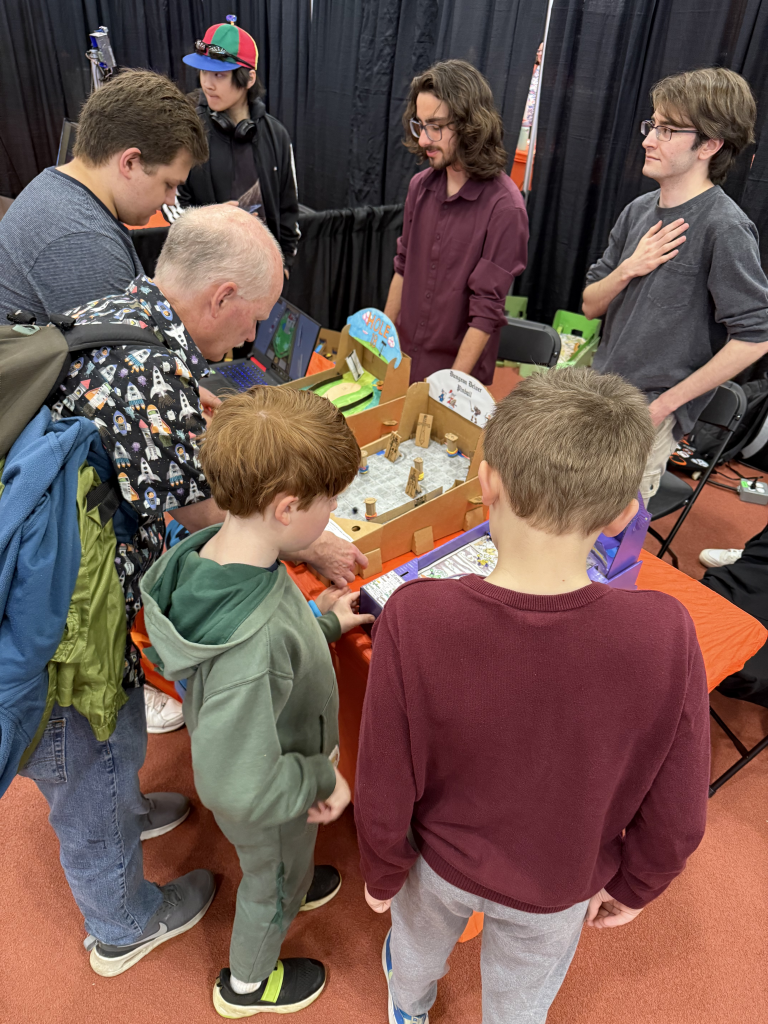
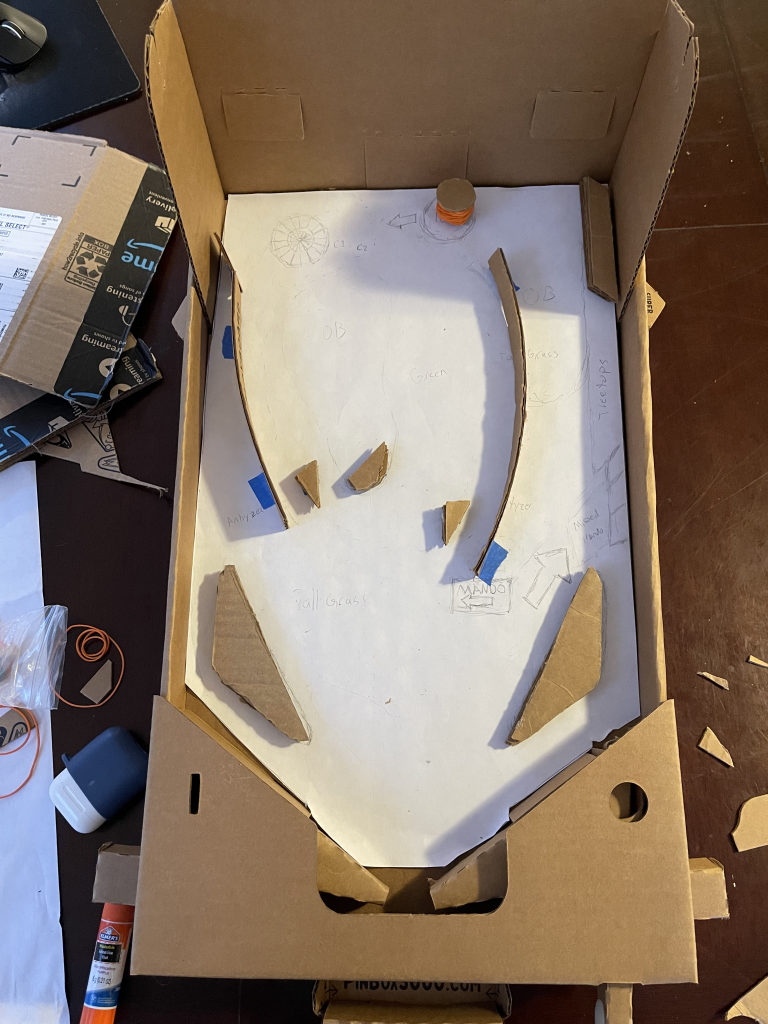
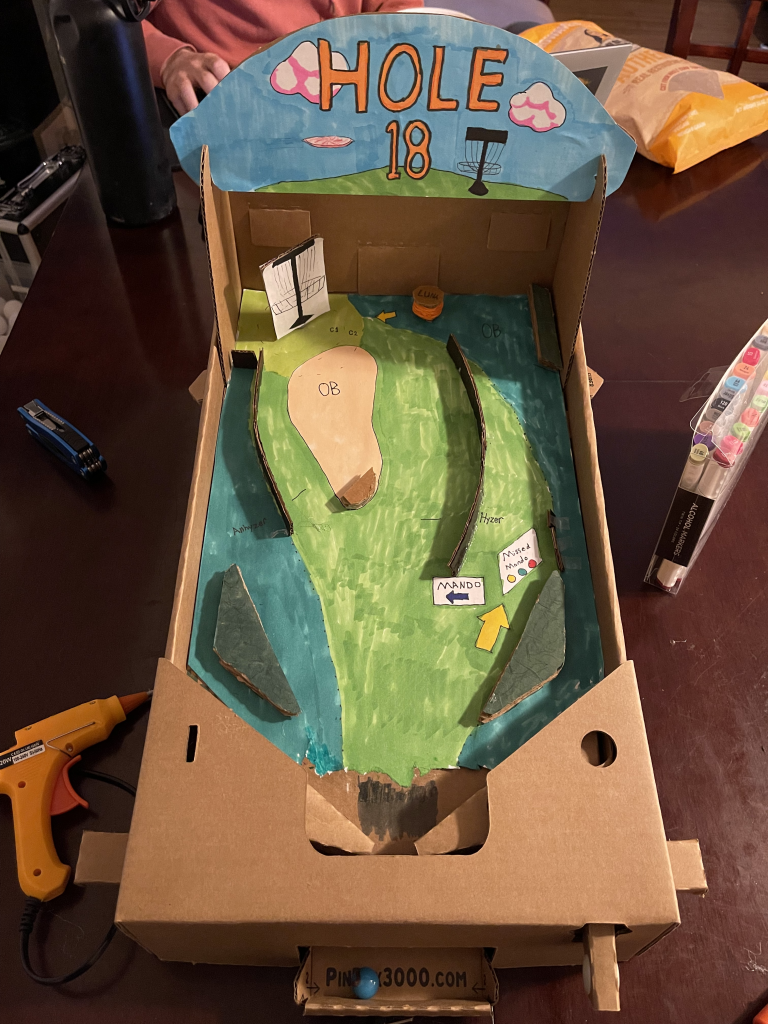
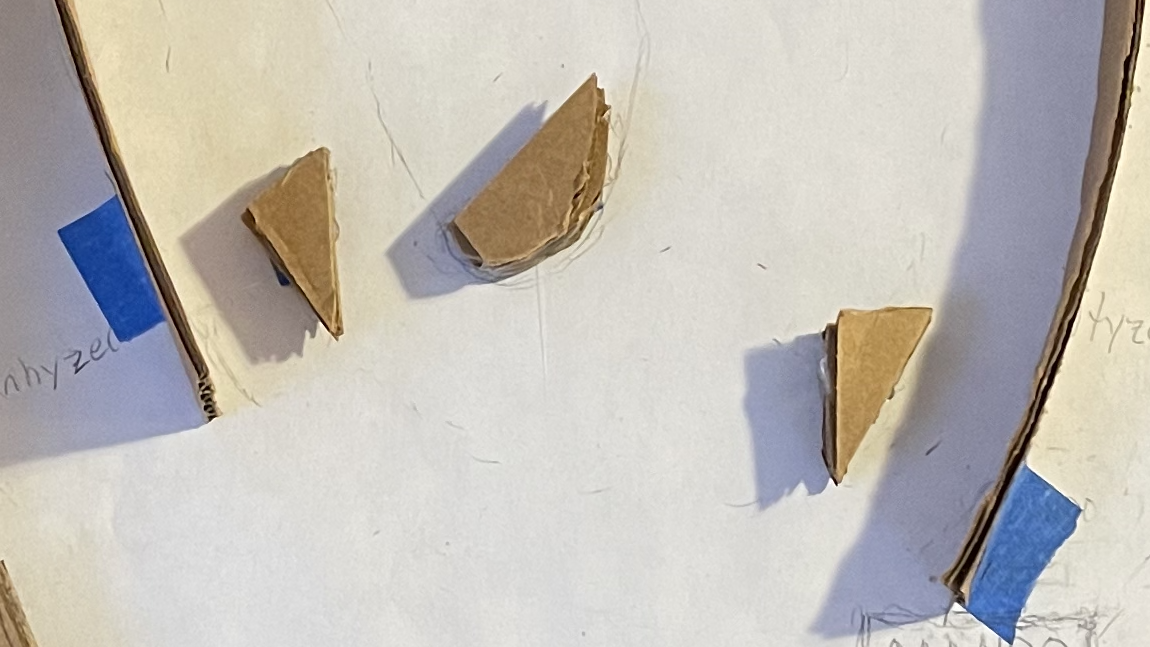
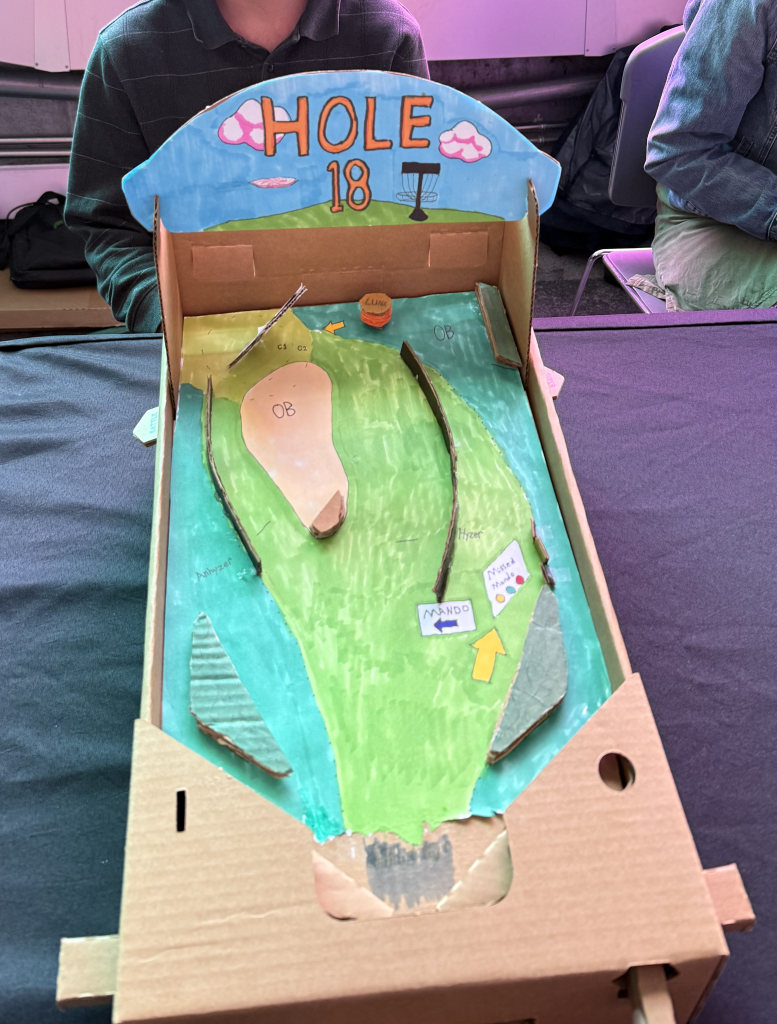
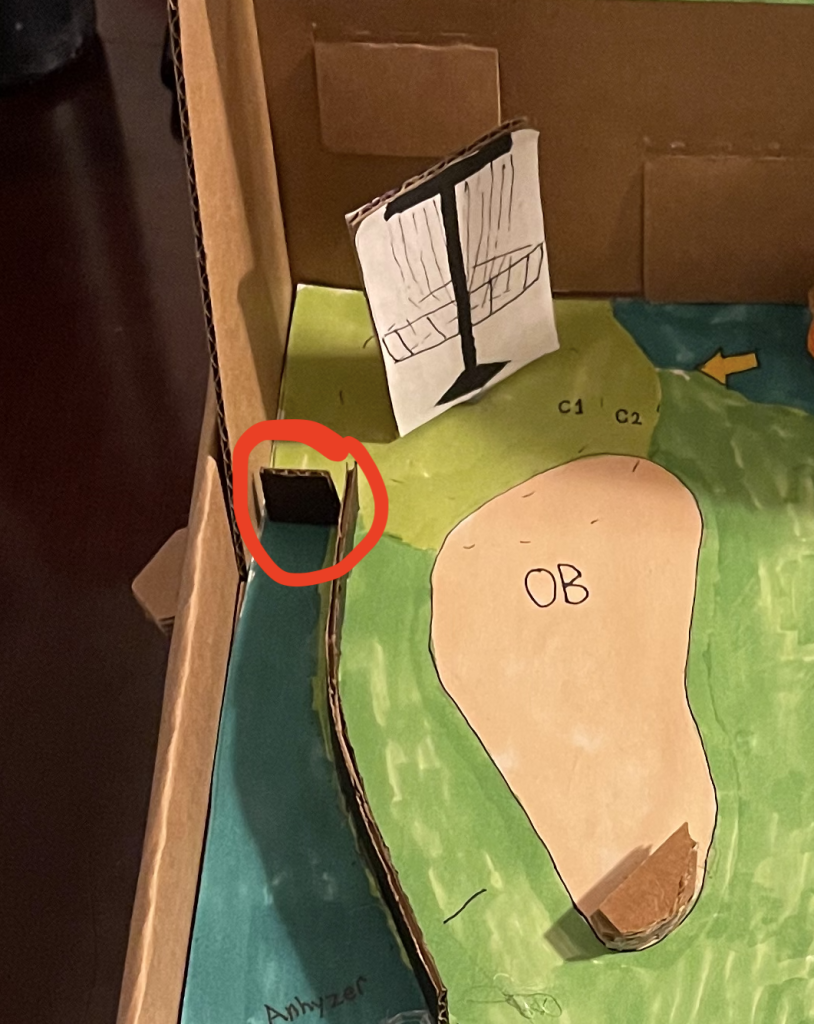
I learned a few valuable things from my experience at Imagine. The main thing was that you shouldn’t wait until the last minute to try to install visual pinball on your laptop. I also learned a lot about my pinball machines. One issue with my Hole 18 Pinball was that I had a wall to block players from hitting the target by going up the very left side, but the ball could get stuck on this wall, which I didn’t realize. I had to compromise a little of the “skill” required for my game to fix this issue.

The wall the ball would get stuck on

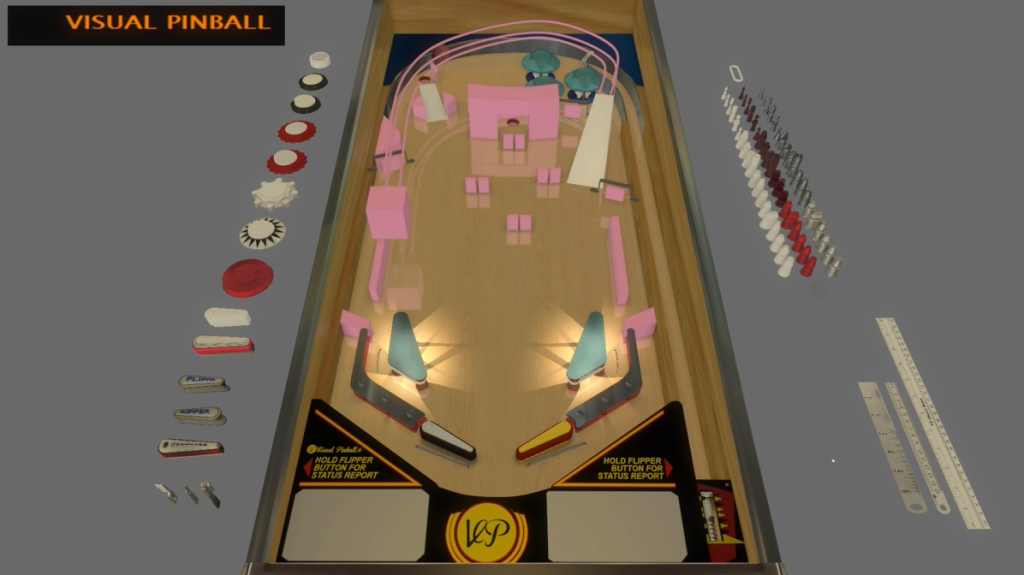
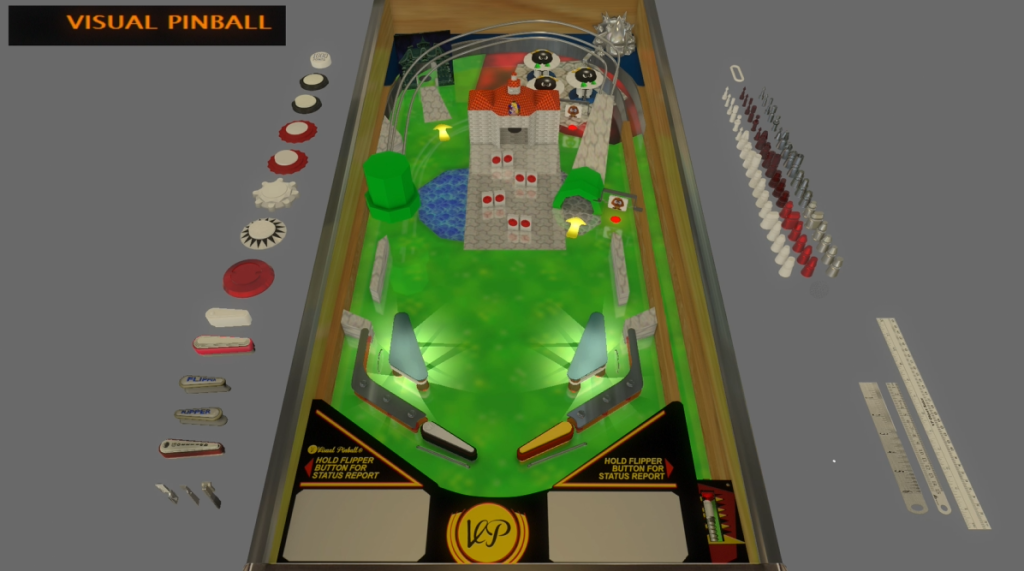
I also realized a few things about my Visual pinball machine, MarioPinball. The main one was that when players would get the ball in Luigi’s Mansion, they wouldn’t realize that they got an extra ball that they had to launch. Sometimes this would happen to me when playing a real pinball machine, I’d think the ball got stuck somewhere and then after a few seconds, check the launcher and see a ball there. I believe that because it was a student project, people were more likely to assume that it was an error that caused the ball not to come down. It’s also possible that this happened because a lot of the playtesters were children and they just didn’t have enough experience with pinball to check for that kind of thing. Those were the main takeaways I got from Imagine.

Strong

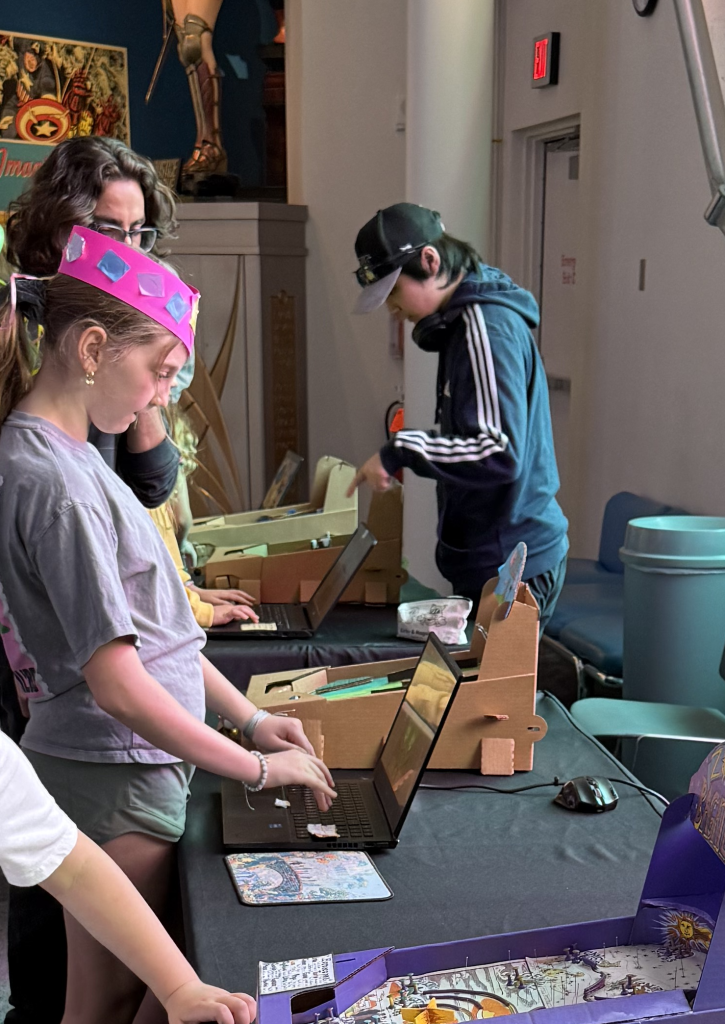
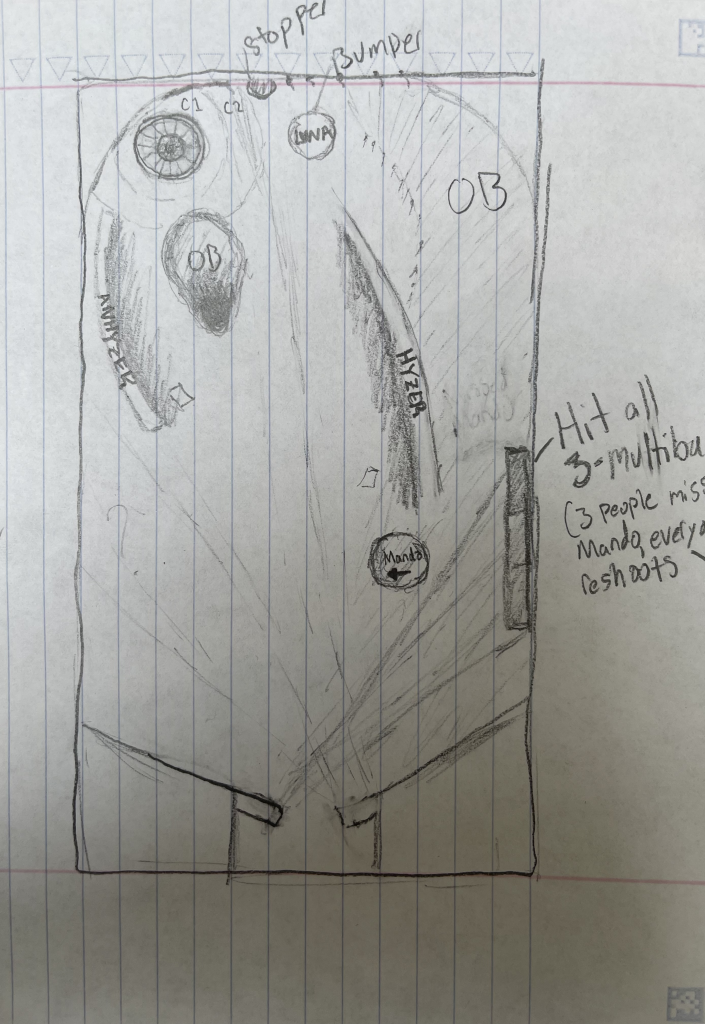
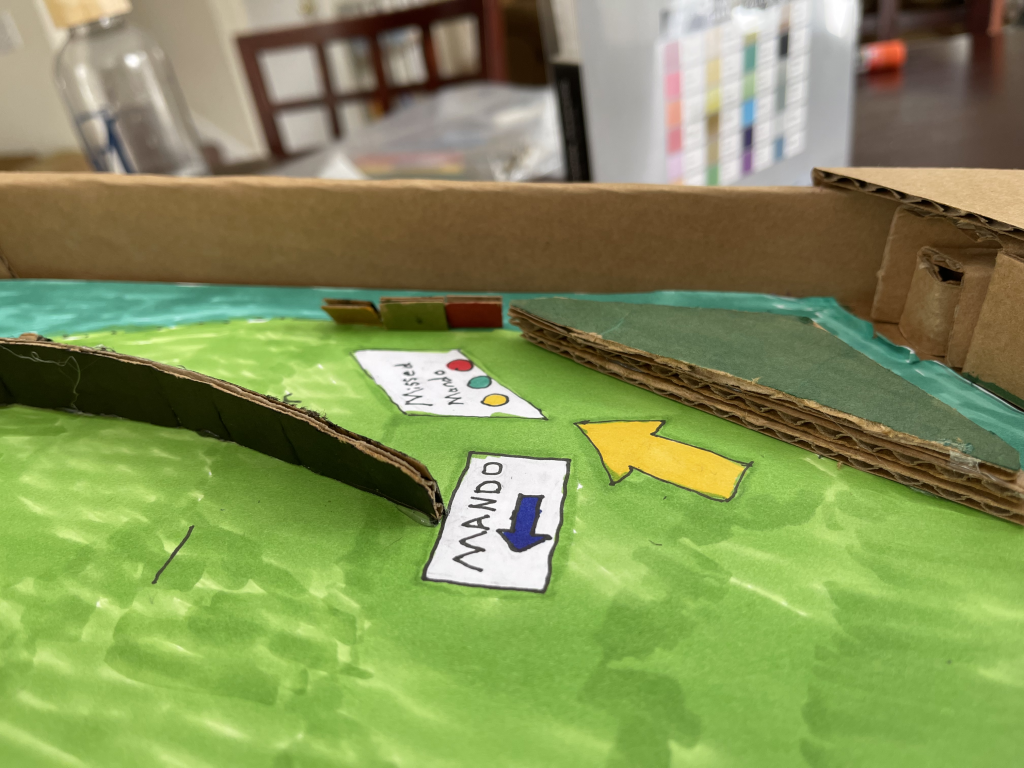
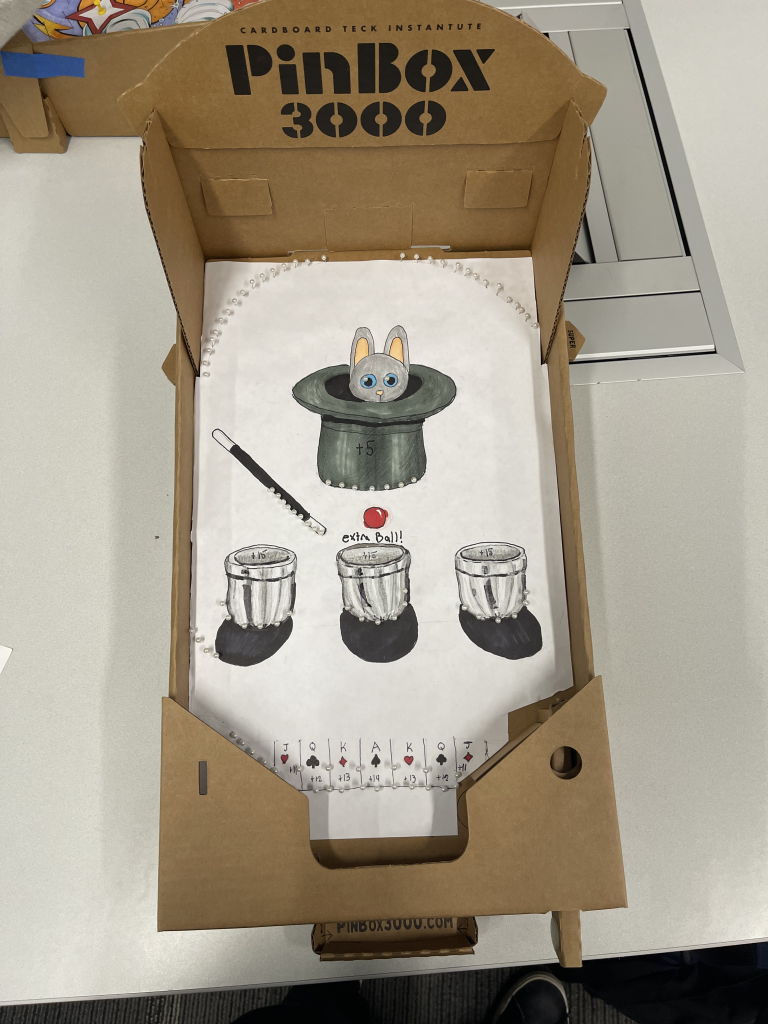
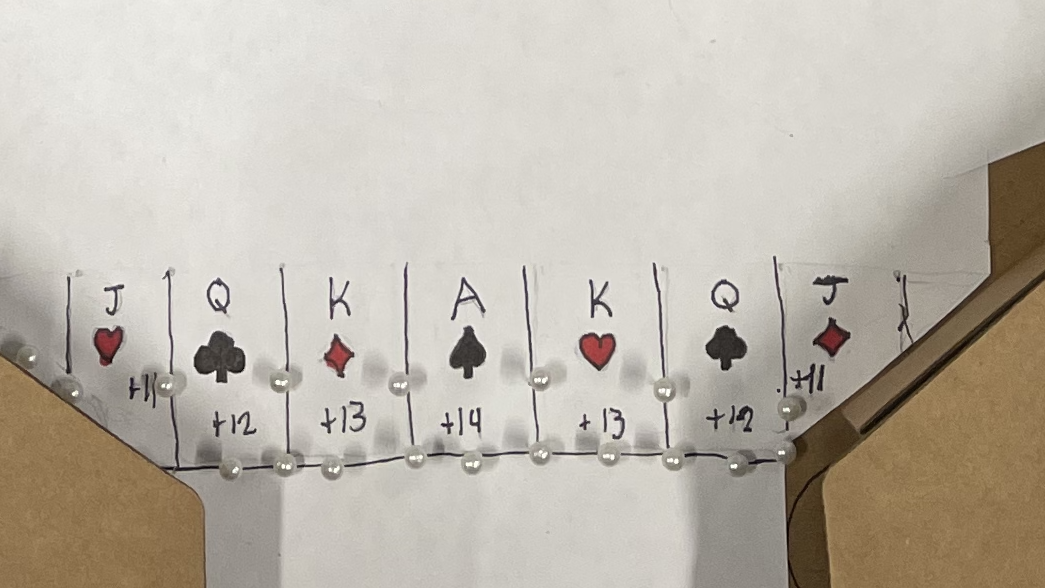
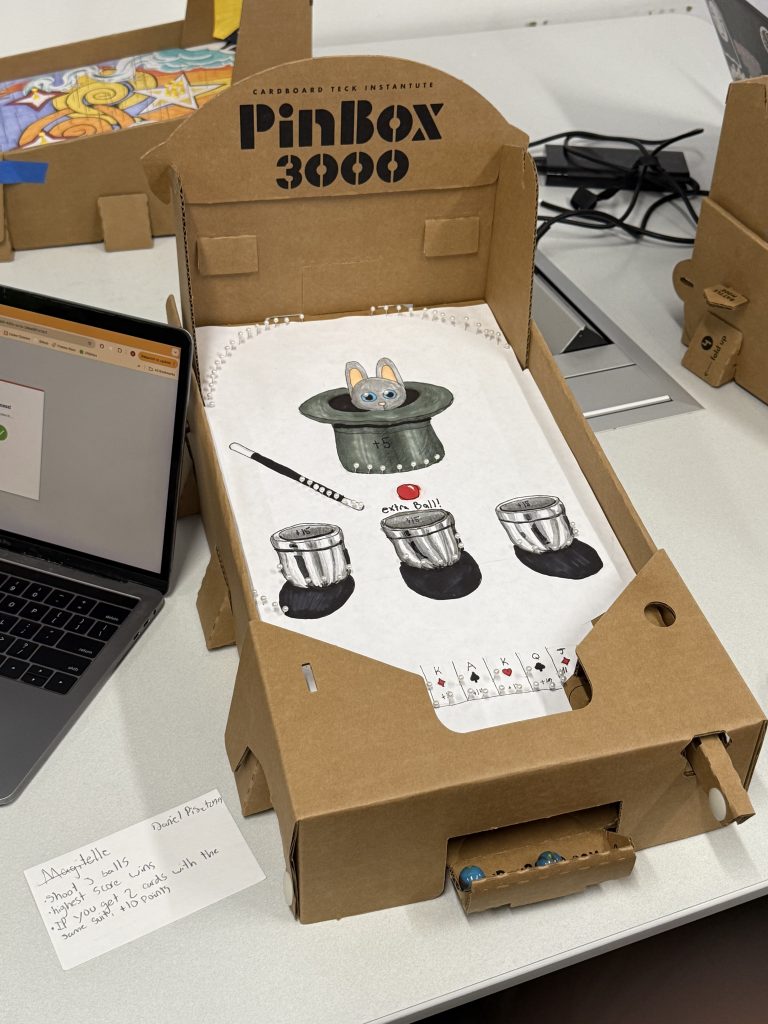
I learned a great deal from people playing my games at the Strong Museum. The first main piece of feedback I got was on the Hole18 Pinbox machine. I have two main lines, Hyzer and Anhyzer that players could try to use to hit the basket, but multiple people showed that when the ball went back down the Anhyzer line, it would shoot right into the middle and instantly lose the game. Because of this, I tried to bend the Anhyzer line so it pointed closer to the edge so it wouldn’t drop the ball down the middle.

Anhyzer Line dropped the ball to the middle.

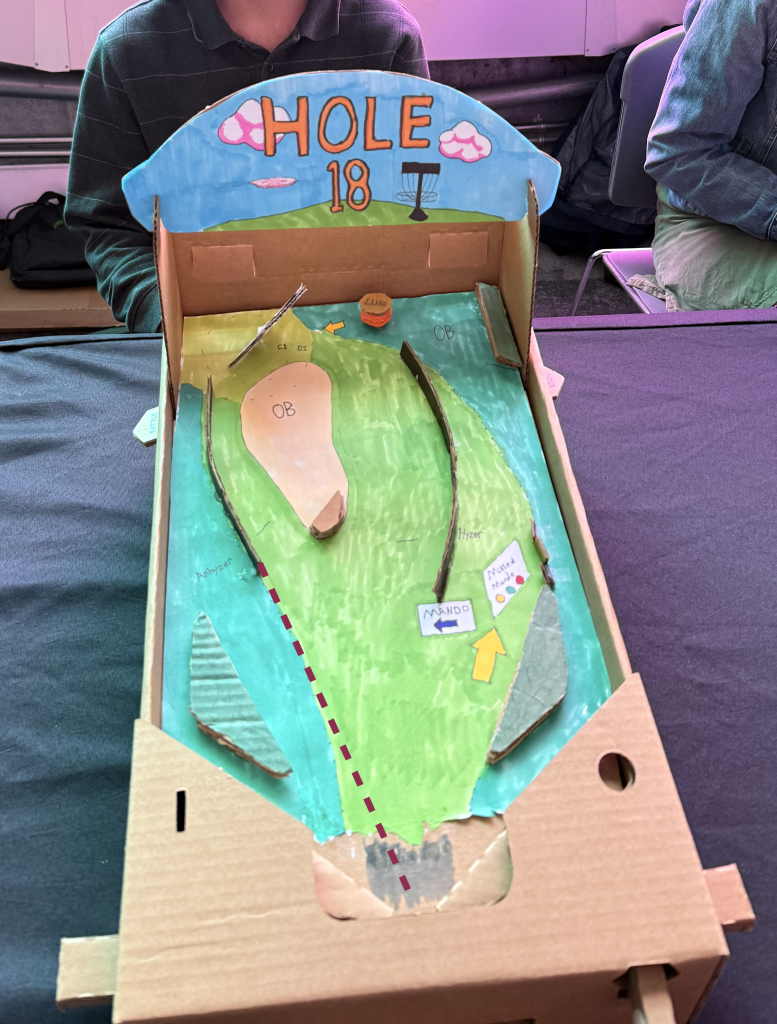
One piece of positive feedback I got about Hole18 Pinball is that it is very beginner/child-friendly. There are 2 simple shots to go for and there isn’t a lot going on. I was happy to hear this because the goal was to have the 2 main shots be the focus and the fact that the other aspects of the box didn’t distract from this was a huge positive. Originally, I had a lot going on with scoring, but when I simplified the scoring to just, +1 for hitting the basket, the box came together. The scoring needed to match the simplicity of the box for a more unified product.

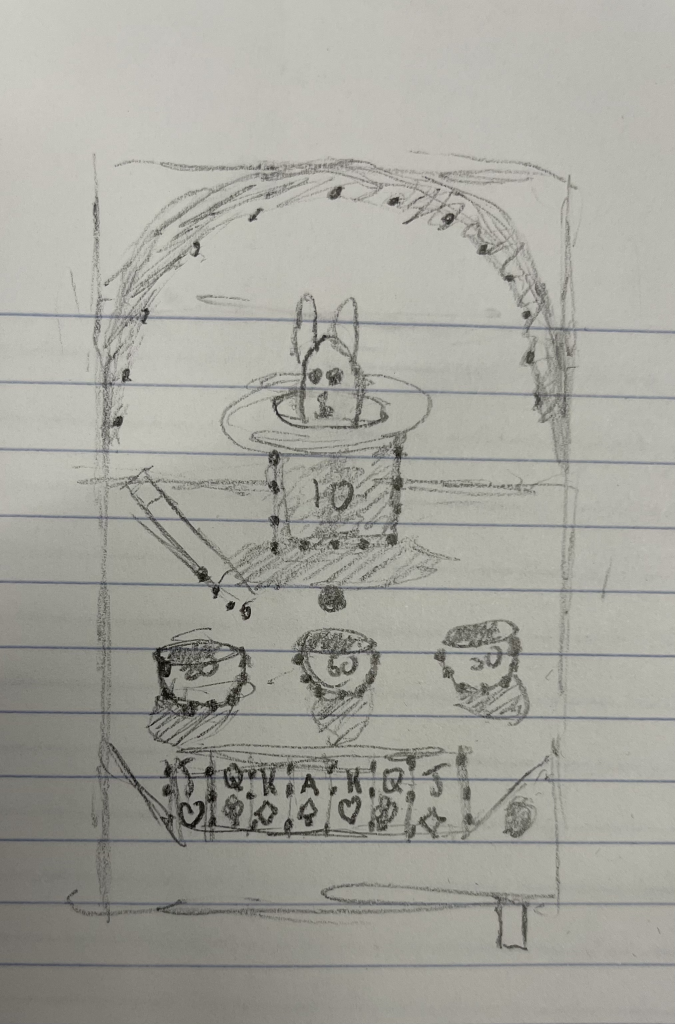
I received a lot of feedback about Mario Pinball. One small bit of feedback from one of my classmates that meant a lot was that the red coins in the center of the machine were perfect for the theming. I have to give some credit to Kai because he recommended putting something in the middle of the machine; it was looking empty before I added the coins. It was great to hear this kind of positive feedback.

The biggest issue with Mario Pinball was that the game didn’t give enough information to the players. All the layouts and shots were clear, but I didn’t get to scoring, so it wasn’t clear that the players were making real progress. I also didn’t have any instructions about a win condition. The lack of a back glass on my machine really hurt it. I had to narrate what players should be going for as they used my machine, which was fine, but the game should speak for itself. The last small issue with Mario Pinballl was that when players would win by completing all the challenges and then getting the ball into the castle, the ball would shoot back to the players like nothing happened. I did have lights on a Bowser statue in the corner to try to convey that he had “fallen into lava” but because the ball was released after 1 second, players didn’t have time to focus on that. They expected “winning” to mean they didn’t have more to do, which is a fair assumption, so they were surprised when they got the ball back. I made a small change that the ball would just be kept if they won, which is what it should have been from the start. Other than that, most of the feedback was very positive!

Takeaways

I am so happy I got to take this class. I learned a lot about the history, design process, and industry of pinball. The biggest takeaway that I got was that taking this class felt like being a kid again. We did “crafts” working on the Pinboxes, and we went on a field trip to the Strong Museum. This class had a feeling of fun to it, which is not common for a college course. It was a great experience and the things I can take away from this course, both my knowledge and the pinball machines I built, are so cool and make me incredibly proud. For this course, I give a 10/10, would recommend.

Mario Visual Pinball

Visual Pinball Post

My cardboard Pinball machine was Disc Golf Themed. Unlike most people, I didn’t bring my cardboard box to digital. This was mainly because I felt like there weren’t enough features for a more advanced machine, and I also wanted a machine that was more recognizable to the average person. For these reasons, I decided to pivot and make a Mario-themed Pinball machine. Right off the back, I was happy with how many different features I could easily include using things from the Mario universe. Let me explain the making process.

Initial Sketch

Original Pinball Design

The idea sketch idea had these main features: Peach’s Castle in the center, mushroom bumpers, a warp pipe that brought the ball around the course, goomba spinners, a Luigi ball unlock, and a Bowser figure that would fall in lava after you hit every other feature. While presenting this in class, Professor Jacobs had the brilliant idea of using lights instead of actually animating the figure. I ended up taking his advice.

Block out

The initial block out yielded 2 main changes from the sketch. The first change was that I moved the bumpers to behind the castle. This was because it made it possible for the ball to go into the bumpers right after launching it, and it also meant the castle would be less covered and more of a centerpiece of the machine. The second main change came from feedback from Kai while I was working on it. He said that the middle of the board felt very empty. I realized that he was right, so I added targets down the middle that you could shoot, and they would fall. At this point, I didn’t know what I would make the targets, but I wasn’t worried as there were lots of enemies in the Mario Universe from which I could choose.

Polishing

The polishing phase of this machine took the longest by far. The first thing I worried about was textures. I was inspired by Mario 64, so I used my inspiration to steal those textures. Then I Modeled a version of Peaches Castle in Blender and added it to the machine. I thought the playfield would look boring being all grass, so I added a lava section at the back. When it came to texturing the bumpers, I realized that mushrooms would no longer make sense, but Mario 64 has bully enemies that try to knock you into lava, so it seemed like a fitting reskin for the bumpers. I decided to make the targets in the middle red coins. After adding the bridge texture to the playfield below the castle to look more like the starting area from Mario 64, I had to move the targets a little to be on the bridge. The game also revolved around collecting 8 red coins, so I had to bump the number of targets from 6 to 8. I also added a little Bowser statue to the top right corner of the box using the model from Mario 64. Another change from the sketch was that the top left corner had a Luigi section which would give you a Luigi ball, but I changed it to Luigis Mansion because I thought it would look cooler. This would end up having negative consequences later (Foreshadowing!!). A small detail I added was that the first ball you have is red, like Mario, but if you get the Luigi ball, it’s green to show a visual difference. The last visual thing I added was lights, so the features had visual feedback for the players. And then with a little bit of scripting magic, the box was complete. It works almost exactly as I planned. If you shoot the ball into the castle, it will just spit it out, but if you shoot it into the castle after hitting every spot, indicated by their lights turning off, the bowser statue will light up showing that you won!

Feedback

I got some good feedback at Imagine. The main thing I took away was that it was fun and addicting (Yay!) Multiple children were playing it and had to be begrudgingly taken away by their parents. The only bit of negative feedback that I got was that when players hit Luigi’s mansion and it kept their ball and put a green ball into the launcher, players did not realize they got an extra ball, and they thought their first was just stuck. This is because I had no signifiers of what would happen when you hit that. Maybe if I just kept it as the Luigi symbol it would have been clearer, or I could have just had the words unlock Luigi ball on the mansion to show it. Those were the main points of feedback I had gotten.

Conclusion

I am very happy with how the box turned out. I think the features work well, some of the shots are challenging, but I don’t think they’re too hard. What I’m most proud of is that it plays and feels like a pinball machine, which was my main goal from the start. To that end, I think I succeeded wonderfully and I’m very proud of the work I did for this class!

Sources

Hole 18 Disc Golf Pinball

Initial Design

My initial design had 5 main features. A 3D Hole that players should try to hit, OB (Out of Bounds) sections that hurt scores, A Hyzer and Anhyzer line (The different ways you can throw a disc), a putting bumper (It’s almost like you’re actually putting!), and a missed mando section (Explained Later) that would give you a multiball. The recurring theme throughout this design process was that the missed mando section was nearly impossible to get right.

As seen above, the initial build remained very similar to the initial sketch. The biggest difference is that added sections above the flippers for the ball to bounce off of and to. give the missed mando section a clear line to take. These parts made the box feel more like classic pinball, and gave the ball more interesting bounce dynamics when it got to the bottom of the box.

After this layout, I quickly realized 2 main problems. Firstly, I never 3D Printed a basket for the hole, the main thing players are supposed to try to hit. Secondly, If I place any physical objects on the missed mando section as it were, when the player shot the ball, it would just hit the missed mando section. These problems led to solutions of varying success. Firstly, I changed the 3D hole to a 2D image of one that could spin around. This was a great change. As you can see in the design, there are 2 main walls the player can try to play to hit the hole, the hyzer and anhyzer lines, but with a 3D basket, a player would have no reason to go for one over the other. With a 2D plane as the basket, sometimes the flat side will face one line or the other. This encouraged players to go for different lines to get a better hit to spin the basket. The solution for the other problem was not as big an improvement, I just moved the missed mando hits to be passed the launch section.

Final Design

The final design yielding one more major change. Originally, I cardboard next to the hyzer and anhyzer lines to force a player to directly hit the shot. In the final design, I decided to get rid of these because it made the game less fun. This is not supposed to be an insanely difficult real pinball machine, it’s supposed to be a fun, casual cardboard pinball machine, and removing these parts helped fulfill its design purpose.

Removed pieces

Playtesting and Feedback

My original rules and scoring for this box were way too complicated. It had score calculations based on the number of shots it took to hit the basket, it involved subtracting 1 from your score when you hit an OB section. This was too confusing. Players didn’t even try to calculate their scores. Additionally, players were confused by what it meant to hit an OB section. I quickly realized that the rules were too complicated, so I boiled them down to the 2 main mechanics. Hitting the basket gave you +1 point, and hitting the 3 missed mando colors would give you multiball. Except how do you do live multiball on a cardboard pinball machine? I simply changed it to just give you an extra life.

These changes yielded much more positive feedback for my box, but one problem still remained. WHAT DOES THE MISSED MANDO MEAN!?!?!? Let me explain, and show why I couldn’t fix it.

Mando in disc golf stands for mandatory. It requires players to throw their discs on a specific side of something, like a tree. If you miss the mando and throw to the wrong side, you take a stroke penalty and have to throw at a drop zone. Why does it give you extra balls? This comes from a house rule of my friends and I when we play. If all players miss a mando, we let ourselves rethrow it. I wanted to put this idea into my game. So I put the section in and put 3 different targets for 3 different players. In hindsight, maybe it would have been better to have 1 small target than 3. Players didn’t understand why there were 3 things you were meant to hit. In their defense, it didn’t make sense (or wasn’t explained clearly). I realized this kind of feature is not intuitively designed, and that was kind of the biggest problem with the box.

Missed mando targets to hit that players never saw

Other than this, feedback for my game was mostly positive. I credit its greatest strength as playing well. It feels like a pinball machine, obstacles are spaced fairly, and you can learn to hit the shots. Despite the missed mando problem, I would still refer to this box as a success!

Pinbox Bagatelle – Magitelle

Initial Sketch and Idea

My design remained mostly true to my initial sketch. There were a few scoring changes from the initial plan, but the biggest change was that when you got the ball into the middle cup, the one that the hidden ball in a cups and ball routine would be in, the player would get an extra ball. This small, on a whim change had big ramifications for how the bagatelle would be played.

Side-by-side comparison

Changes

One idea that I stuck with the entire time was that if got two balls in different card slots that matched suits, you would get 10 bonus points. But when I added the extra ball, I realized that not rewarding any points for landing in that slot would make the extra ball reward worthless. It may as well have not been there. So, I made the extra ball reward 15 points as well. This meant that the new meta was to try to get infinite extra balls for infinite extra points. Although there is no upper limit to Magitelle’s score, the highest score a player was able to achieve was around 80 (disappointingly low compared to infinity).

Another interesting thing about the meta is that because of the pin on the Jack of Diamonds on the very right, it is possible to shoot with such little power that the ball would stop at the Jack of Diamonds, but it was also possible to shoot with enough power to have the ball stay along the right wall, and then come down and bounce over the Jack of Diamonds into the Queen of Clubs. That meant if your first ball missed the extra ball and landed in the other Queen of Clubs or the King of Diamonds, a player could purposely try to match the suit for guaranteed bonus points instead of trying thier luck at getting the extra ball.

Scoring at the bottom, players can jump the Jack of Diamonds.

User Reactions

The feedback I got was mostly positive, although there were a few points of possible improvement mentioned. Firstly, a playtester wrote that it is hard to see the suit of a card when a ball lands in that slot. Someone else wrote that the rules don’t clarify if you should remove a ball when it lands on the board. Both of these would be simply fixed with clarification on the instructions that once a ball lands you add its score and remove it.

A bigger issue with my game that I discovered through feedback was that the ball got stuck on the launcher very often. For some reason with the way I assembled my pinbox, if the ball bounced onto the launcher it would stay there. I knew this would happen when I played it, but I was easily able to just relaunch the ball by pulling back on the plunger and releasing, but players didn’t know if that was a legal move they should do. While I could have explained that in the rules, I instead tried to mess with my launcher to stop the problem of it getting stuck, but I was unable to stop it. Another issue was that the pins used to stop the ball would sometimes dig too deep into the cardboard and lose effectiveness. This was really only an issue with the pin in the top right of the box that the ball would bounce off of off the launch. Although I could lift it back myself, after repeated hits from the ball, the pin would always sink down. In hindsight, I could have hot-glued the pin at the correct height, but that thought did not occur to me while making improvements between playtests.

Despite these small issues, I received a high rating for theme execution, info/clarity, and playability, which I would call a huge success!

That is the journey I took with my Magitelle Bagotelle!