Goose 2: Canada

Have you ever looked at a Canadian goose on your way to class and told it “Fight me?” No one? Just me? Alright then moving swiftly on, my advanced Pinbox design is titled Goose 2: Canada and is just an expansion of the goose game head to head design I designed.

The main draw of this design is the extensive use of the soundboard I had purchased beforehand, but this time with speakers installed. I’ll be taking the goose honk samples I got off the internet and mixing them into a variety of sound effects for the soundboard to play.

As for the triggers for the sound I’ll be hiding momentary pressure switches under the playfield such that the switch is on the surface. The idea is that the marble will roll over the switch and trigger the sound, but if the marble is too light then I will have to get creative.

Functionally, the last feature will be making bumpers with cut cardboard holding a rubber band around them, to give a little extra kick to the bounces. There’ll need to be more testing, but I’m confident in the relative simplicity of the idea.

I also intend to add some color to the design, with printouts similar to how I made the bagatelle earlier in the semester.

Anyway, that’s all I’ve got for now. Here’s the presentation given in class.

Named Goose Game Postmortem

Sometimes Columbus just comes back from the grave and ruins a perfectly good plan. Or in other words “the story of how Columbus made my speaker delivery come too late and sank the main gimmick of the project.” Ethan and I had a ‘fun’ time after that.

I’ll take a step back and talk about the good things with Named Goose Game, which boils down to 3 things. First, it certainly was playable, and at least somewhat enjoyable. Second, is that laser cutting is a viable way to make obstacles out of cardboard. Third, is that ramps are pretty easy to implement with thin enough cardboard. It was mostly technical knowledge, as the soundboards lacked a critical part: the part that makes sound.

That takes me to the less than stellar parts of our game. We didn’t have time to get any sort of art/decoration onto the playfield because we both had busy breaks. Second, Columbus Day delayed speaker shipment by 1 day, meaning the speakers came in the day AFTER the project was presented.

In the end, there was a silver lining though. It was still pretty fun to make vocal honk sounds at your opponent while playing.

Pinball Alley – Advanced Pinball Design

My advanced pinball design is called Pinball Alley. The goal for my advanced design was to introduce a more advanced scoring system than my previous designs, as well as some new features. Inspiration for this concept came from my love for bowling. I wanted to introduce the theme of bowling into one of my machines and I decided that I could use bowling’s scoring system to my advantage. I also thought it would be a cool idea to allow more than one player to compete against each other for a higher score, using the scoring system I put in place. Lastly, I was aiming for a higher skill level and using bowling’s scoring helps with that. All of these ideas led me to the advanced pinball design below.

After doing some research into layouts for bowling designs, I eventually came up with the above advanced design. While focusing on the bowling theme, I decided to use the idea of bowling pins as a main focus for my playfield. Drop targets would represent the pins themselves and a ball return pit would aid in the return of the ball after shots. I made sure to keep the playfield pretty open so players can aim their shots. I also have bumpers to help guide the ball during play.

For the top of the playfield, I focused on player scoring methods. At the center is the drop target pins, where players can compete to get a higher pin count as they play a ten frame game of bowling. Each player has two balls (marbles) to use per frame and as long as the ball stays in play, they can keep raising their pin count. They can get 1-9 pins, a strike, or a spare using those balls. I’ve placed a ball return pit behind the pins that aids in the idea of a bowling lane (with bumpers to guide into the pit). I also added special bonus holes for an extra way to score 10 points.

Besides the drop target pins, I’ve added another new feature to my advanced design. On the left side of the playfield is a ball return tunnel. The ball return tunnel will give the player an extra ball if the ball travels through it. This is meant to give players an incentive to travel around the playfield and not focus entirely on the pins. The bonus holes provide a similar incentive. After witnessing its use, I really wanted to try the extra ball mechanic, which was one major reason I decided to use it for my advanced design.

After giving my presentation, there wasn’t too much feedback in terms of my design, many classmates seemed to be interested in the idea. However, there are a few things I might change for my design as I build it. Based on the size of the playboard, I might need to remove some of the center bumpers so players can properly aim the ball around the playfield. Another change may come in the form of scoring. Although I want to focus on a more advanced scoring system, keeping the scoring simple to understand is also important. Therefore, I might set specific values for a spare and strike. I might also set rules to the extra ball and bonus hole mechanic so that players can’t constantly rack up extra balls/points instead of actually playing the main bowling game. Regardless, I believe that this design is much more advanced than my previous designs and I can’t wait to get started!

Bowling Background Reference: http://wallsdesk.com/wp-content/uploads/2016/10/Bowling-HD-Wallpaper.jpg

Dragon Ball Z Post Mortem

After the play test session, the problems with our machine became very clear. The most obvious of which was the areas where the ball would get stuck. Despite us trying to iron out all of these spots in the building process, balls still got stuck under the ramps and on the side windows between the two playfields. These are easy fixes and we plan to touch them up.

Another big issue is with this battlebox was our drop mechanism. This was done to have the game start with an 8-ball multi-ball for each player. This was so the game would start incredibly hectic and fast-paced and over the course of each round the game would slowly become more deliberate and concentrated; however, in many of our playtests, the drop mechanism dropped a lot of the balls right down the middle at the start of each round, draining at least 2-3 balls on each side immediately. This was frustrating and confusing for a lot of playtesters. We think the fix for this is to wall in the sides and put the balls there, so that balls don’t drain immediately. Another problem is that balls had a tendency to go flying out of the machine. We believe this was caused by the ramps connecting the machines not being an even surface. This could be fixed with a simple taping over the ramp surface.

One suggestion made by a playtester (Shouts out to Jimmy) on how to improve the game was to introduce different balls, some of which would be worth more points. This would add an extra level of depth to the game, because players would have to be more considerate of that ball worth more points. We liked this idea quite a bit as it keeps the frantic energy of the machine while adding a new and interesting layer of complexity to the game play.

Our machine had many flaws, but I believe most of these are easy fixes. The overall concept and design of our machine seems to have been successful. During playtests, players were very excited and engaged during the game.

-Christian Axisa & Chris Commisso

Battleship: A post mortem

By: James Licata & Samuel Unferth

The machine
Picture by Samuel Unferth

This game was originally going to be much different with more elements, but the issue was the time we had to create it and the size of the playfield. In the original design we planned to have ships carved out of foam and cardboard, but we found that if we did put the ship there the ball would have a hard time making its way through the central playfield. The other option was that we could put it on the edge, but we felt that there was no reason to do that since the ball would not really end up there in normal play. Because of this we simplified the game significantly.

Another thing that we had to determine was the ability to move the ball form one machine to the other, which we determined that we could use ramps and pathways. This was a consideration as we wanted to make sure that we could make it slightly more interesting than just one path. To do this we considered having a one-way ramp on either side. To do this we had a ramp and railing so that only one person could pass it over.

The building of this game was a major process especially for Sam as he ended up cutting his thumb open with an exacto knife and burning his skin with a hot glue gun. With the experience that we got from building our first machines we were able to make our machines much better this time around. One example of this is the spinners and bumpers. On Sam’s machine he had issues with the spinner getting caught and the bumpers acting more like ramps but with the testing we made it much better. Another thing that we learned was to use spray adhesive first to lay down a background versus having to fit it around the other elements.

The machine being played
Picture by Samuel Unferth

People generally liked our theme of Battleship, though people did note that the playfield thematically was kind of bland, which admittedly it was. People liked the idea of using pins as life points on the battleships themselves, but wished we did more to bring the spirit of battleship into our design.

The playability was the most well received part which is good because that’s where our focus was primarily. They liked that unlike some of the other machines on display, ours felt like a direct head to head competition with decent length rounds, and the ability to pass the ball back and forth easily enough without it being effortless. A lot of people also liked the plunger launching the ball to the other playfield if the player is skilled enough to do so, giving them a distinct advantage right at the start.

If we had more time and sanity frankly, we would have liked to implement a grid on the playfield where the players would have to ships each and be able to place them freely at the start of the game in order to make it more difficult for the ball to drain, without it obscuring their own shots too much. Every time a ball drained, the other player got to pick which ship got hit, and when it got hit enough times, it’d be removed from the playfield. Once all ships are removed, that player would lose. It’d be an incredible application of our theme, but unfortunately it seemed too difficult to make from a logistical standpoint.

All assets were created by us. The theme of the game was based on Battleship by Hasbro.

Quidditch: Postmortem

Although it didn’t occur to us at the start, as we went through and iterated through design ideas for the dual machine, we realized how much of a stupid sport Quidditch actually was; seeing how the game didn’t actually end till the Snitch was caught. But as we were trying to recreate Quidditch on a pinball field, we tried our best to stick to the original.

Initial Designs & Improvements

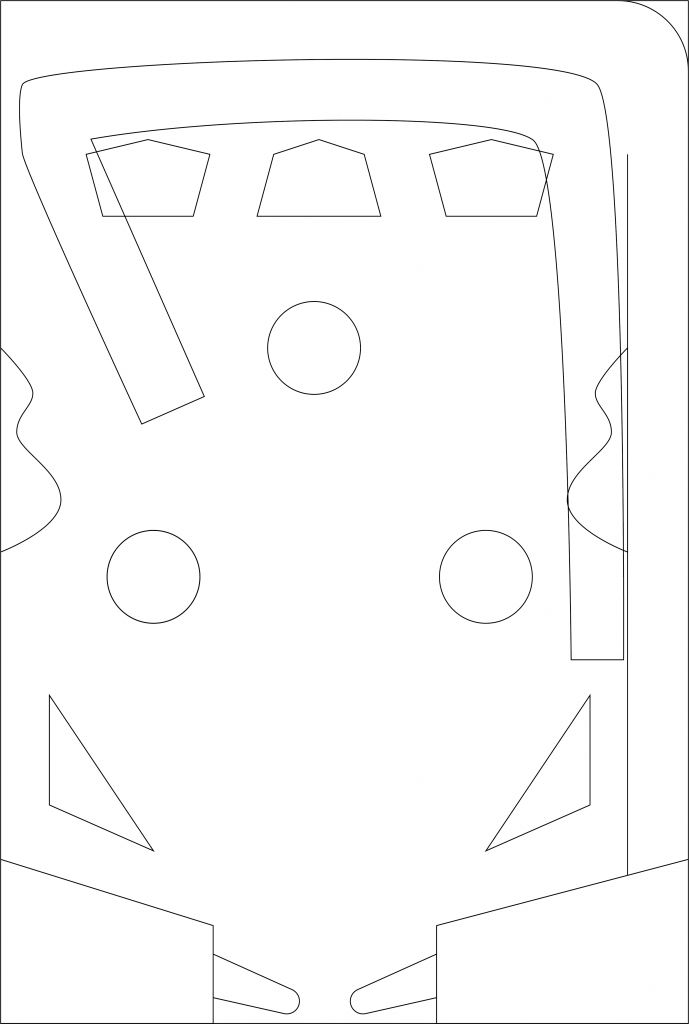
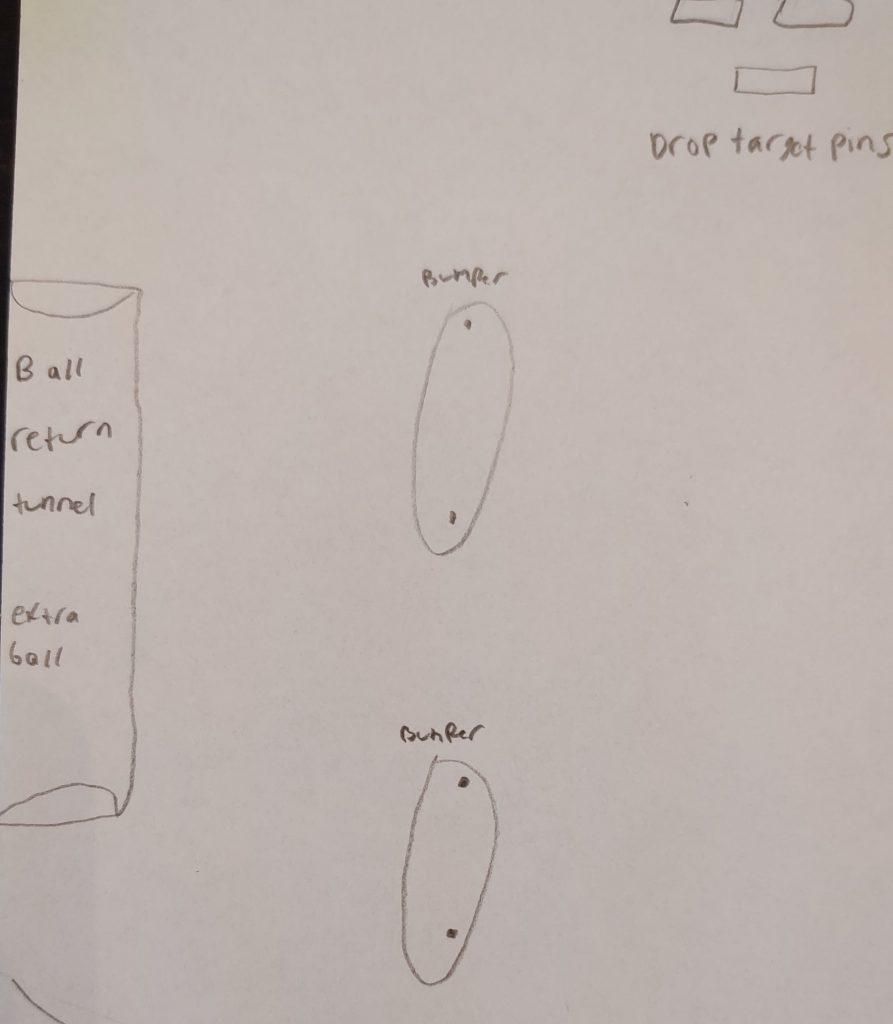
Honestly speaking, the initial designs weren’t really a thing of beauty much alone something one could call interesting. It was basically pinball with just three hoops on the playing field and two balls instead of one. We knew we could do better than that and better we did.

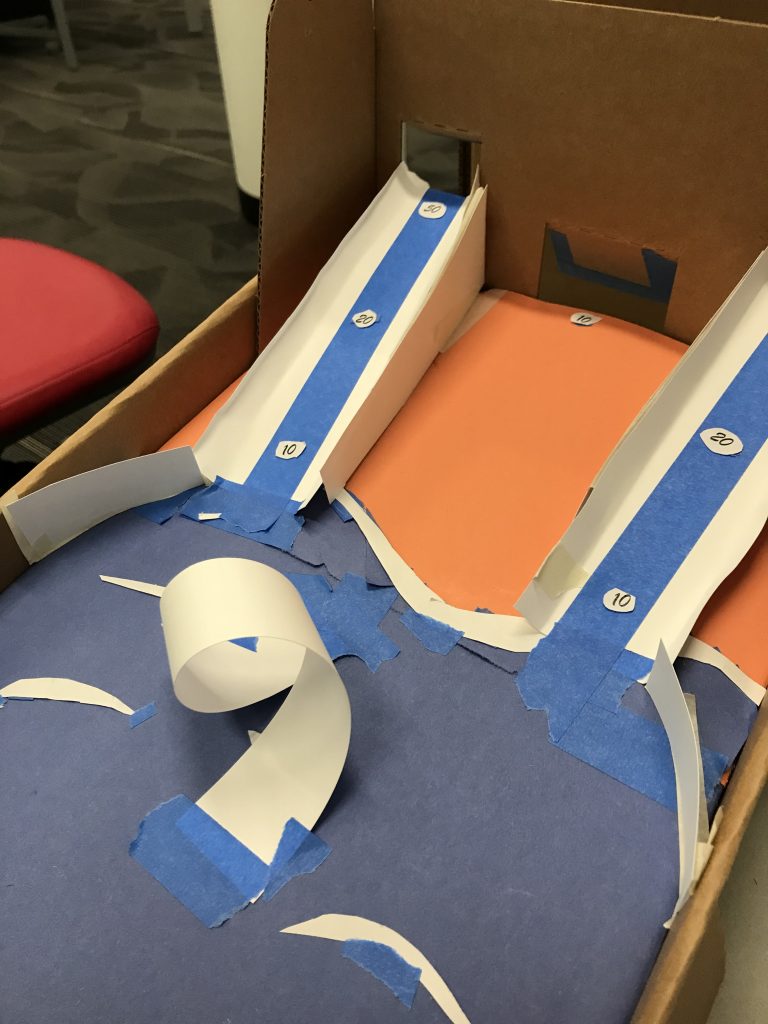
One of the first things we thought about was reconditioning the win condition. Originally it would be so that if the Snitch went through your gutter, you lost. But after some discussing and debating, we settled for making skill shot holes that the Snitch had to be shot into in order for the game to end. This made the game much more skill-based as well as deviating away from the typical pinball win/lose condition.

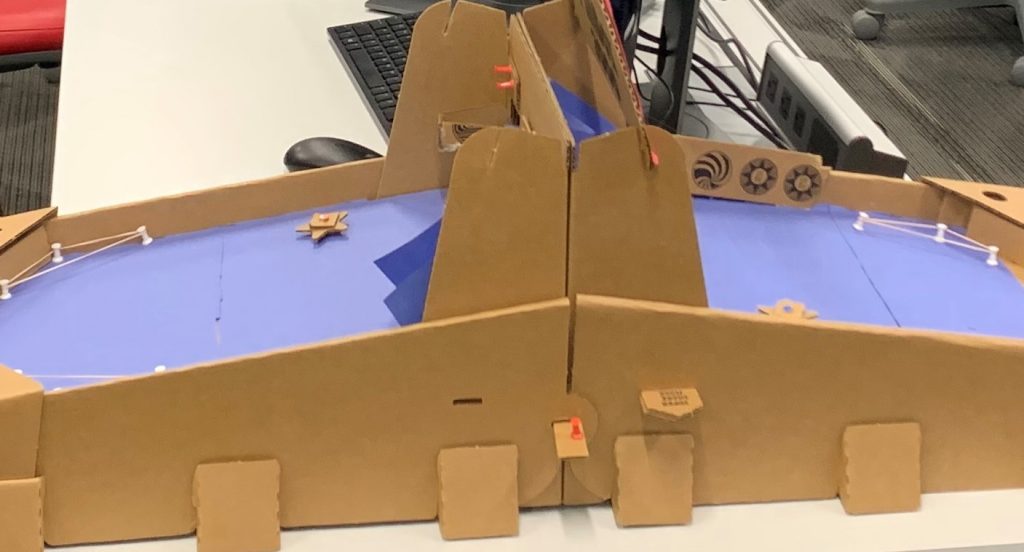
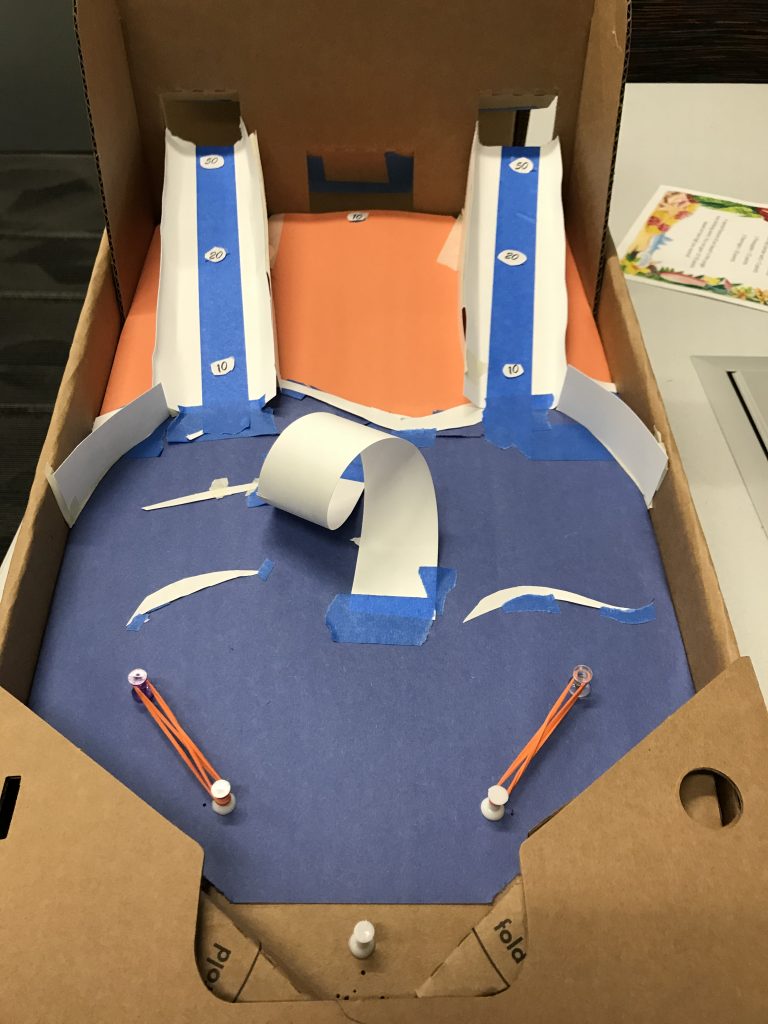
The next thing we changed was how we would set up the hoops. Originally there would be two sets of hoops on both sides of the field but we deemed that to be a potential annoyance as it could interfere with the players trying to shoot the balls past their side of the playing field. Instead, we had only one set of hoops at the center of the field that both the players shared. This allowed for the majority of the playing field to be open and cause less of a disturbance for what it was.

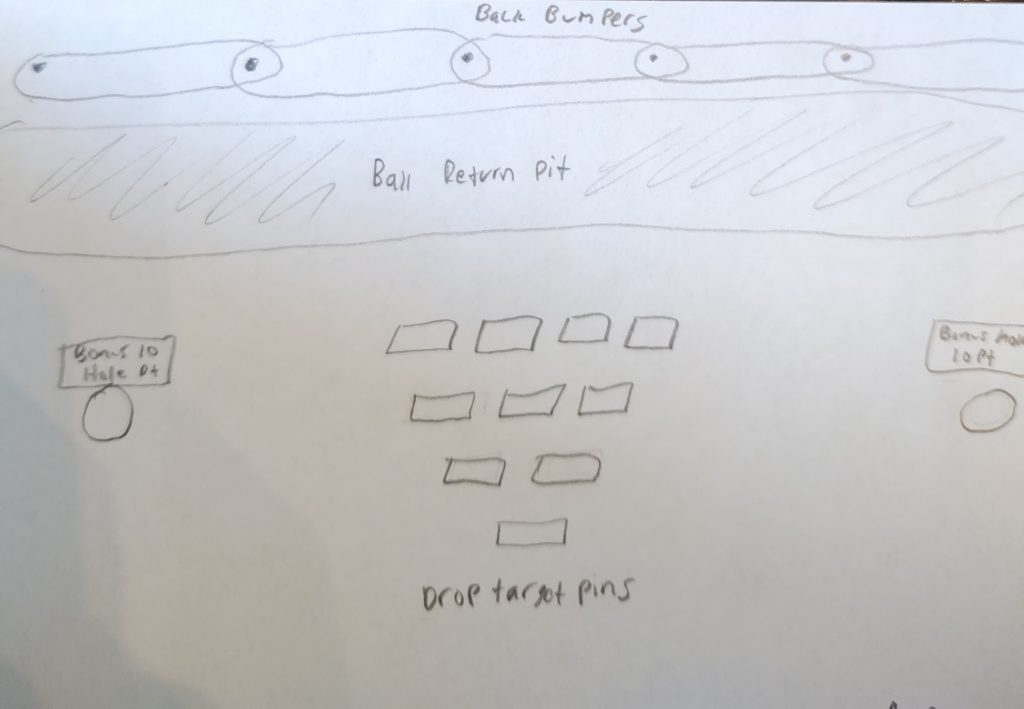
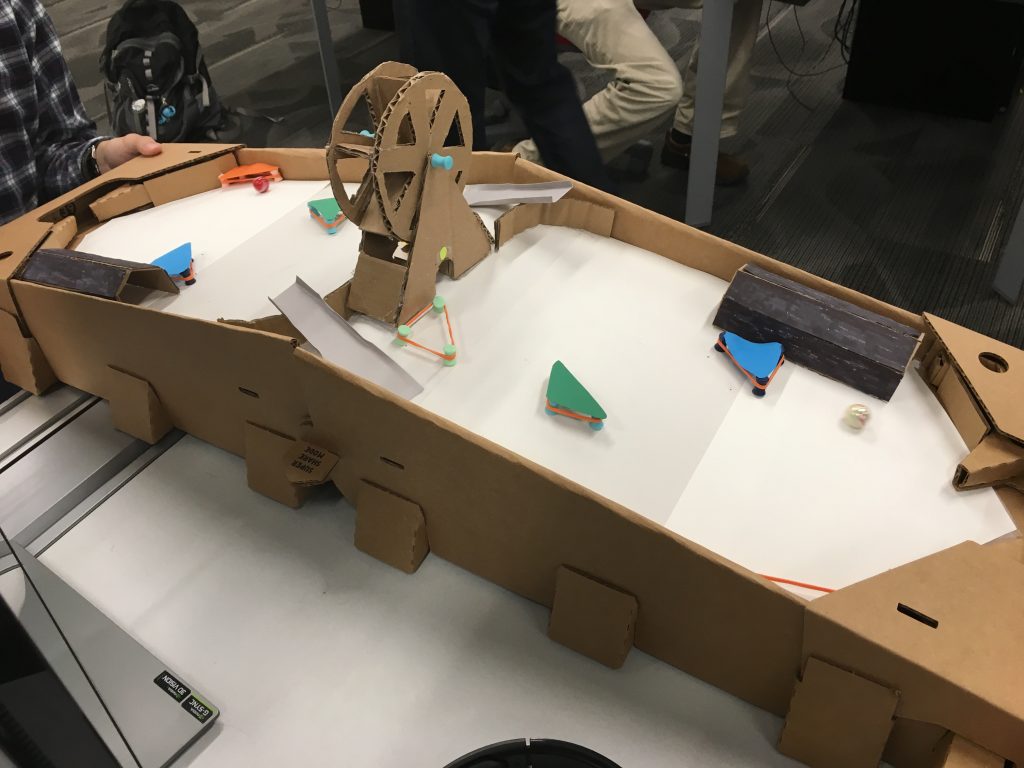
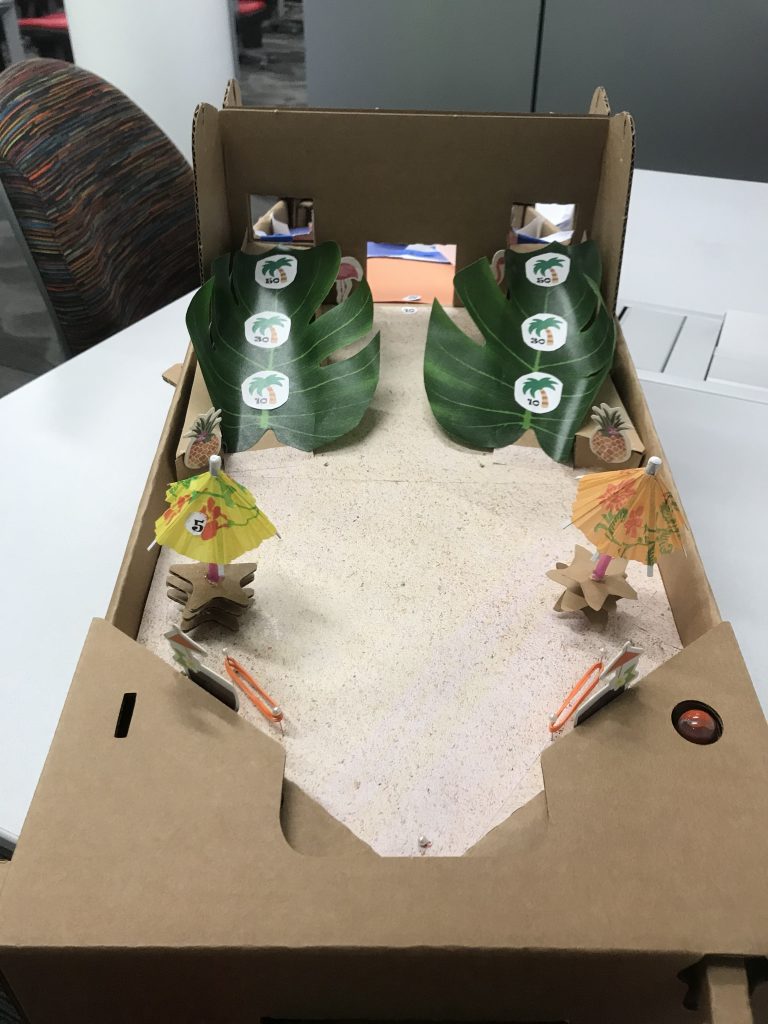
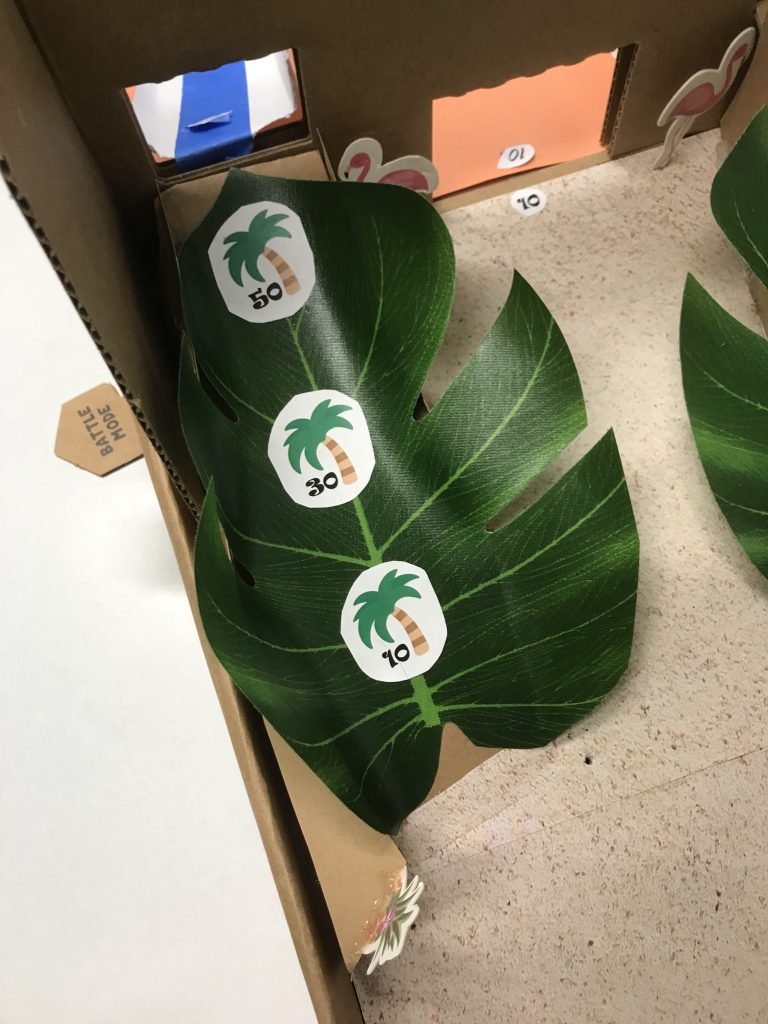
But after we had cleared the playing field of the hoops, we brought in a mechanic that acted out the defenders of a quidditch game. We had a pseudo-grid and golf tees to represent the defenders of a player’s team and the positions they could potentially be in. Each player would get 3 defenders that they would set up on the opponent’s field, as they are there to be an obstacle for the opponent. They were also limited to only one defender per row to prevent one from setting up a blockade which wouldn’t be fair.

After all that, the last thing we did was set an alternate win condition to the game. We realized that it was possible for the game to go on for a long period of time, much like how it was possible with quidditch games in the Harry Potter world and felt the need for another way to end the game. What we came up with was a score limit that if reached by scoring enough points by getting the quaffle through the hoops, would end the game regardless of whether or not the Snitch had been caught and the player who reached the limit first would win. This ensured that while our game is trying to recreate quidditch, we made sure to keep realistic goals for players playing our game.

Playtest & Feedback

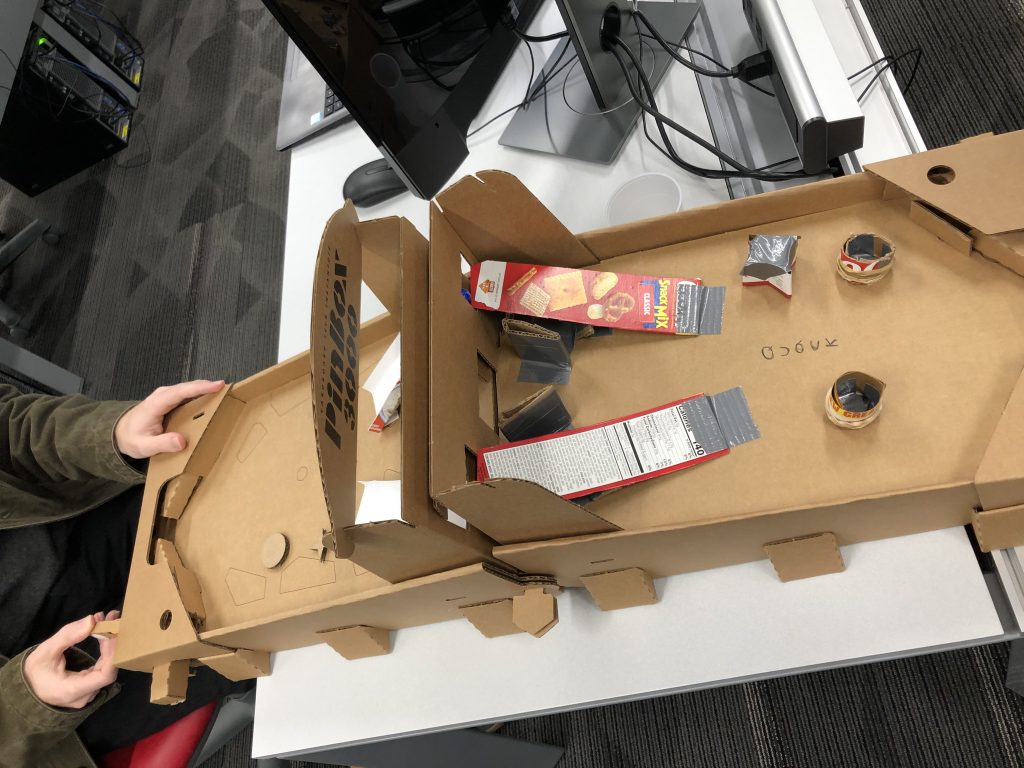
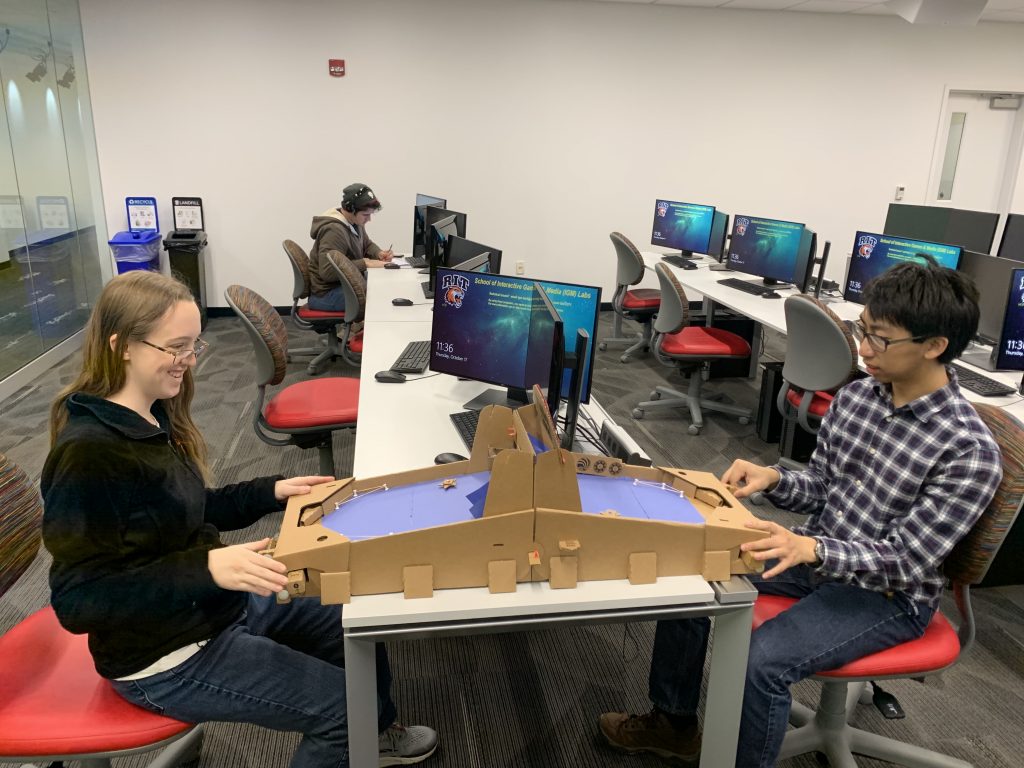
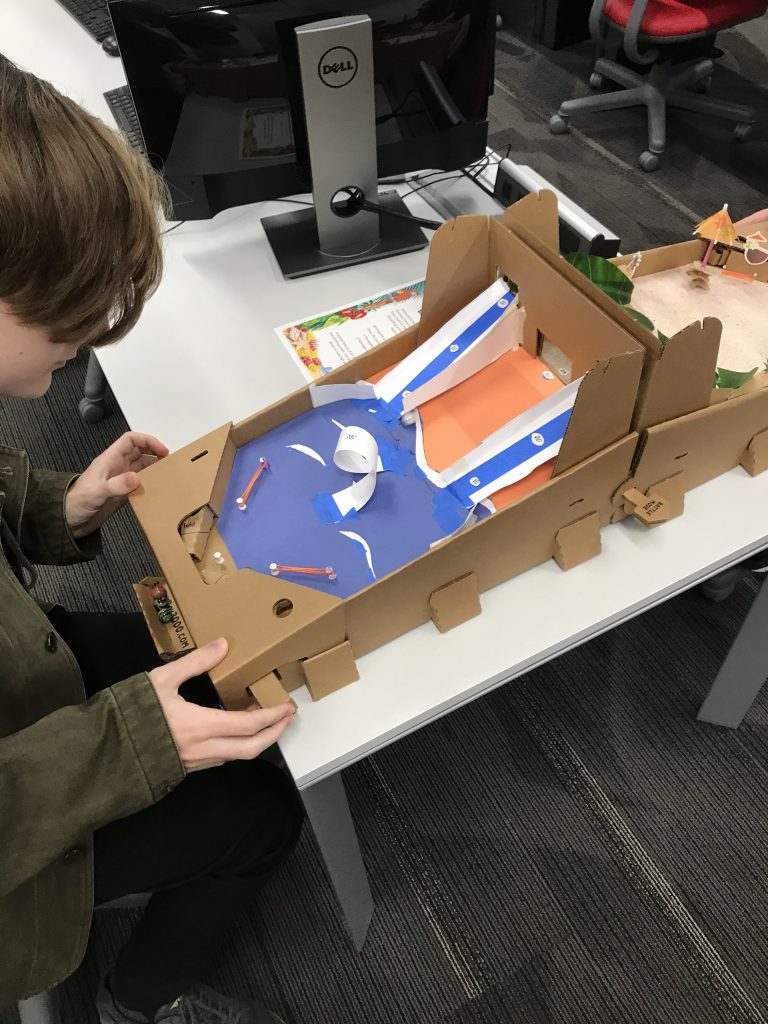
There really isn’t much to say when it came to the playtests. Most people seemed to enjoy the game but many can agree that it can get a bit hectic when there was a total of three balls on the playfield at any given time and sometimes they’d go flying off the decks as well.

Any improvements that came to mind after the playtest were heavily limited by the fact that we’re using a physical machine: a reliable method to keep track of the score, something to keep the balls from flying off the deck, a way to play out of bound balls quickly back into the game, etc.

Due to the limitation of having to work with a physical machine, not many improvements can actually be made without the proper skill sets to do so.

But if we could make a digital version of this game, we wouldn’t hesitate to do so.

Amusement Park – Post Playtest Results

Project by Katy Mollenkopf and Ben Stern

An overhead view of the playfield

My original concept was to create a playfield themed like an amusement park because it’s a fun setting to work off of and expand upon. In my previous bagatelle design on surfing, I received feedback stating that tunnels were fun for players, so I integrated more tunnels (the ones by the plungers and the tunnel in the middle for the Ferris wheel in this example). I also played around with the concept of ramps and bumpers and how that could play into the theme.

The ramps are meant to be roller coasters and the tunnels are meant to resemble those of dark rides or haunted houses. I topped the bumpers with colored paper to further push the jovial theme of amusement park rides.

Both Ben and I agreed that we wanted gameplay centered around more than just draining the other player’s marbles, so we went with having players visit all of the amusement park rides as the objective.

Based on the testing we did outside of class, this objective worked well because some of the rides (namely the ramps and Ferris wheel) were difficult to hit, so it wasn’t too easy to win, but still quite possible. Based on feedback gathered from the class playtest, though, players actually found the ramps too difficult. As I watched, I noticed a lot of players kept losing marbles inside of the bumpers, so I’ll want to construct filled bumpers in my next design to prevent this. I may also need to reconsider bumper placement for future designs, since they didn’t seem to support the goal of visiting all of the rides – rather, they acted against it and caused players to drain marbles quicker. Besides that, the Ferris wheel was accessible and players were determined to visit all of the rides.

A couple of players also said they wanted the to spin the Ferris wheel. This got me thinking of how I could implement interesting features to future designs that are unique, such as LED obstacles, spinners, or other neat things based on what the design inspires in players. All in all, it was a helpful playtest and made me consider some important factors that I didn’t think of when coming up with the design initially.

Paradise Island – Battle Mode Pinball Design Post Playtest

By Alex Stevens and Kent Reese

This is the Paradise Island Duel-Play our goal was to make a Duel-Play that

  • Resembles paradise on a tropical island
  • Makes players feel relaxed as they have fun
  • Uses ramps to connect both playboxes
  • Implements use of thematic spinners and studs
  • Incorporates fair scores for both players
Alex’s Side of the Machine
Kent’s Side of the Machine

We feel, based on the feedback from the play session and the aesthetic of the board, that we accomplished our goals. Our board looks like a tropical paradise, and the play board isn’t too chaotic as to stress players out.

Alex also made a rulesheet for the game:

The rules, tying in with our aesthetic goals even further, thanks Alex.

The biggest complaint we got was over these ramps, the loop on Kent’s side, and the walls adjacent to the ramps on Alex’s side:

Kent’s Ramps

Alex’s Ramps

These ramps are really difficult to get the ball over on to the other side, making it difficult for either player to have a meaningful or consistent cross play between the two sides. If we were to remake the machine, the ramps would be shallower as to allow the ball to ascend easier.

The loop worked, players were able to successfully loop the ball several times, but it killed the momentum of the ball, making the middle gate nearly impossible to get the ball through, making for an inconsistent and frustrating experience.

The walls on Alex’s board are directly in line with both the plunger and the “bozo zone”, making shots bounce back very quickly and the ball being sent to the gutter pretty often if you weren’t tact with it. This was counter-intuitive to our design goal.

Alex’s Side of the board getting played
Kent’s side getting played

On the theme of the board we got high praise, both sides capture a beachside aesthetic, but Alex went the extra mile and got a variety of nice aesthetic touches that added to the theme, specifically the leaves used as ramps, the cocktail umbrellas used in the spinners, and the sand-looking textured paper. Our features all mesh with the aesthetic, and we got verbal praise for that as well.

Despite some of our notable hiccups, the board was playable and the class was generally receptive to our take on a laid back form of pinball.

Kent’s assets were obtained through the kindness of our classmates and the Magic Center office.

Alex’s assets were found at these references

Sand Reference: https://www.apartment-cassis.com/wp-content/uploads/2017/07/sand-background-.jpg 

Palm Tree Reference: https://www.pinclipart.com/picdir/middle/0-4586_sticker-tree-clip-art-transparent-palm-tree-emoji.png 

Tropical Rule Sheet Border Reference: https://i.pinimg.com/originals/40/ed/95/40ed954446c1b4c61116ac66ddc5313c.gif

Named Goose Game

Honk

Every Goose, ever

Great ideas can come from anywhere. Including hitting a roadblock on ideas and firing up your switch to kill some time. After a play session of Untitled Goose Game I realized that for this head to head project I could make it goose themed with the express purpose of having an analogue of “Press Y to Honk.”

And so I got to work making a quick sketch. The premise of the game is that the players are opposed geese fighting for the pond. The marbles are an abstraction of their attacks against each other, where sending the marble to the other player’s playfield is a counterattack, while draining the marble on your side is getting hit.

The playfield with all its bumpers and the two ramps

If the playfield looks barren, that is because it is. I purposely left it fairly empty, as the examples I looked at had relatively simple playfields. I reasoned that a large portion of the fun came from the presence of a second player. Plus, I know that the Pinbox 3000 is quite a small unit, and has a correspondingly small playfield, so I can’t get too crazy either.

Honk, honk

The goose I walk past to get to class

This version with the red lines highlights the ‘bozo zone’ which are the two lanes that are easiest to shoot down. I decided to put the ramps to the other player’s side in those lanes because a head to head machine is not very exciting for both players if both balls spend the entire game on one side. So, the ball should be able to switch sides with relative ease, something players who find themselves juggling both marbles often will appreciate.

HonkHonkHonkHonkHonk!

The goose that is currently chasing me as I write

The main gimmick, past being a head to head machine, is the ability for players to honk at each other. I plan on installing a module on the side of each machine that consists of a battery pack, a soundboard, speaker, and button. When pressed, the button will trigger the soundboard to play the honk sound effect. The main intention is for the player to hit this button whilst both marbles are on the other player’s playfield, but players are free to hit the honk button whenever they’d like.

That’s it for my Named Goose Game, designed to test the idea that honking at another player while they struggle with two marbles is fun.

Train Bagatelle Concept

Trains are cool and good.

The concept sketch for the design

The concept of my bagatelle is to incorporate a more unifying theme to justify some of the more common design tropes of a traditional bagatelle. When we learned about bagatelle machines, I couldn’t help but notice most of them were lacking in theme or had no theme at all. So, the challenge becomes finding a good theme for a board and game that’s so oriented around straight lines, holes, and not much else. The best theme I’m able to think of to fit the specifications is a train theme. With the tracks acting as justification for the pin placement and their destination being the holes.

Nothing about my concept is terribly revolutionary, but I hope to make something aesthetically and conceptually cohesive rather than a vague “game”.

The feedback I got in class was that while my concept seemed sound, it was lacking in actual trains, and I couldn’t agree more I’ll be adding train decals to the final machine. The other suggestion I received was to add a whistle, while it’s a neat idea I doubt I could implement it.