Into Hollownest Advanced Pitch

The Game I am designing is Into Hollownest based on the game of similar title Hollowknight. This is focused around the different things you see around the landscapes as you adventure through the game. I plan to have a variety of objects that the player can interact with and influence.

The reason I chose this theme is that I really like the game and I am always excited to work with the environment and the features of the world. I am also excited because in week 1 I had the idea of using the sword as either a tunnel or a ramp and I feel like this would be a great time to do that.

The pinball design – By Sam Unferth using Photoshop

This design is meant to be somewhat advanced with an extra flipper, ramps, rails, bumpers, and spinners. But the real advanced idea I have is to make the machine 2 times bigger in all dimensions for a total of 4 times board surface area. The black angled lines are the locations for the flippers, The object on the right is the plunger, the red shape is the spinner, the faces are bumpers, and the sword is a tunnel.

The biggest feedback I have was to make sure my scope is manageable and that the theme was exciting. As this is a very well loved game I really hope I can do the theme justice.

There isn’t much scoring planned for this game so right now I don’t have a main goal for the player to complete.

The biggest issue I may have with this project is the actual construction of the machine itself. As I have not really taken into consideration how large this machine will be or how I am going to build it, that could cause me to run into roadblocks. Based on initial testing the flippers may cause issues due to the needed size and force. After working with some cardboard it may be too hard to build the frame sturdy enough so I plan to work with a few other possible materials.

Advanced Pinbox Postmortem

To be honest, I wasn’t sure how my machine would play out as I had spent so much time building it, I didn’t have as much time to test it out myself and flesh out the minor details. But after going through the playtest, it seemed like there wasn’t too much to worry about.

The Good

Overall, both the back and front ramps worked pretty well and no one really seemed to have trouble accessing the upper level. They required both a certain amount of strength and precision to use and the ball is quick to return maintain the quick pace that I wanted the machine to have.

The Bad

Overall, there was a lot of places where the ball could get stuck, and which it did, which I wasn’t able to flesh out due to lack of testing. Most of it was solved by shaking or nudging the machine a bit and the game would go on as usual. But it did happen a little bit too frequently.

What I would change

Other than making sure the gameplay is smooth by fleshing out the pinball getting stuck caused by less refine building, I would’ve like to have refined the upper level more than I ended with. I think it worked decently enough but there was definitely more room for improvement. Hopefully, my take of this design with Visual Pinball will end up with a more enjoyable design to be played.

Advanced Pinbox Design

Initial Thoughts

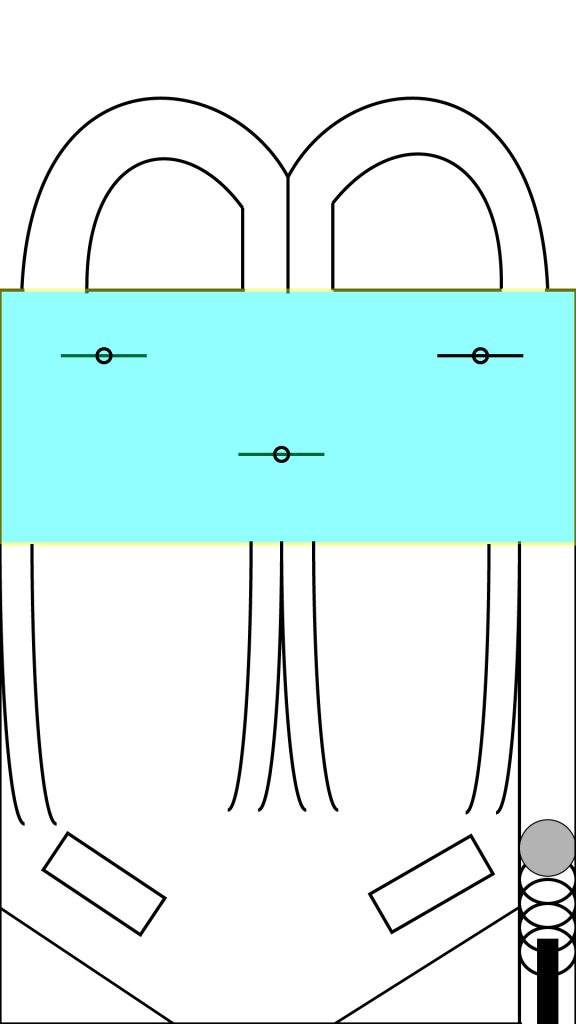
If there was at least one thing that I wanted to try with my advanced design, that was using ramps to get to a second level of the playing field. There was something about having multiple levels that always fascinated me when I see machines implement them in their own style and I wanted to give that a try.

Initially, I thought about what I specifically liked about machines with an upper level and how they handled it and narrowed it down to a few features;

  • A skill shot ramp that leads up to the upper level
  • Interactable objects on the upper level
  • A fun way for the ball to drop back down to the lower level
Initial Design Comp

After deciding on what I wanted, I started crafting.

Actually Making it

The first part wasn’t hard to implement as I just connected the lower back hole that was for the battle mode with a ramp that leads up to the upper back holes.

I did spend a little too much time though making it functional. I initially built the ramps out of cardboard but they were too stiff to bend in the steep ramps I wanted them to be and the way cardboard bends usually ended with the result of the pinball not even being able to reach the upper level at all.

Next, I tried 3D printing it but immediately gave up due to time restraints and eventually settled for lightweight cardboard. They were easy to work with and would maintain smooth curves for the pinball to reach the upper level.

After that was the objects I would populate the upper levels with. I originally wanted some sort of spinners but couldn’t get them to work smoothly. So I opted for golf tees and a hole in the center to make it like a mini bagatelle game in parallel with the pinball.

Then the last part was the method for the pinball to return to the lower level. I decided to make a half pipe as it was easy to implement as opposed to the railings I thought I could have made but I couldn’t figure out how I would’ve implemented them. Functionally though, they are identical so I don’t think it makes too much of a difference.

Lastly, this was something I added towards the end but I created a very steep angled ramp that would act as a skill shot and another means to gain access to the upper level. I threw this in to add emphasis that the skill shots that lead to the upper levels aren’t just about precision, but also the amount of power is required to reach the upper level.

Similar to sports, the idea I wanted to convey was that not only do you have to “swing” hard at the ball, but you had to stay precise with your “swing” at the same time to hit the target.

Wrapping Up

Overall, I’d like to think I had built a machine that achieved everything that I initially wanted for most parts. But I think I’ve had enough of the Pinbox for now and am looking forward to working with Visual Pinball.

Electric Eel Abyss – Playtest Feedback

A picture of the full pinbox in class, setup for playtesting.

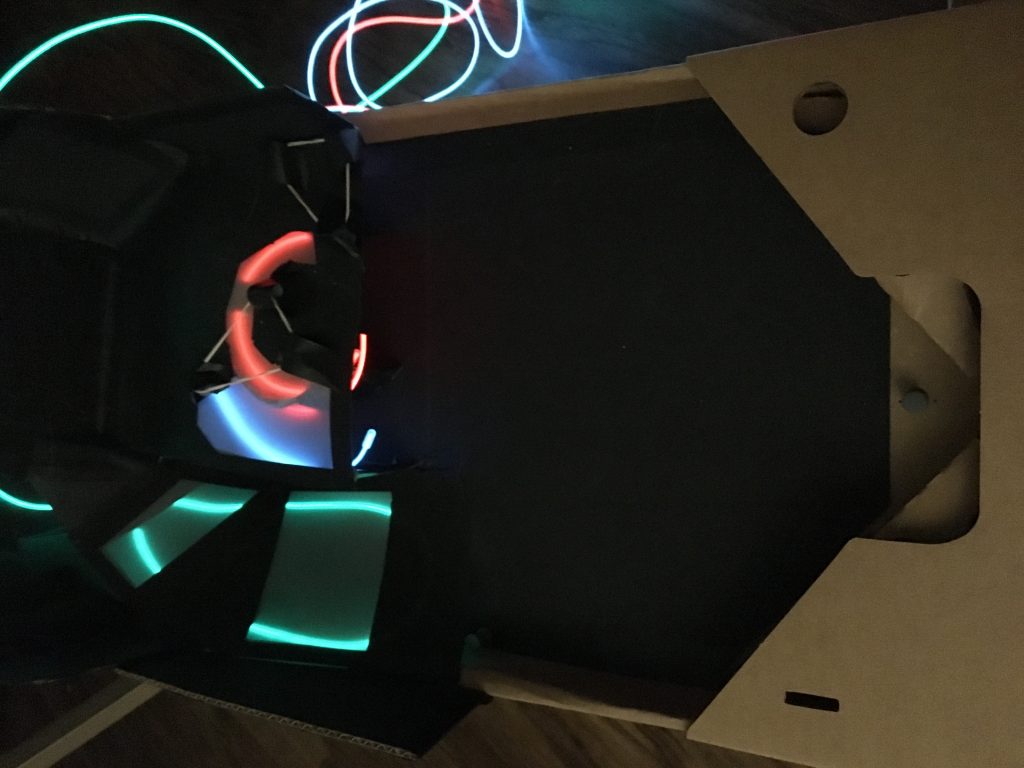
Although the el wire and the blinking lights on the eel were a bit washed out in the room from the lighting, people liked the aesthetic, especially the wires shining through the transparent material. One comment I received mentioned that the loops felt really nice and that the upper level worked well.

People liked the ramp and felt that it was of a good difficulty – however, I couldn’t physically mold it into quite what I wanted, even though it works well as it is. It was also challenging to add the bumpers to the upper level because of the malleability of the material, and the lights wouldn’t stay put inside of the tunnels. I would say hooking up the wire so that it was where I wanted it was the most difficult part of building this machine.

Some other suggestions I got were to add more things to the playfield, such as drop targets/bumpers or other goals that players can aim for. I am thinking of translating this design to visual pinball because I really like the concept of it and people enjoyed the features I had in place, and I could definitely expand upon it gameplay-wise. I also want to take advantage of the digital medium to add/elaborate on the neon lights and implement different kinds of materials, since I wouldn’t be restricted to what I can physically make and use.

Machino 3000 Postmortem

For my advanced pinball project I decided to try and make a table that would react to the pinball that was inspired by some of the bonus stages of the Pokemon ruby & sapphire pinball game. For this project I needed an arduino, unfortunately the arduino did not arrive until the day before the project was due so I did not get to add as much as I wanted to this pinball setup.

The one thing I tried to make sure the table would do was react to the ball. I did not want to directly use buttons, partially do to not having the materials, but mainly due to wanting to recreate the feel of the pokemon pinball game, where it feels like parts of the board are alive and not simply components. I managed to create a sensor with variable succes by using a library that checked capacitance between two ports of the arduino, and connecting the circuit to some tinfoil on the back. I also covered the ball in tinfoil and put some tinfoil connected to ground beneath the sensor on the back. letting the ball complete the circuit whenever it touched both pieces of tinfoil at the same time. As stated before this didn’t always work and the wires that connected the sensor often came loose. I also added a motorized arm to the playfield that would block the ball but did not have the time to program a pattern of movement so I just had it mainly controlled by a potentiometer.

While I think that the idea for the pinball table was interesting the fact the supplies came in late did not help with the design. The game did not have any visuals as well which probably did not help its case. Overall though I think I did ok for the amount of time I had (because of the late delivery).

Electric Eel Abyss (Changed from Neon Boneyard) – Advanced Pinball Pitch

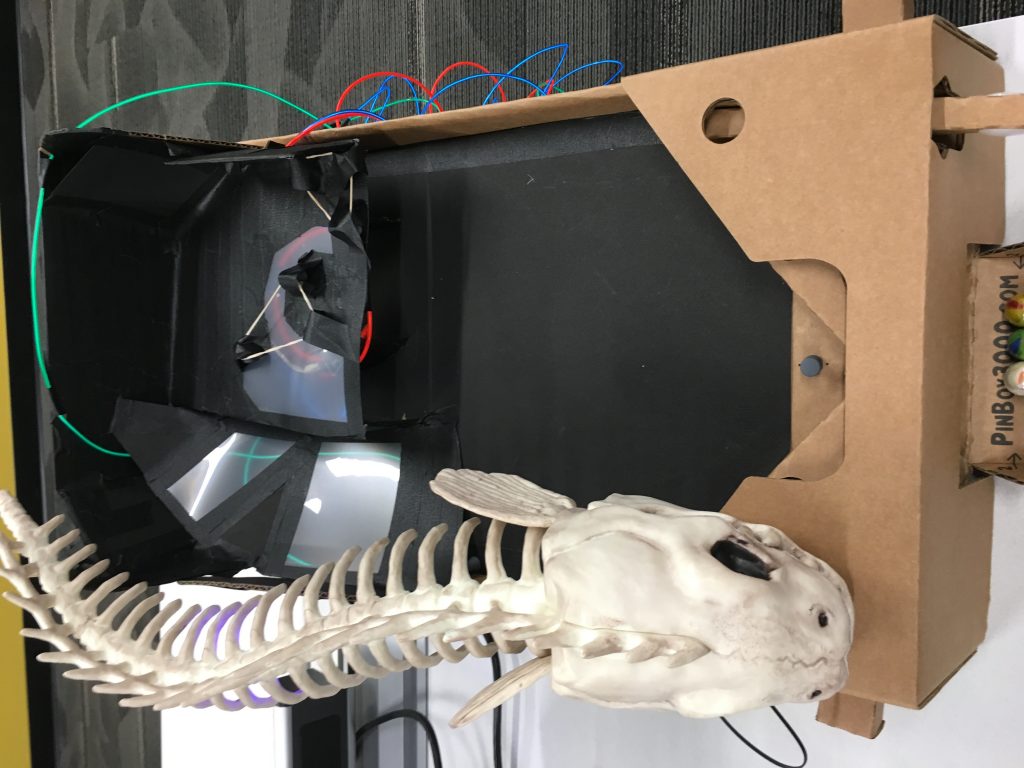
When I was shopping around for Halloween decorations, I came across this interesting, light-up skeleton eel on sale at the JOANN location here in Rochester (https://www.joann.com/). I decided to make my advanced pinball machine themed around that.

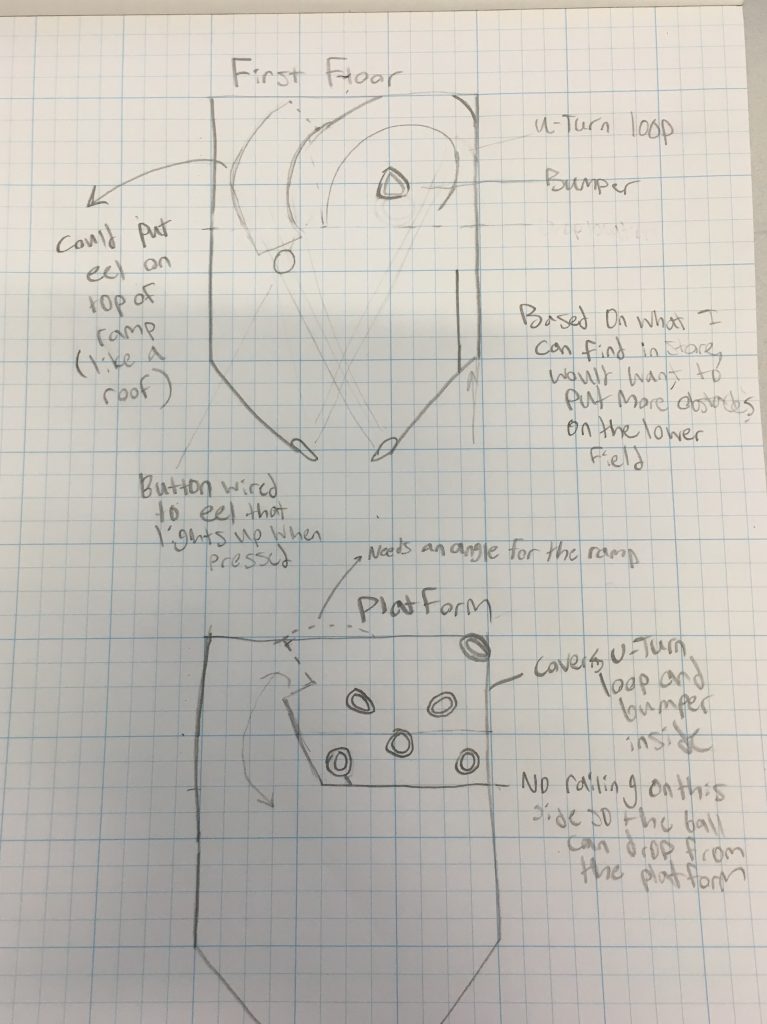
My layout drawing / original pitch.

The “advanced” part for me was working with el wire and creating a second floor with a ramp leading to it. Further learning from my previous pinball iterations, I incorporated two tunnels underneath the upper playfield. I also found some clear folders that I never used and thought it would be cool to use that for the upper floor instead of plain cardboard so the el wire could be coiled underneath, exposing the inside of the tunnels more. I was inspired by the Black Knight 2000 machine in some of the playfield features, most notably the tunnels underneath the second floor and a ramp leading up to it.

The pinbox in the dark without the eel, just the el wire.

I also added some bumpers to the upper level to make it more interesting, but I didn’t have enough room for nearly as many as I previously thought in my layout drawing.

Jimi Hendrix Post Mortem

For my advanced pinball machine, I decided that I’d go with Jimi Hendrix. I have always loved Jimi Hendrix, and felt that he deserved a pinball machine. I knew I wanted to capitalize on his guitar solos. The way I decided to do this was through the use of more elaborate ramps, which also happened to fill the “advanced”-ness of the assignment.

I tried to fit as many ramps as I could, originally trying to go with four, but then realizing that the pinbox 3000 would not be able to feasibly fit them, but I somehow managed to get three to fit well enough. The only problem that I noticed with the ramps was during playtests, the left-most ramp was incredibly difficult to land in, which arguably isn’t that bad, as it means that there is at least one shot that requires more skill than the others. If I were to continue building upon this machine, I believe I’d probably simply make the entrance to the ramp to be larger, but keeping the angle that is required for it, as that should make it easier, but making not nearly impossible anymore.
The other design that I used was a multiball. The inspiration for this was from a few machines I saw at the Strong Museum that used a target, requiring a hard hit to reward the player with a multiball. Mine was not as difficult as the ones I had seen, however I think players enjoyed having a multiball option. On the fly while playtesting I actually also allowed for skilled players to lock a ball back into the multiball zone, because it was a difficult shot to make, and felt that rewarding them in that way was fair. Overall I’d say it was a successful mechanic.

The last mechanic I had in the machine was one I had been trying to get into my machine since the completion of the bagatelle machine, a fidget spinner as a spinner. It wasn’t very complicated, which was exactly why I wanted it, it was simple to get on the field, just buy a fidget spinner, and it worked great. The only problem I found is that fidget spinners aren’t built to be hit constantly, so towards the end of the day, the spinner actually broke apart, requiring me to put it back together, thankfully it wasn’t permanent, but it is something I should keep in mind for the future.

Overall, I think my machine was fun, and there are a few changed that I’d want to make, particularly in the visual appeal, as I kind of threw together the visual part of the machine. I also plan on continuing this machine into the virtual pinball assignments, as I had a ton of fun making the machine.

Pinball Alley: Advanced Playtest

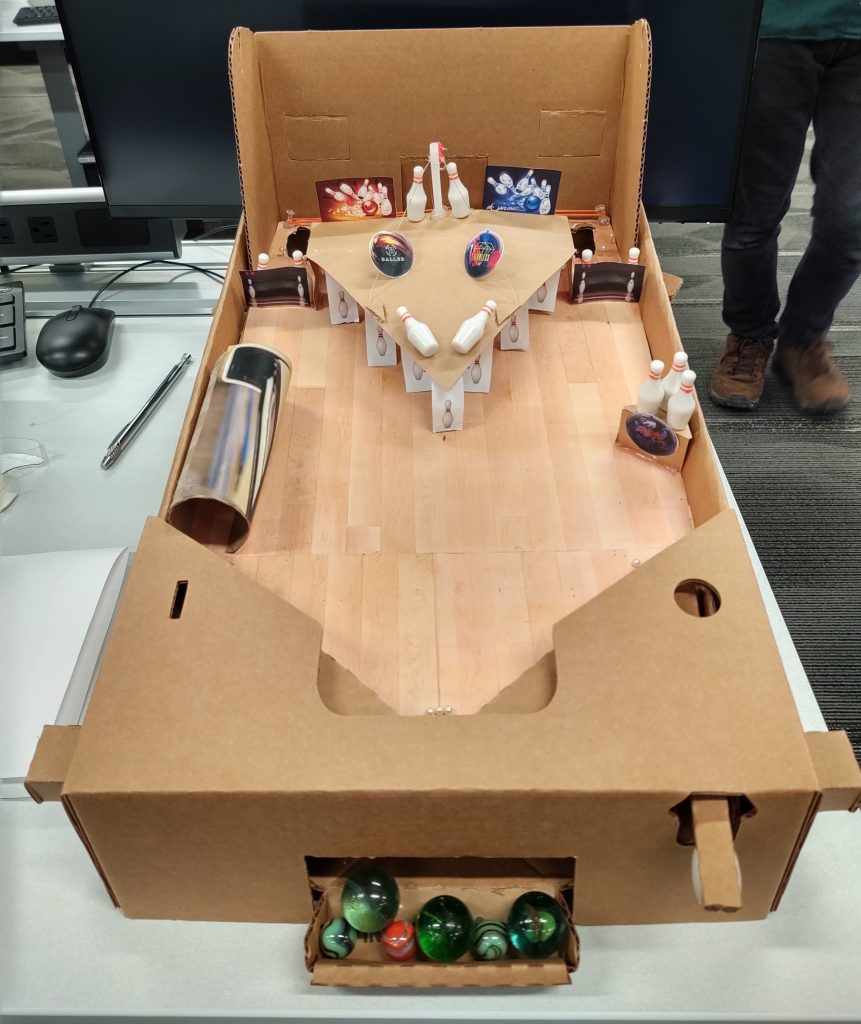
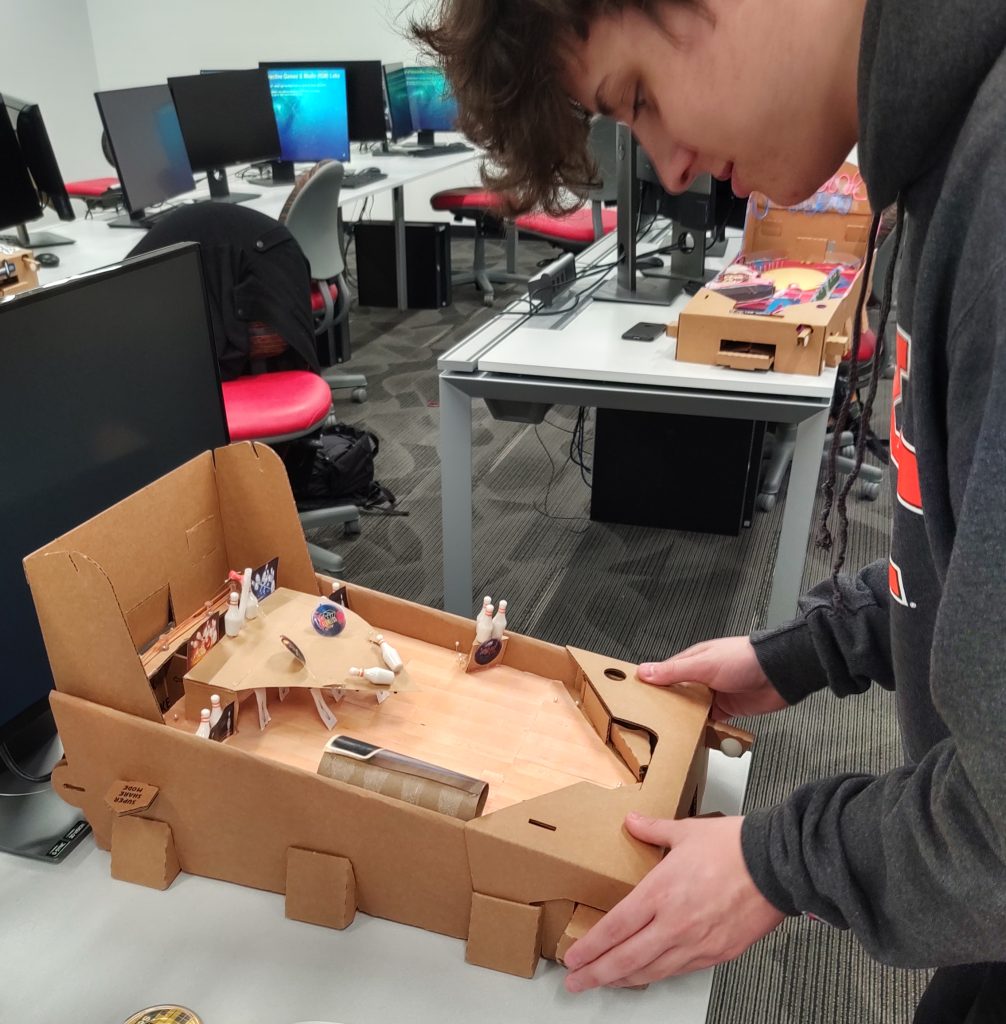
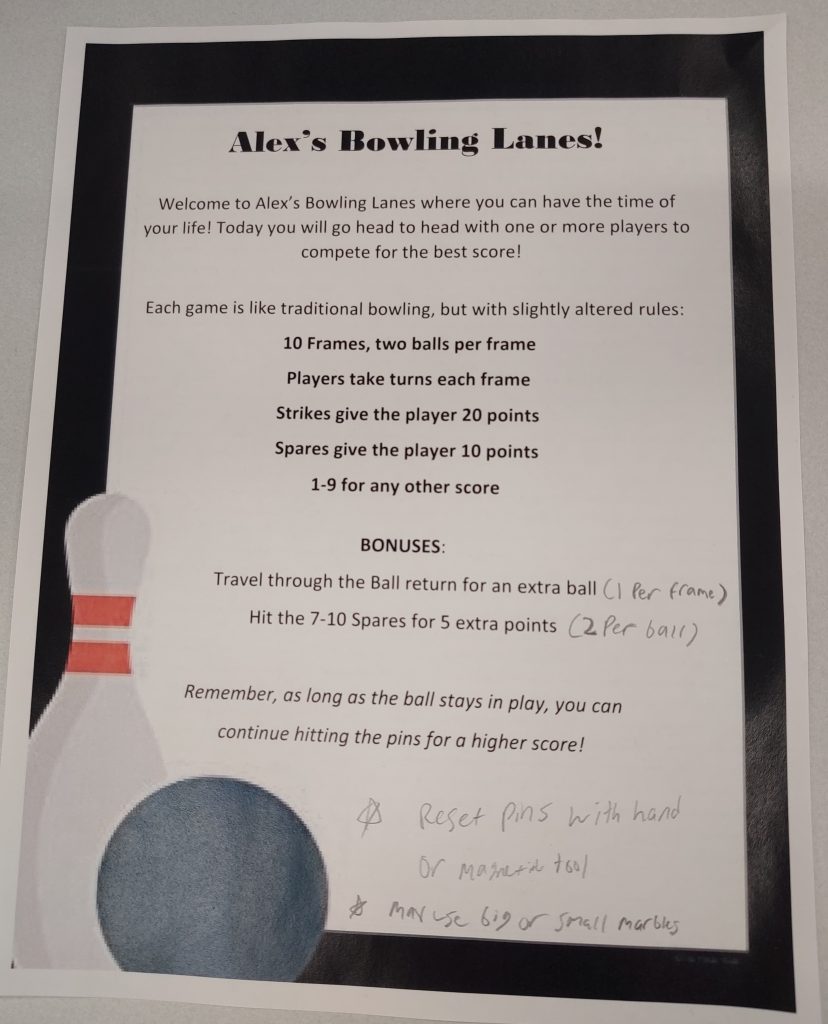
Today, in class, we playtested the final products of our advanced designs. For my design, I was going for a bowling theme that used a more advanced scoring system than my previous designs. I used drop targets for the pins and decorated my machine with bowling attire to give the feeling that players are in a real bowling alley.

Building my advanced design took a lot of problem solving and ingenuity. In order for the drop targets to work, I had to line them up properly so that they would remain over the playfield. Keeping them above the playfield would prevent any friction when the ball hits them. In order to properly do this, I attached the drop targets to a roof of cardstock and lifted them off the playfield using side supports. However, the supports were a bit too short, leaving some of the drop targets to scrape against the playfield. To help with this, I added a back support and a bit of fishing line to lift the roof off the playfield. The result worked, it wasn’t perfect, but it was good enough for the time being. To keep the drop targets up when hit, I used magnets, which was pretty neat to implement. The rest of the board came with careful decorating, resulting in a playfield that is much more advanced than my previous designs.

While playtesting in class, I received a lot of feedback about the theme, playability, and implementation of my advanced design. Most people thought the theme of my machine was well established and it really looked like you were bowling on a wooden floor. The game was addicting and knocking down the pins was very satisfying. However, the way the drop targets were implemented made the pins difficult to knockback at times. Other than that, most people seemed to like the concept of my design.

If I had to redo my advanced design, I wouldn’t change very much. The design came out great and it was really fun to make. However, if I had to change one thing it would be the drop targets. Although they came out better than I expected, my current drop targets aren’t the best representation of a bowling game. It’s very difficult to get a strike or spare because there are no pin-on-pin reactions when the ball hits the drop targets. This leads to a less realistic game and negatively affects the scoring system I have in place. To fix this, I’d probably use objects that can be knocked down onto each other and aren’t too difficult to set back up. Other than that, I’m proud of how my advanced design turned out and I look forward to experimenting with the Pinbox in the future!

Wooden Floor Reference: https://invisionhardwooddecor.com/wp-content/uploads/2018/02/hard-maple-hardwood-flooring-natural-select-better-natural-essential-lauzon.jpg

Bowling 7-10 Split Reference: https://www.bowl.com/uploadedImages/Source/Source_Home/Untitled-2(2).jpg

Ball Return Reference: http://www.pintsandpins.com/wp-content/uploads/2012/09/Century-Lanes-Ball-Return.jpg

Baller” Bowling Ball Reference: https://www.bowlerx.com/wp-content/uploads/2019/09/hammer-baller-bowling-ball.png

Flawless” Bowling Ball Reference: https://cdn11.bigcommerce.com/s-e12a1/images/stencil/1000×1000/products/6349/31697/HMR_Flawless_NEW__03705.1545499943.jpg?c=2

Savage Life” Bowling Ball Reference: https://images.bowling.com/large/11955.large.jpg

Bowling Pin Reference: https://www.trzcacak.rs/myfile/detail/114-1143333_png-dlpng-download-image-bowling-pin-clipart-png.png

Blue Bowling Ball Background: http://www.backgroundsimg.com/picdir/sm/bowling/backgroundsimg-tournament-ten-pin-bowling-houston-bowling-center-design-3p90y.jpg

Red Bowling Ball Background: https://us.123rf.com/450wm/tilo/tilo1803/tilo180300018/96841894-stock-vector-bowling-game-strike-over-dark-red-background-red-bowling-ball-crashing-into-the-pins.jpg?ver=6

Bowling Page Border: https://images-na.ssl-images-amazon.com/images/I/41nHsq3A9IL._SX425_.jpg

Summer Drift (Formerly Seasonal Drift 2.0) Pitch

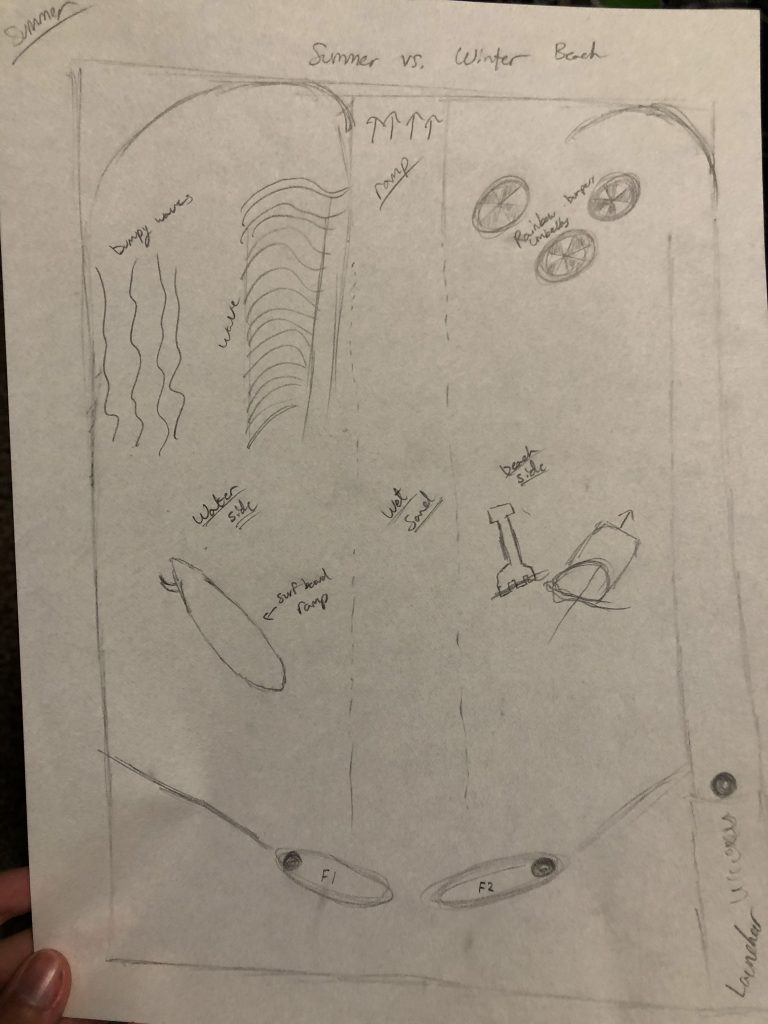
For my Advanced Pinball machine I want to work around a multi ball experience as well as a variety of different interactions on the playfield.

This was the original design I had for my head to head machine. I’ve decided to just work with the Summer theme because trying to create a differently textured playfield to incorporate ice was rather tricky and I really wanted to try to create some sort of wave/tunnel. I plan on changing up a few elements like the shovel and pale to maybe a sandcastle where I can place the multi ball.

Gold Rush! An Americana Pinball Game

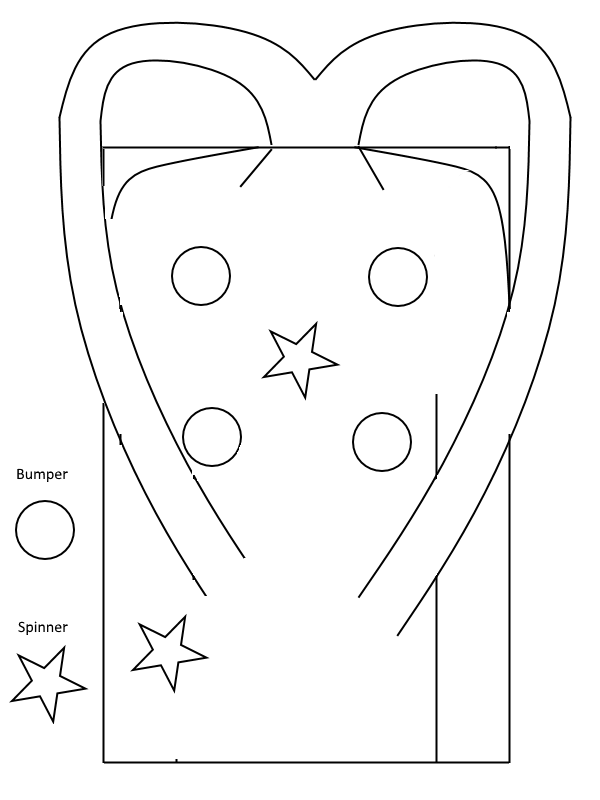
When the 49ers went out west to claim their fortune, I doubt they were looking for a silver ball. In my Advance Pinbox 3000, you take on the role of those 49ers and try and find your own fortune.

Design mockup of the board

In Gold Rush you are tasked with retrieving the gold from the mine, to do this you must open the door at the top and then go up either of the ramps to collect the gold. Once the gold has been retrieved, you win.

Additionally, there are bumpers of TNT and spinning pickaxes on the board. These are for thematic, obstacle, and bonus purposes and don’t satisfy the win condition.

I hope the external ramps will be much more friendly to player than in my head-to-head, and to ensure that I will be decreasing the angle of the board so it’s not so difficult to hit the ball up the ramps.

I will be adding better decals than my previous designs and hope that it will be a very aesthetically pleasing board. I want to take inspiration from Norman Rockwell and many Americana works.

here is the link to the google slides