For the presentation at the Strong I will be bringing my advanced Visual Pinball machine, Virtual Virtuoso. I think the elements of the machine play better than any of my previous design and the virtual machine can hold up a lot better than a Pinbox might after 5 straight hours of use.
Month: December 2019
Virtual Virtuoso (Advanced Visual Playtest)
The feedback I got for my advanced visual playtest was very helpful and insightful. I got valuable information regarding the difficulty of my machine and some of the accessibility of some of the components. My machine was straightforward and clear, but some of the elements were much harder to consistently reach than I had initially thought during my personal playtests.
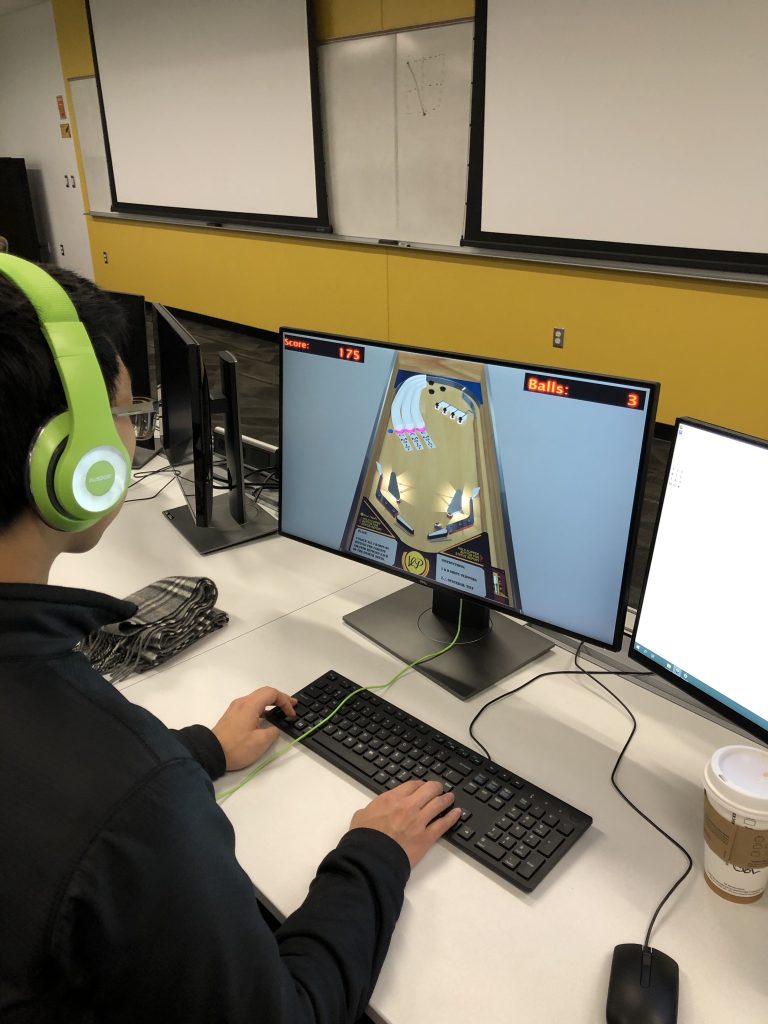
I plan on adjusting the width and location of the drop targets as well removing the reset trigger located on the right. I also plan to clean up the visuals so that targets stand out more and there is no white on white.
The Experience v2.0 Design
For the advanced pinball machine, I chose to continue my Jimi Hendrix themed machine. This time though, rather than use my original design for the field, I completely redid the entire field. I felt that the old design worked well for the pinbox, as there was no score system involved, however, with a virtual pinball machine, there was a higher bar to hit due to how easy it is to create more complex mechanics within the machines.
First off, I knew that I want to keep the long winding ramps, however the original design for them created a lot of empty space for them that I needed to remove. So what I did was make them thinner, and longer instead. I hope that this will keep the appeal that my past machines had where the ramps were fun, while giving me more room to work with to add more things.
Next I completely reworked my bumpers. If you’ve played pinball machines, you probably know the standard use of bumpers. A trio that will rack up a few points by bumping the ball between them. The reason this is so widely use isn’t because of a lack of imagination, but rather that this formation just works great. I realize that in the first machine, I didn’t put enough thought into the placement, however, being in anything less than a group of three meant that you didn’t get the fun bumping that you do with three, and honestly, anything more than three is just overkill.
I also wanted to add something more akin to a professional machine, and that meant giving the player some objectives. So what I did was add a set of targets that will then light one of the ramps, or the bumpers. Hitting these will give you a bunch of extra points. This I think makes the game have more direction than just shooting the ball hoping to not drain.
The final touch I added was putting in sound effects, I found a few open-source sound effects and threw them in. The effects I kept short enough that they didn’t create loud obnoxious noises, but long enough that they made sense for what type of trigger they were being set off. What I mean by this is that the ramp has a longer guitar riff, while the bumpers are single strums of a guitar. I think this really brings the entire machine together to make it more unique.
Strong Choice – Return To Hallownest

The game I chose to bring is my advanced visual pinball machine. The reason I chose to bring this is due to the fact that the size of my advanced pinbox means I cannot fit it in my car easily. Therefore I thought it only right to bring the other homage to my favorite game my advanced visual pinball.
I think that this game is very representative of the amount of work and learning that I have gotten from iterating over the last 5 machines, both physical and digital. I feel that with this machine I can show the kids at the strong, how cool Hollowknight is, while also letting them play a really cool game!
Return to Hallownest – Pitch
Return to Hallownest is a homage to my advanced pinbox design Into Hallownest. I feel that after my pinbox I did not use enough theming to really classify it as a game that represents my favorite video game. It is based on the game Hollow Knight and therefore I tried to play on the different aspects of the game. Some of these aspects are the boss fights, the sword, and the art style.
A big part of this game was the idea of having multiple levels of play. As you can code with this machine, I felt that I could really bring it to the next level by adding different goals other than just keeping your ball alive. To do this I wanted to portray a boss fight. In Hollow Knight you shouldn’t just run up and try to fight every boss as soon as possible. To have a good chance you need to prepare, upgrade your nail, explore and get money, and equip charms. Some bosses even require you to defeat other bosses before you can even see them. All these aspects were something I felt I could use to make my game better.
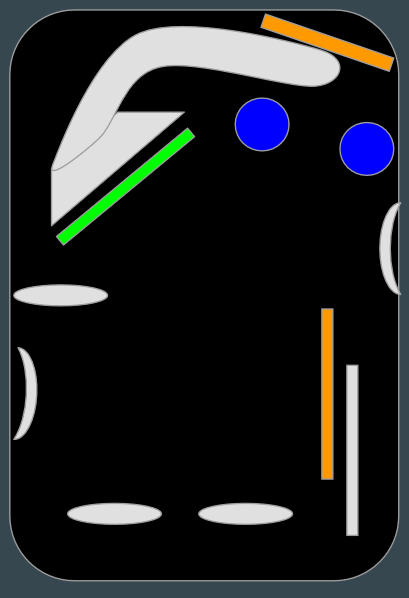
My original design was very rough due to me wanting to base it off two other machines. So above you can see my rough draft. They gray shapes are more general geometry with the ovals being flippers, and the curved shape near the top being a ramp. The blue circles are bumpers, and the orange rectangles are different targets. I plan to use a variety of objects to complete my goals such as triggers and drop targets. I plan to use drop targets for charms in front of the ramps, and triggers to signify the minibosses.
The scoring of this game is going to be minimal with a focus on how quickly the player will be able to complete the goal and with the minimum amount of balls. The idea I plan to have is a multiplier that gets reduced base on time, and the balls affect the score linearly.
The biggest issue I feel I will face is making the goals completable in a timely manner. This may occur because if I want to have all these goals, if one goal is placed in a bad spot, it could delay the entire game. Pinball is never fun if you must do one small thing that is virtually impossible in order to proceed. Therefore, it will have to take a lot of testing to make the game feel and play well.
Pinball Alley v2: Advanced Virtual Playtest
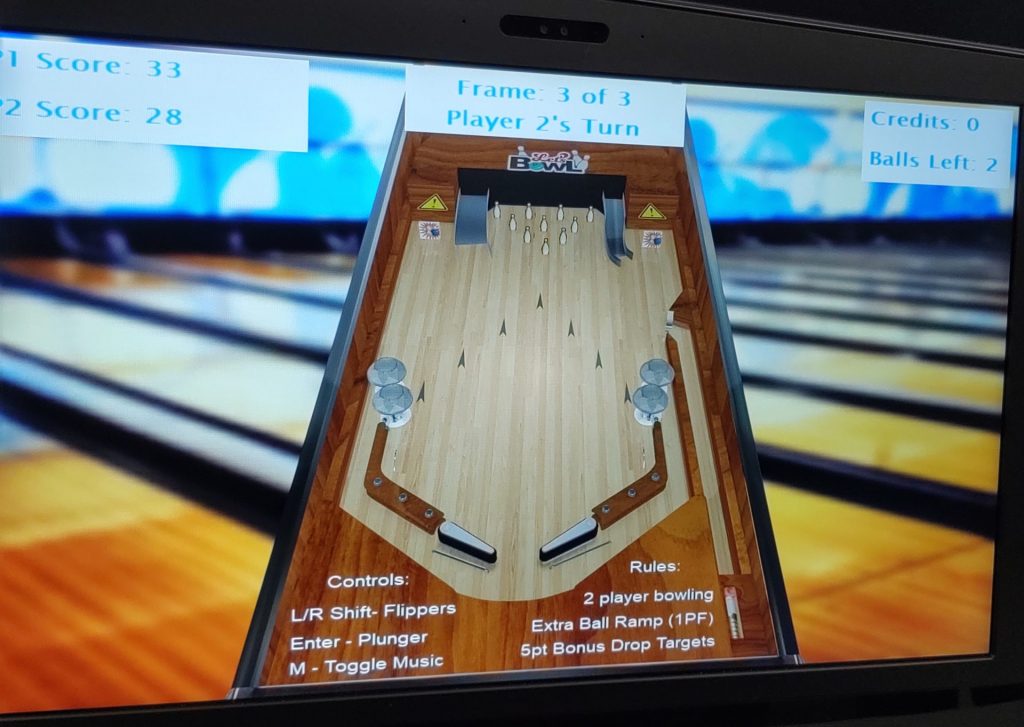
Today, in class, we playtested the final products of our advanced virtual designs. For my design, I remodeled my advanced physical design into a virtual design that worked better. This design focused on the theme of bowling and used drop targets for pins, had bowling sound effects, and even had a playable two player game.
Making my advanced design was much easier after gaining some experience with Visual Pinball. I started by setting up the initial layout of pinball components, which came from my design drawing. After that, I worked on the drop target pins and the bowling game logic. This logic wasn’t too hard to script, but it did take some time and was more advanced than my previous scripting. Once the game itself worked, I added sound effects, scoring, and images. For this machine, I decided to put my best effort into the look of the machine and I wanted players to feel like they were playing a legit game. After seeing the end result, I would say that my goal was achieved and the machine worked really well in resembling a bowling alley.
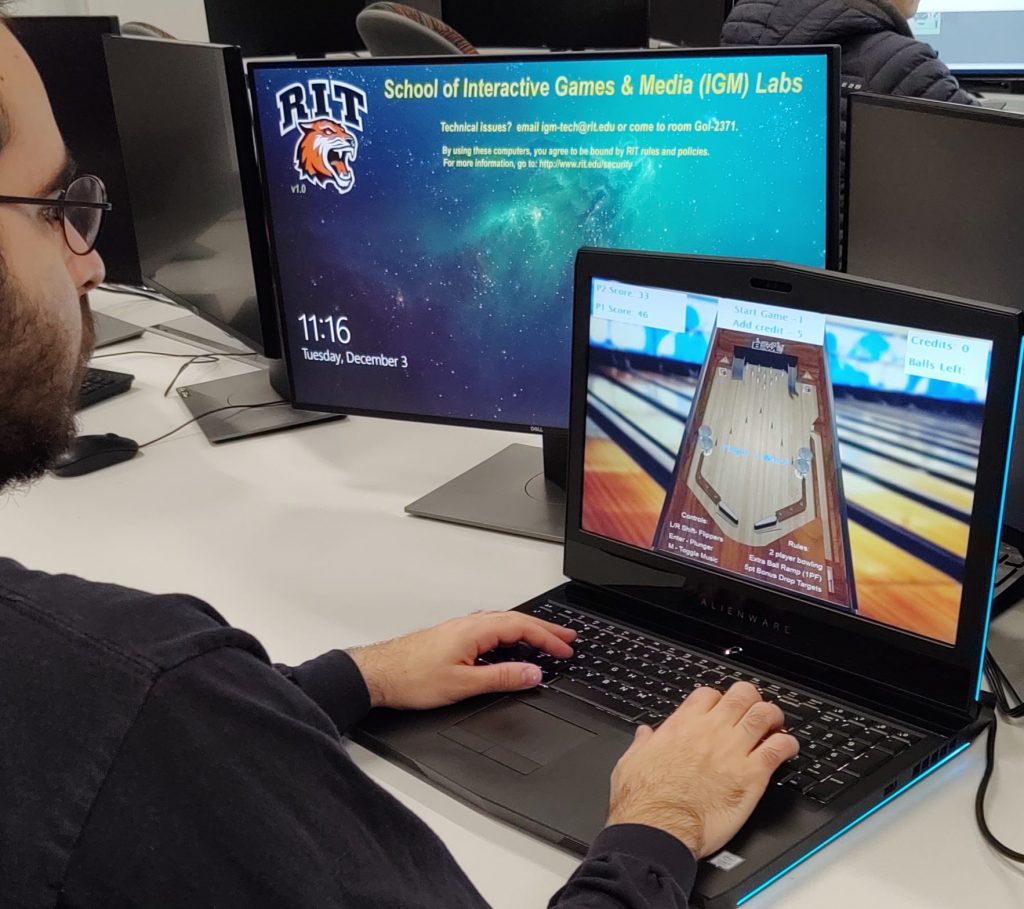
While playtesting in class, I received some feedback about the theme, playability, and implementation of my design. Most of the comments I received were in regards to my theme. Everyone seemed to like the bowling pinball game, as well as the sounds, which they said went well with the machine. The two player aspect was fun for most of the playtesters and made the game more appealing because it introduced a challenge between players. They also mentioned that the implementation of the design worked well, such as the pins. They did mention, however, that it would be cooler if the pins could fall on top of one another. But with limitations of the software, this would be too difficult to implement. Regardless, my machine turned out to be a success and I’m glad the class liked it.
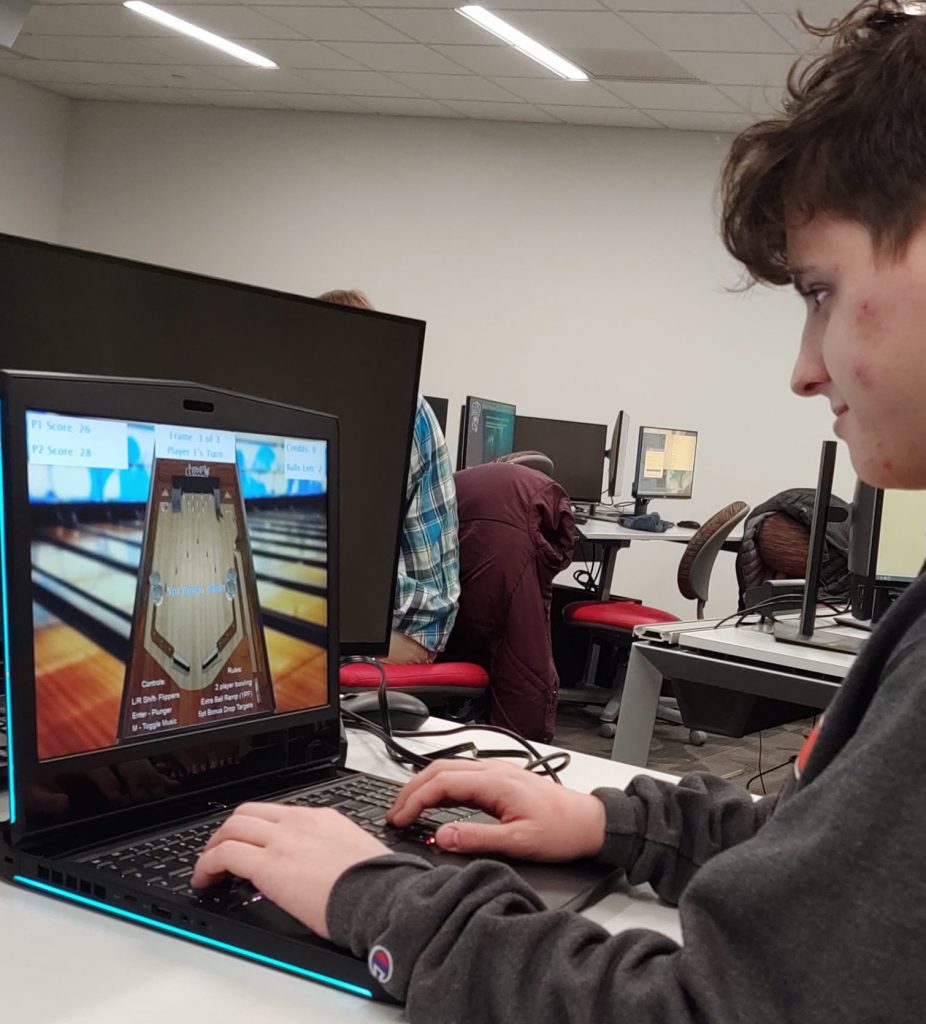
If I had to redo my advanced virtual design, I wouldn’t change too much. The whole point of this design was to resemble my advanced physical machine and improve upon the idea using Visual Pinball’s various tools. I believe I achieved this goal perfectly, however, if I had to change something, I’d work a bit more on the bowling score calculation. For the scoring of the game, I focused on a simpler version of bowling, since I capped the game at 3 frames (otherwise it felt too long). However, If I were to go back, I’d do some research on the scoring behind bowling and try to implement that in my own way through scripting. This would make the game feel more realistic. I would also go back and find more reliable sound effects for the machine, since I struggled a bit with finding sounds that fit the machine the way I wanted them too (even though the class liked them). Other than that, I enjoyed the time I spent using all the skills I learned in class to make this final machine. I hope I can use these skills again and I’ll definitely experiment more with Visual Pinball in the future!
References
Bowling Floor Image: https://i.imgur.com/qa2h9W8.png
Back Glass Image: https://starlitebowling.com/wp-content/uploads/2017/03/Starlite-Background-1.jpg
Polished Wood Image: https://i.pinimg.com/originals/89/b4/f2/89b4f216bc39b79db3cdb20a2b03eb11.jpg
Bowling Pin Image: https://cdn.shopify.com/s/files/1/1840/8513/products/bowling-pin-classic-sports-cremation-urn.jpg?v=1565542302
Bowling Explosion Image: https://cdn.clipart.email/babb868e78a598d5d0df43a8a855993f_smartness-bowling-ball-and-pins-clip-art-clipart-skittle-pencil-in-_1188-1300.jpeg
Black Material Image: https://colourlex.com/wp-content/uploads/2017/04/Spinel-black-painted-swatch-47400-opt.jpg
Ball Material Image: https://t1.rbxcdn.com/d2a9c95ee07a5fd244a89c542df112f2
Bowling Arrow Image: https://www.trzcacak.rs/myfile/detail/16-164662_arrow-scalable-vector-graphics-clip-art-black-arrow.png
Warning Image: https://images-na.ssl-images-amazon.com/images/I/41tChfmsyvL._SX342_.jpg
Let’s Bowl Image: https://i.pinimg.com/originals/5c/61/d4/5c61d4830ee96e9a27dbfab3557ec103.png
Bowling Ambiance Sounds: https://www.freesfx.co.uk/Category/Bowling/467
Strike/Spare Sound: https://freesound.org/people/Raclure/sounds/458869/
Bonus Sound: https://freesound.org/people/Joao_Janz/sounds/482653/
Extra Ball Sound: http://soundfxcenter.com/video-games/super-mario-bros/8d82b5_Super_Mario_Bros_1_Up_Sound_Effect.mp3
Buzzer Sound: https://www.myinstants.com/instant/portal-2-buzzer/
Advance VP: Burnout, again
My advance VP board is just going to be an extension of my previous one, building off of it by adding more features, more missions, and pushing more out of the visual pinball framework.
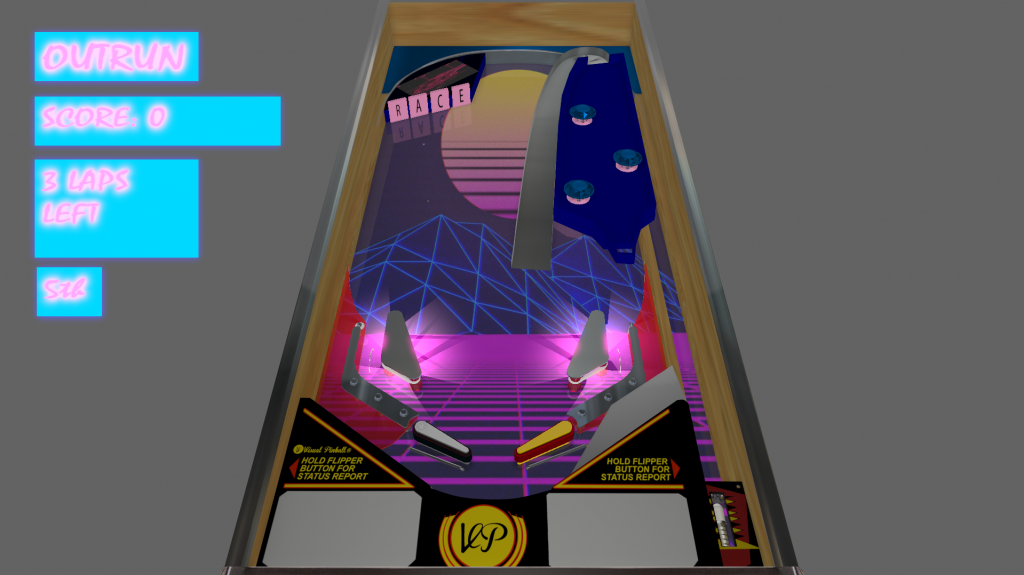
I will be adding outrun music to my outrun themed board, specifically HOME – Resonance. I will make the second level transparent and reimport the rival graphic / place emphasis on it in the board to go on the theme a bit more. Then I’m going to add a spinner underneath the elevated board that acts as “gas” and the player will need to spin it every once in a while at risk of running out of fuel and losing the lead. Finally, I want to add lights indicating what place the player is in and how much fuel they have left.
I think these will make for fine additions to my board and bring it to a higher more advanced level.
Jack Stauber Pinball
I knew from the start of this class that I wanted to a pinball machine based on a musician at some point. As the class went on I realized it made the most sense to wait until we were doing digital pinball machines to follow through on this. As I thought more and more about it, I realized Jack Stauber would be a great theme for a machine. I think his unique, low-fi pop style would be a great fit for a pinball machine. In addition, he has a unique visual style that gives tons of visual inspiration for the machine. He has several distinct visual styles he uses in his various music videos and I think these could be used in different areas on the playfield.
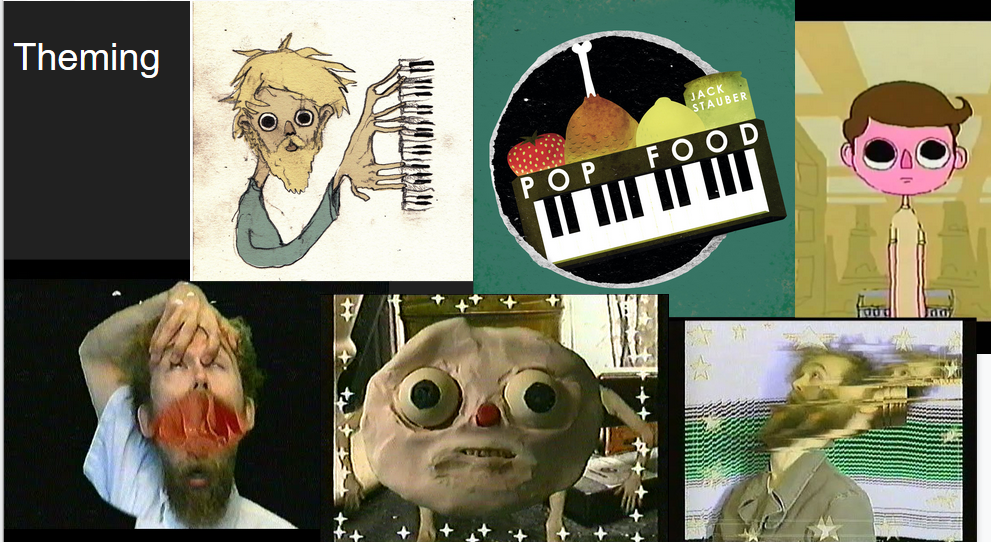
Mechanically, I want to take the ramp-centric design of Basic Visual Pinball table, and add a few more ramps, while polishing the game play. I want to improve the scoreboard system, so it actually keeps track of high-scores. I want to have actual game starting and ending logic, so the player isn’t using the honor system to be limited to 3 balls. I want to introduce goals that reward the player with multi-ball. I think a smaller goal like that (aside from just getting a high-score) would be more rewarding and engaging for the player.
My main goal with this machine would be to have the song change depending on the game. I want different events (Ball draining, multi-ball activated, score barriers) to trigger changing to a different song. Jack Stauber has an excellent discography and I think this would be a fun way to implement that in the machine.
Jet Set Radio VP Basic Post Mortem
So after having people play test my level, I realized I had several spots on my machine where the ball could get stuck. This is was the biggest problem with my machine. Another problem with the machine was that the kicker’s on the out-lanes were always active. This was originally done in response to how frustrating it was when the ball went there so often. However, this created a new problem. It became way too easy to keep the ball in play. I got a suggestion from Jimmy, that I should keep the kickers but make them relatively easy to activate. This is definitely the solution, as from there I could adjust the numbers on activation until I got a difficulty I was happy with.

Another problem I noticed with this machine was the bumpers. The placement and power of them could lead to the ball being in the bumper zone for an awkwardly long time. If I were to update this machine, that is definitely something I would change
After the play test, I think the board is somewhat weak visually. my original intention was for the ramps to look as though they’d been filled with graffiti a few times over, but the texture did not convey this well. A lot of people asked me what the ramps were supposed to be at first. They understood after explanation, but them asking in the first place illustrates the lack of clarity. I also didn’t have time to theme some ancillary aspects of the machine like the wood exterior, the plunger, the flippers, or the kickers. I also would have liked to add more lights to my machine. I think for my next machine, I will use this as a basis to be able to further polish it.
PLayfield art from Ross Burt (https://www.gamesradar.com/why-i-love-jet-set-radios-skates/)
Graffiti texture Ramp Textures: (https://pxhere.com/en/photo/1418330)
Virtual Virtuoso (Advanced Visual Pinball Pitch)
I plan on building off of my basic Visual Pinball for my advanced machine. I want to change up the layout to have some more ramps, play audio, better integrate drop targets, and change the pacing.

