My Showcase at the Strong

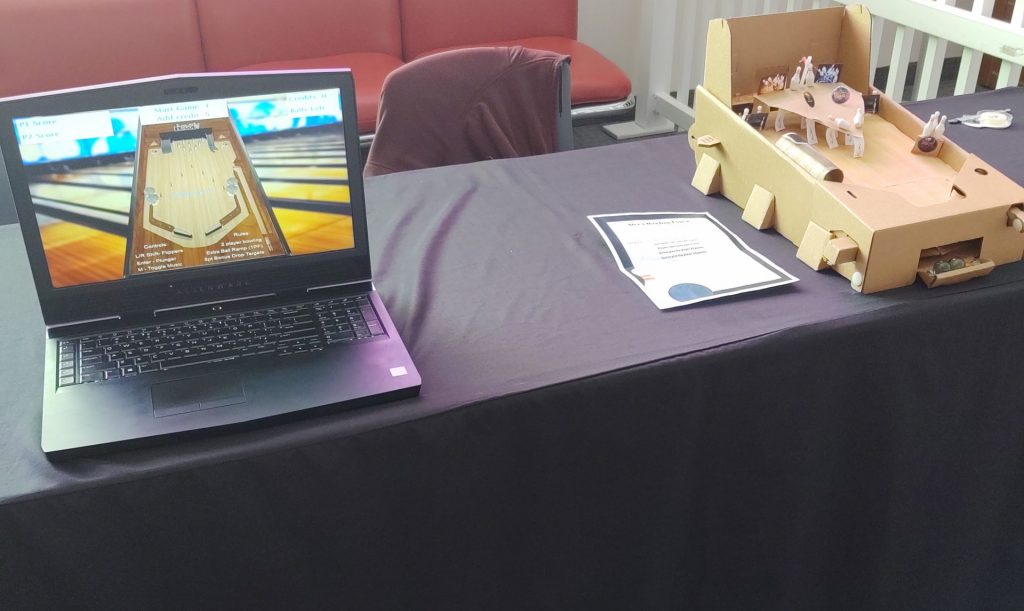
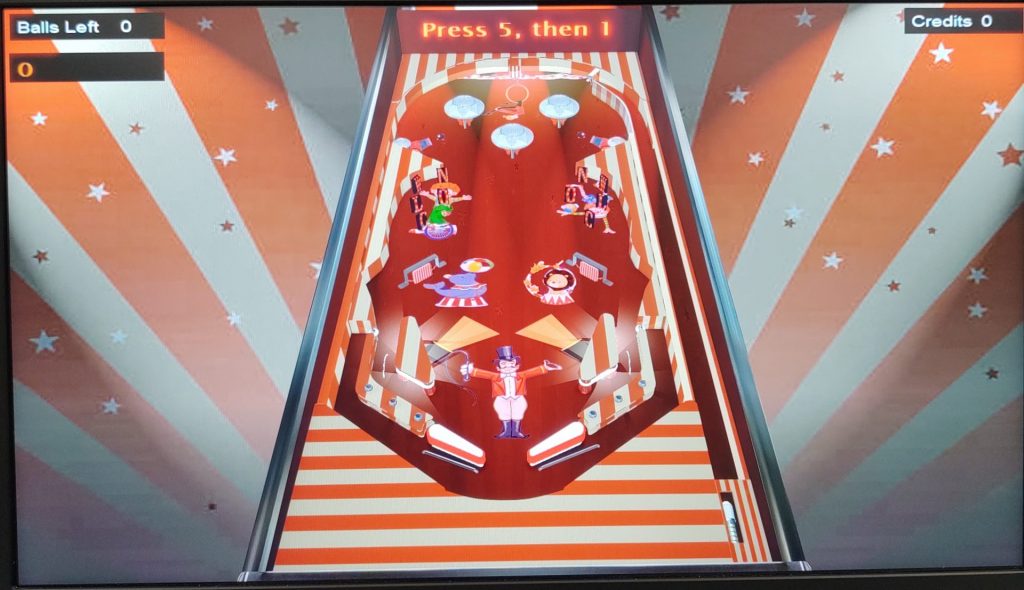
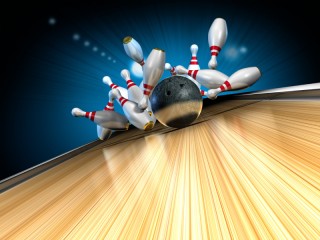
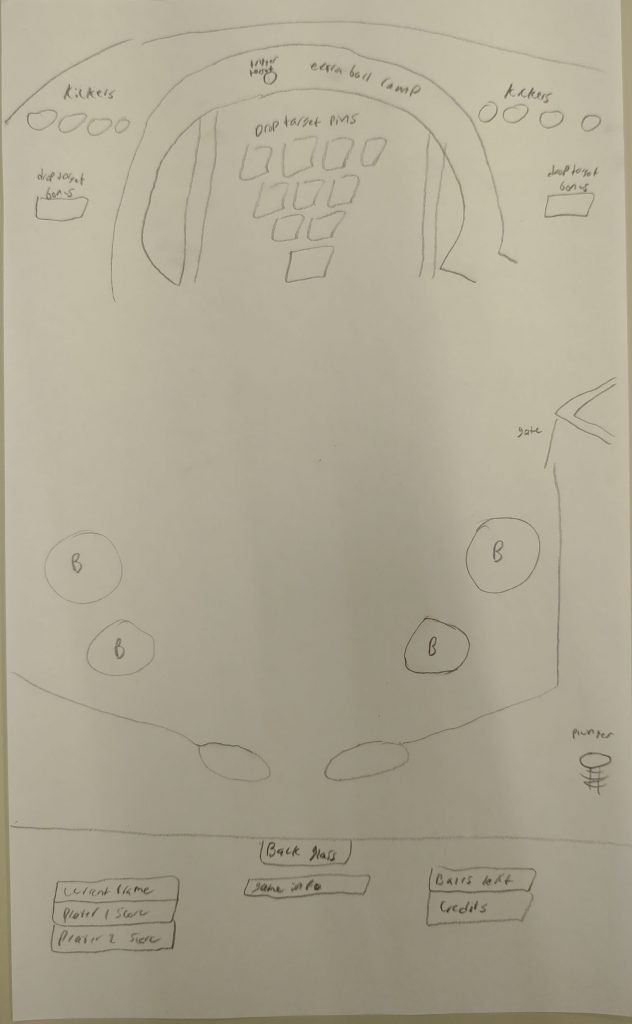
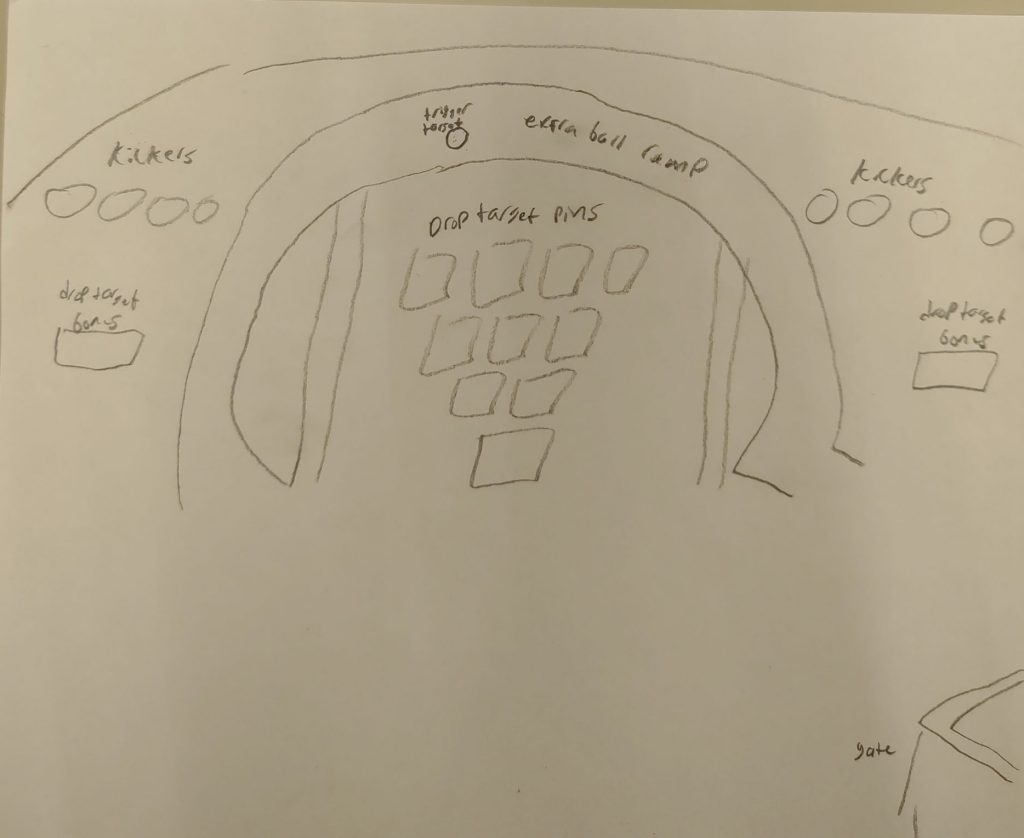
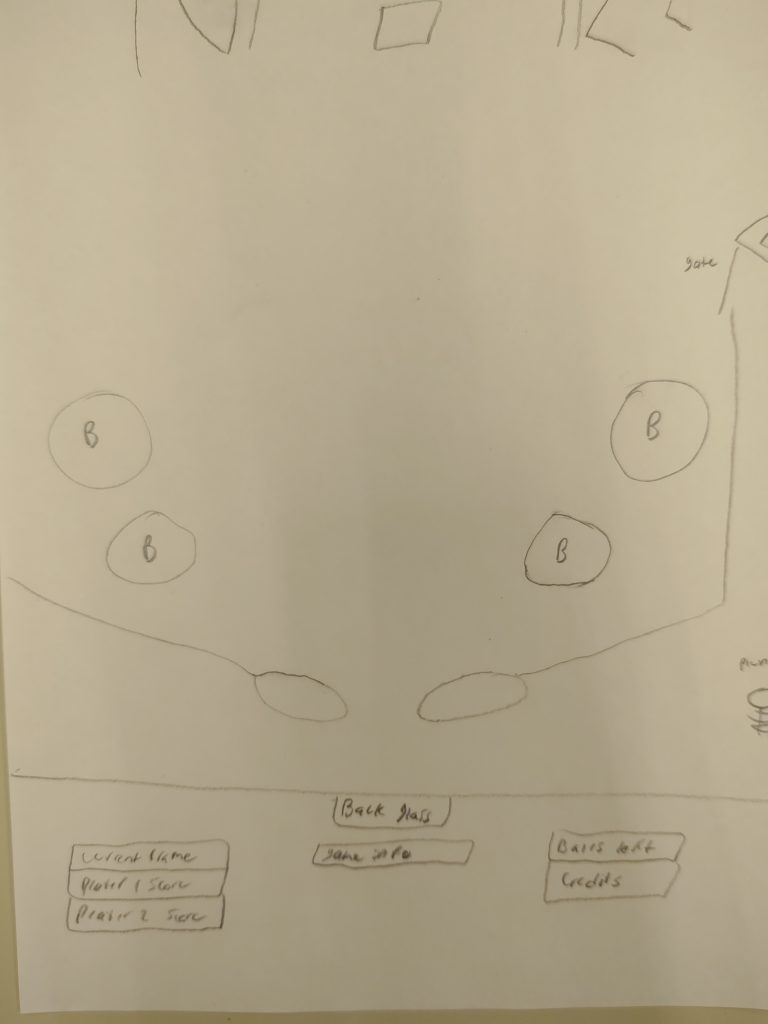
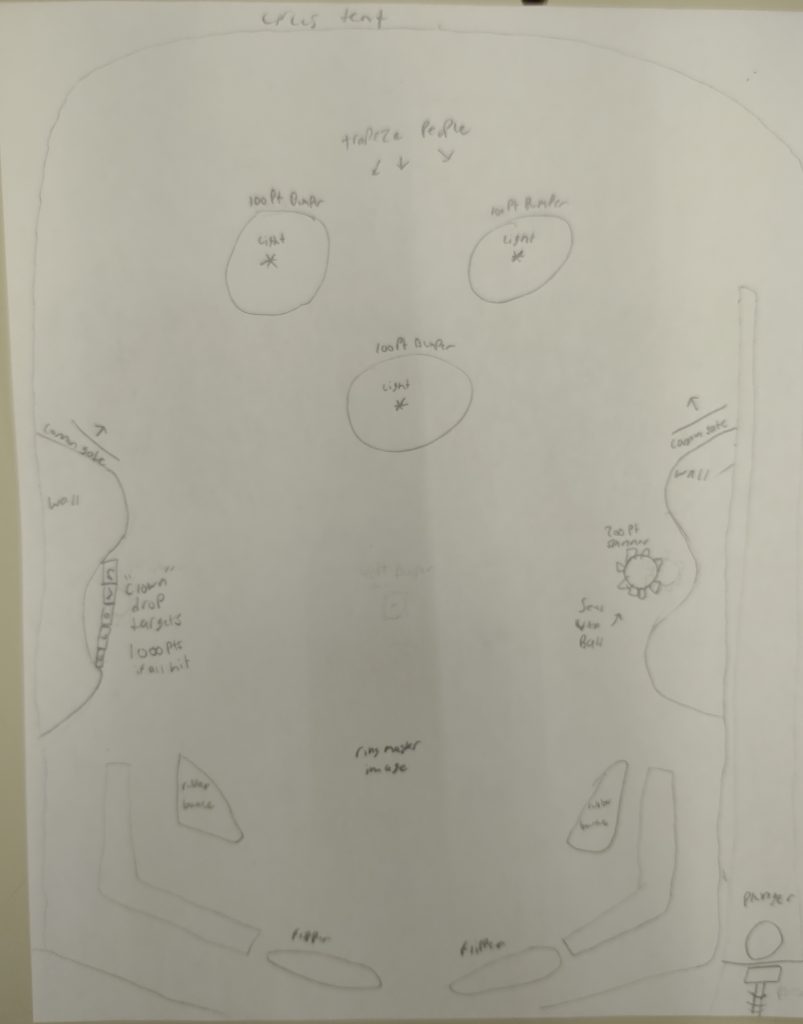
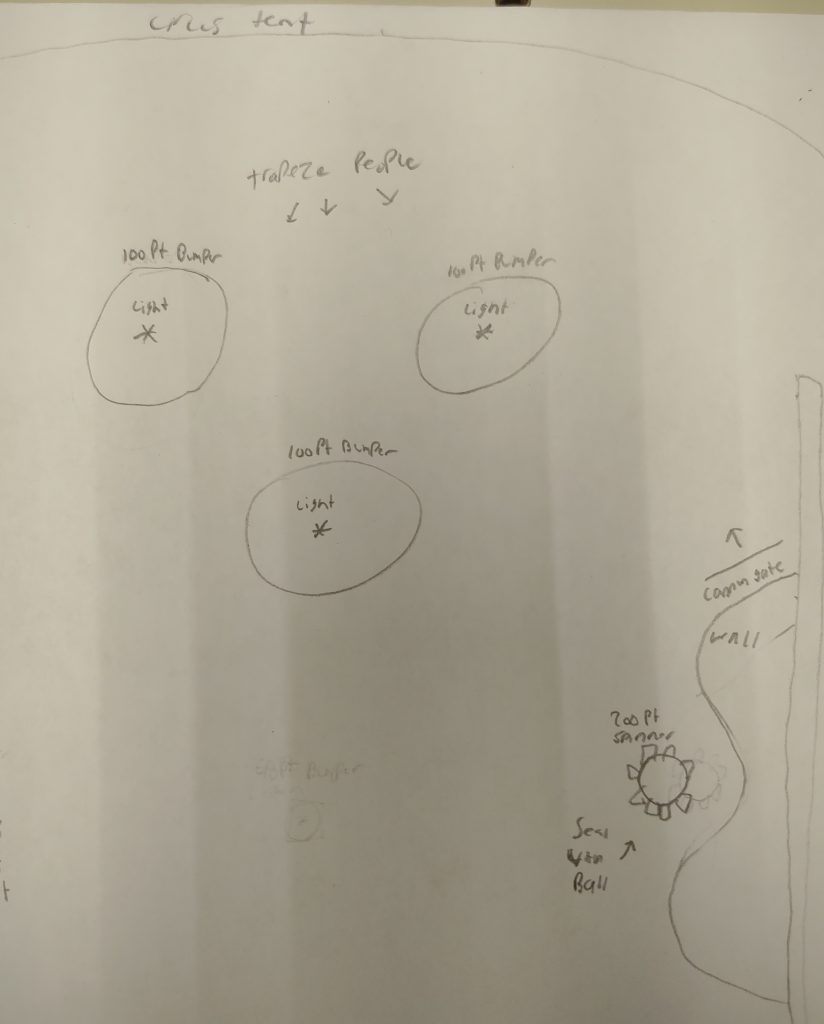
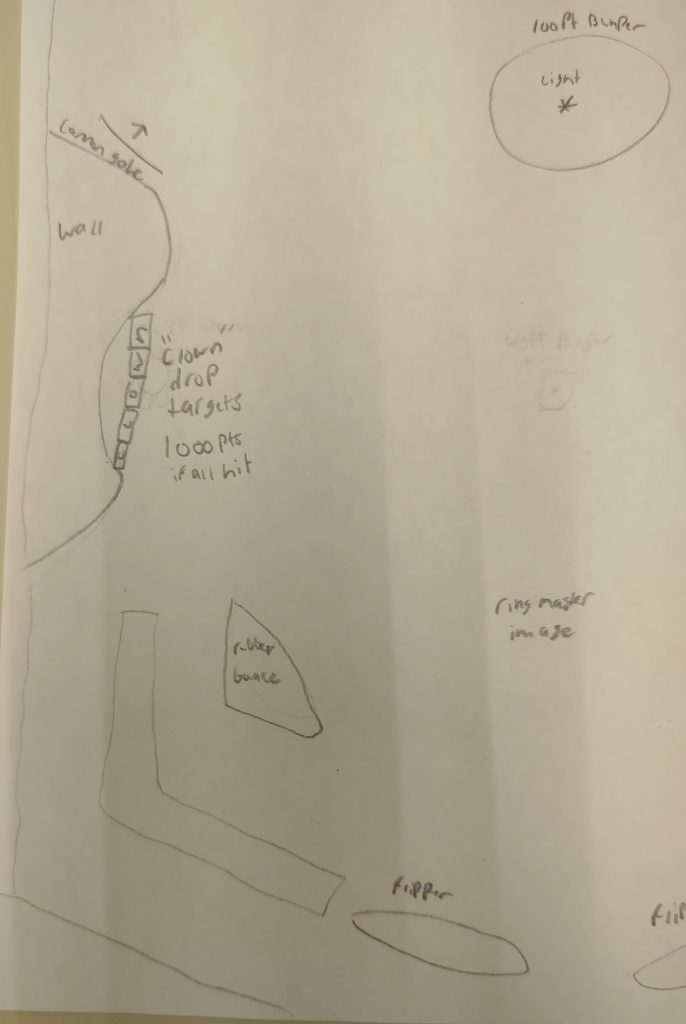
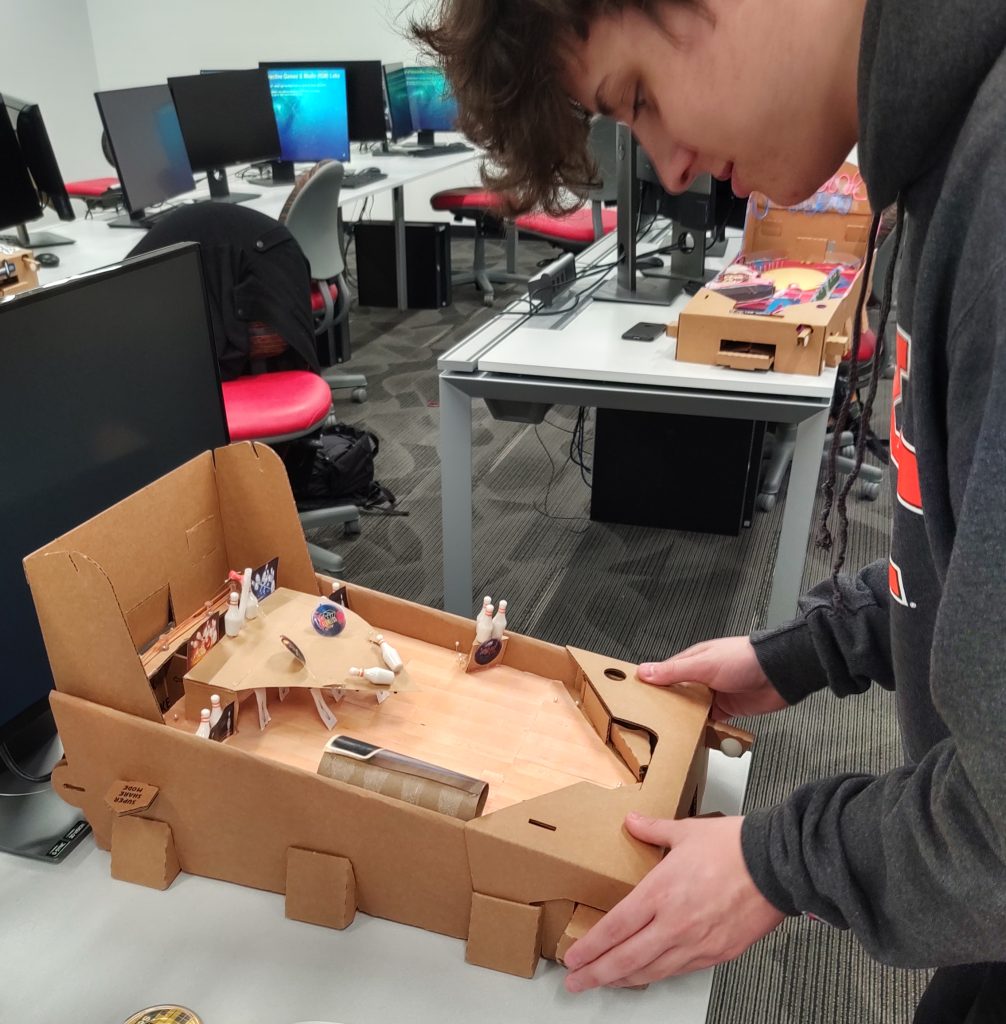
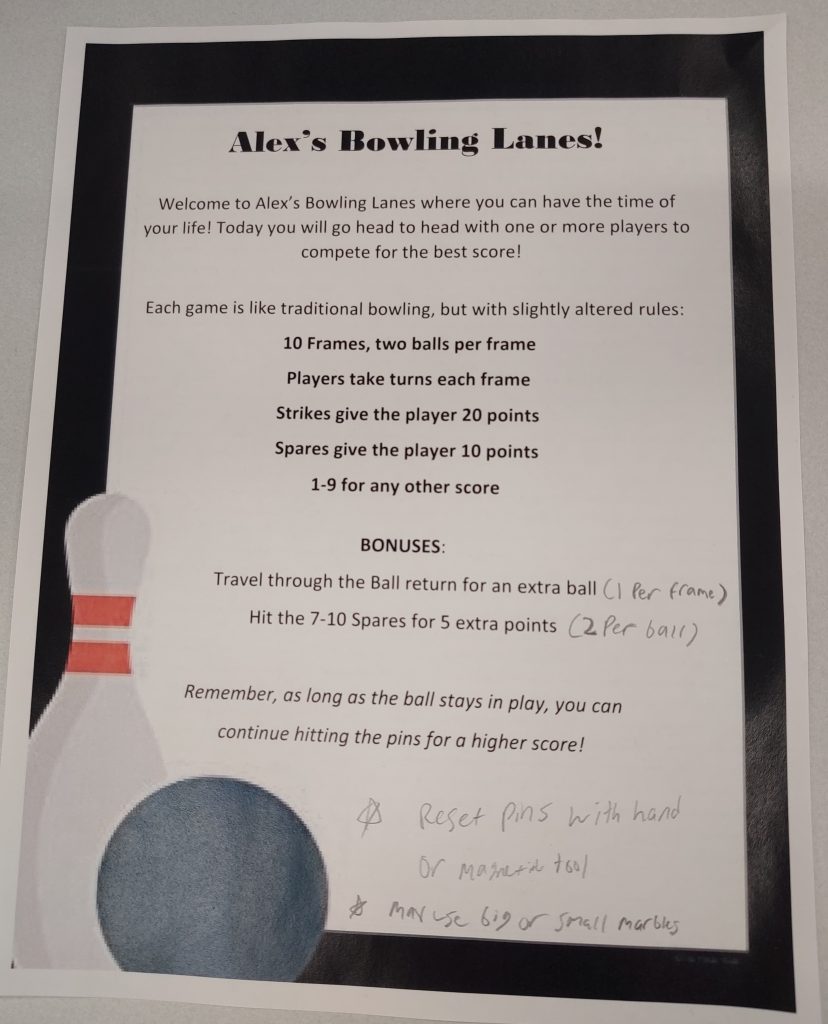
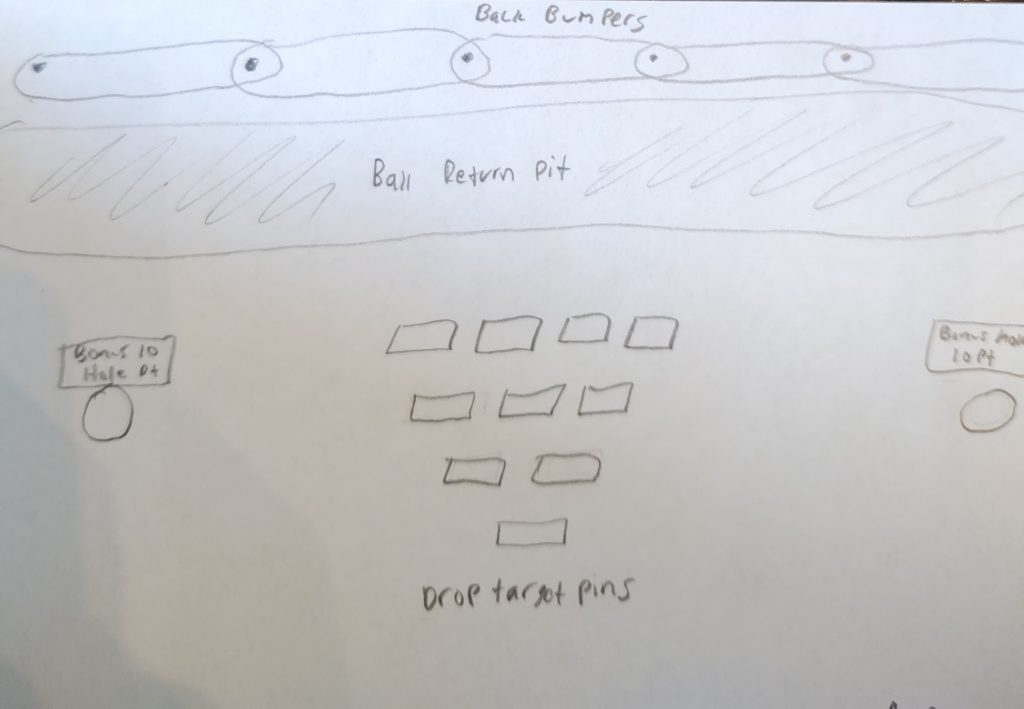
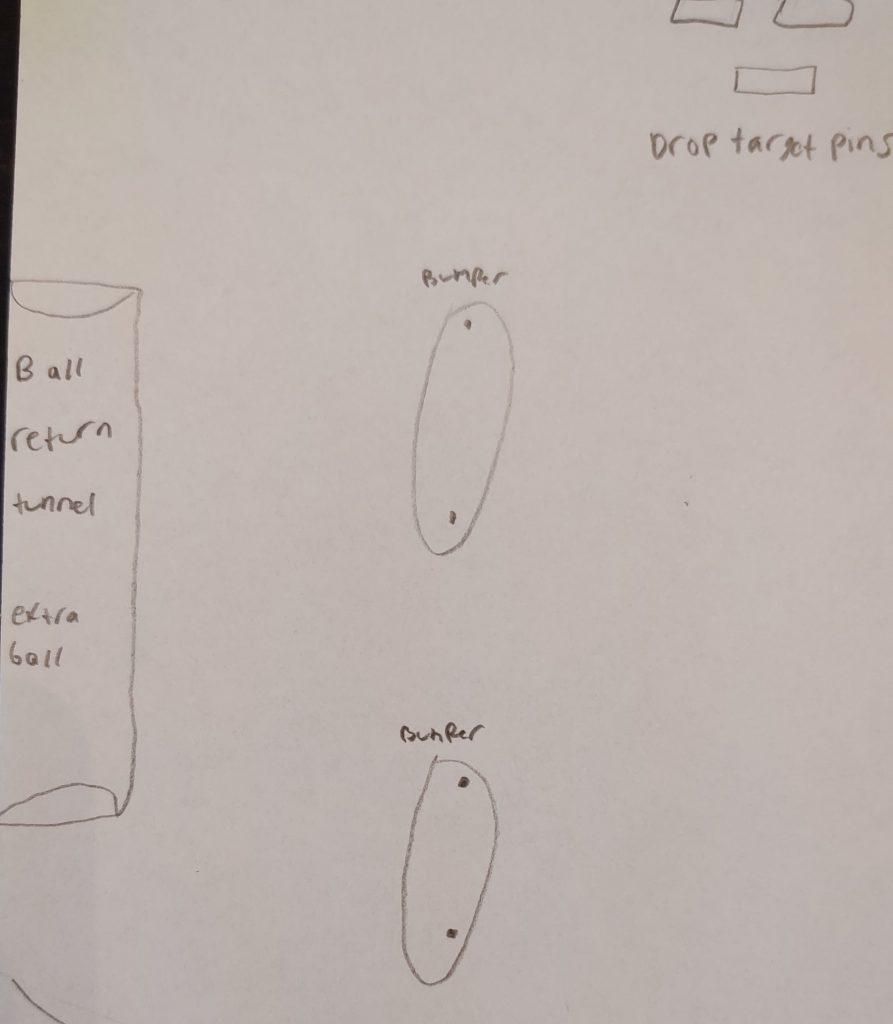
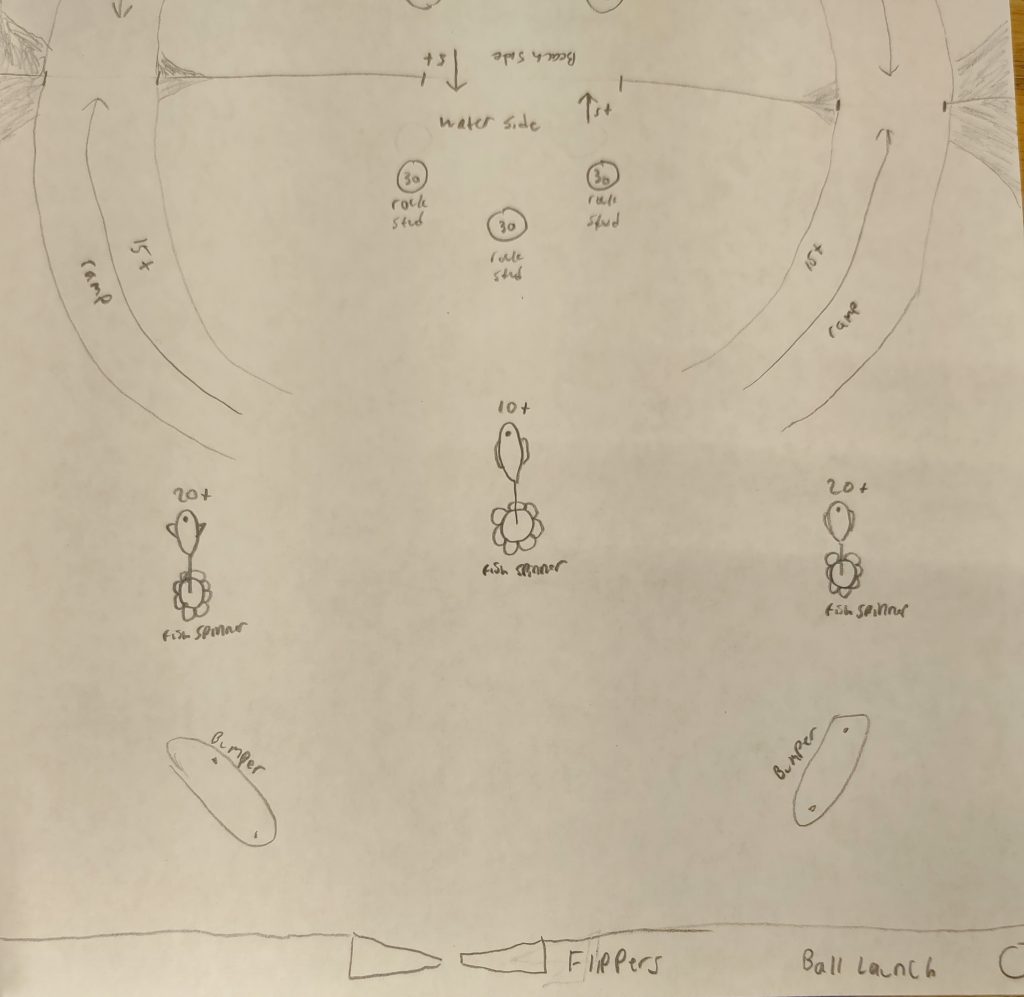
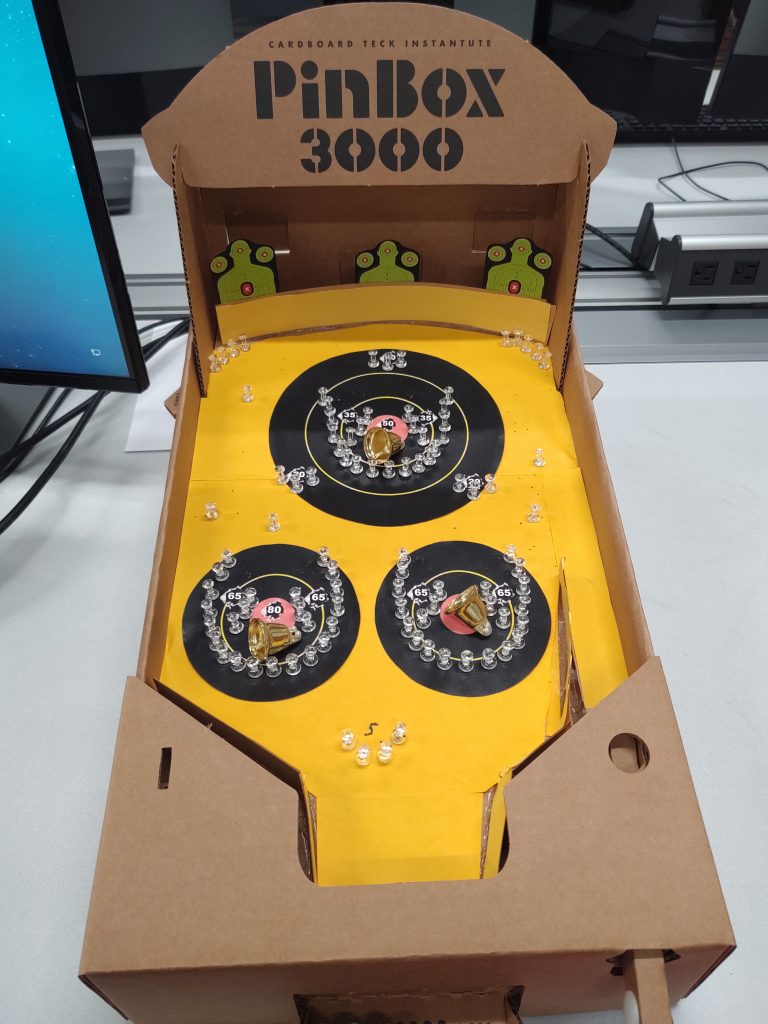
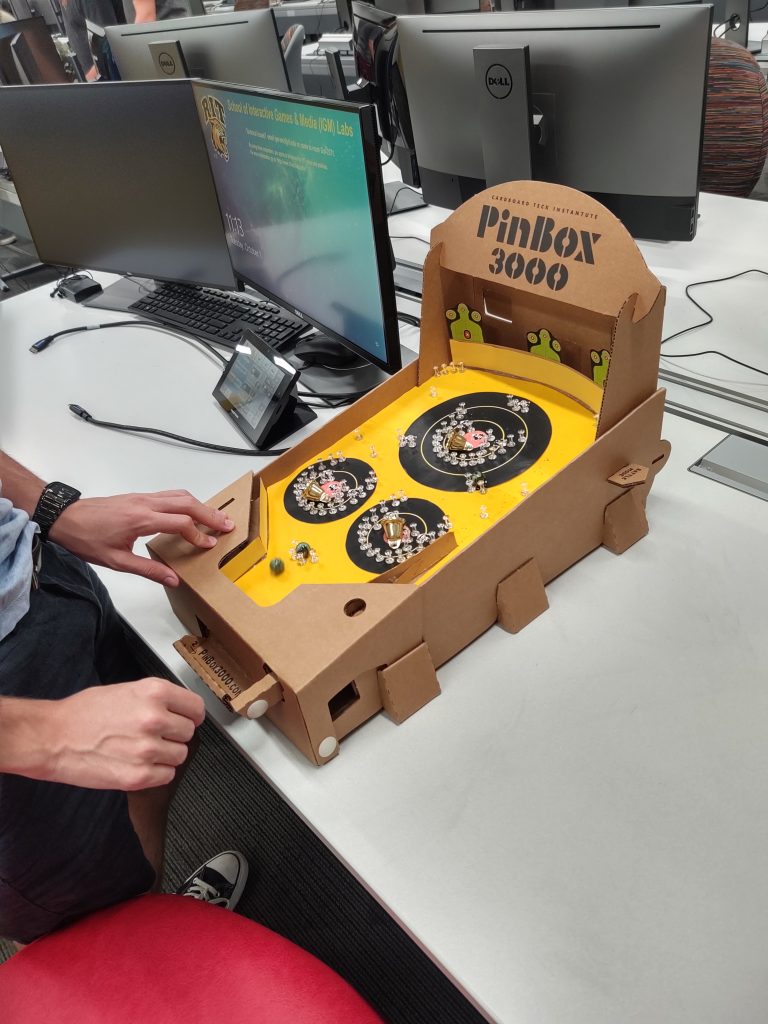
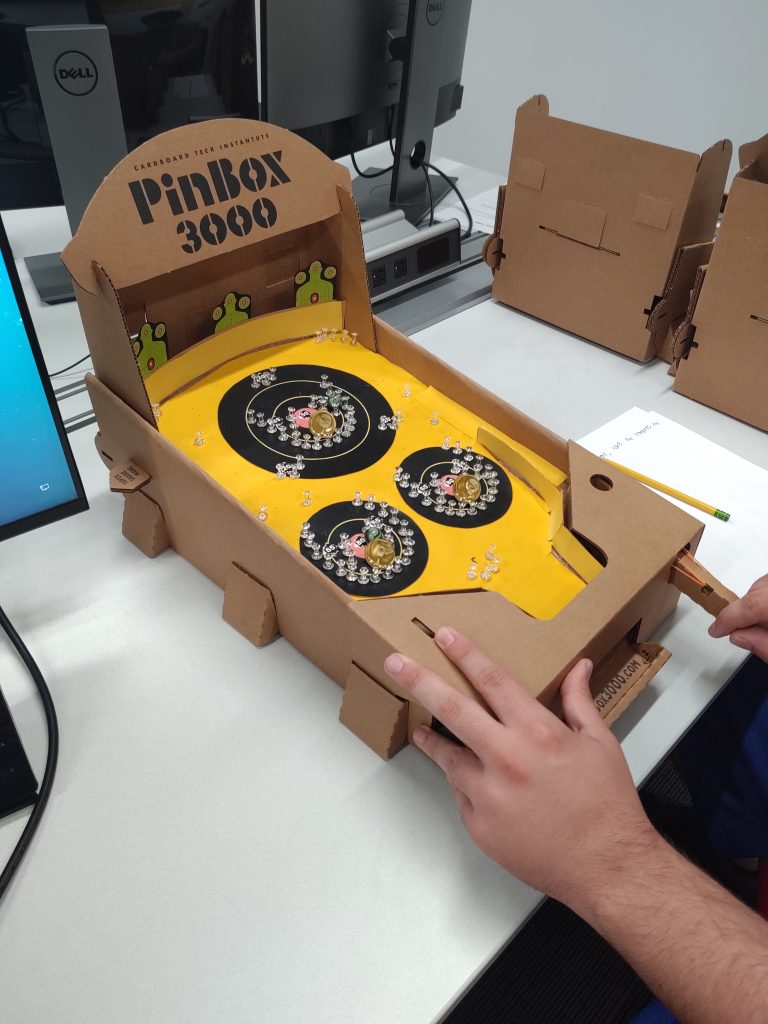
Today, our class went to the Strong Museum to showcase some of the Pinball machines we made throughout the semester. I chose to bring my advanced physical and virtual machine to the museum. My advanced physical machine has an overall bowling theme, with drop targets as pins for players to knock back. I took this design and expanded on it for my advanced virtual machine. The reason I chose to bring these two was to show the difference between the initial idea and the expanded upon version and to get feedback on the difference.

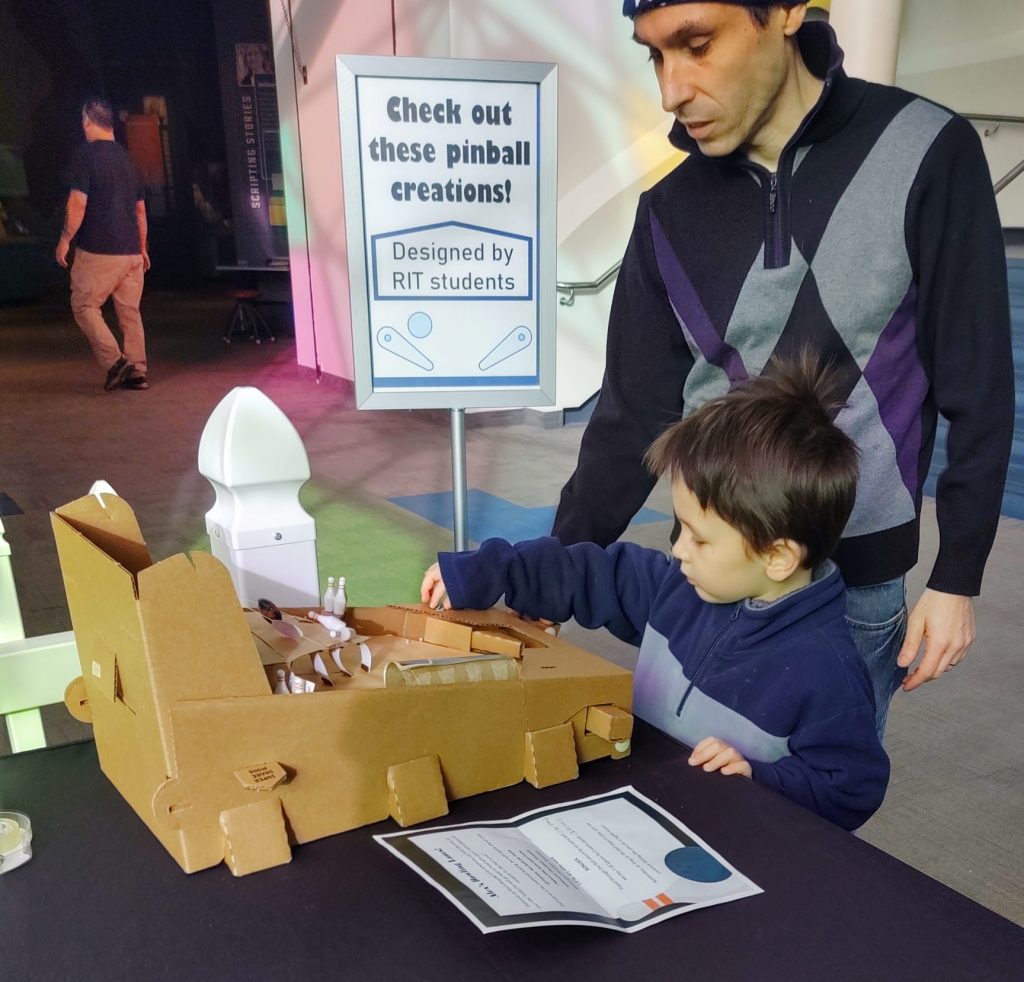
The start of our day at the museum was fairly quiet, not many people came to the museum early in the day. However, after a few hours, almost all of our machines were being played. Everyone who stumbled on my table had something to say about my physical design. Many people were surprised that I made the machine, commenting on its creativity. The bowling aspect of my machine was new to most people because there are few machines like it out in public. They liked how the magnets stuck the pins up, and for children, this idea seemed pretty cool. Of course, there were still some setbacks, such as the big balls getting stuck in the ball return. But other than that, most people really liked my design and quickly moved to see how I improved it with the virtual machine.

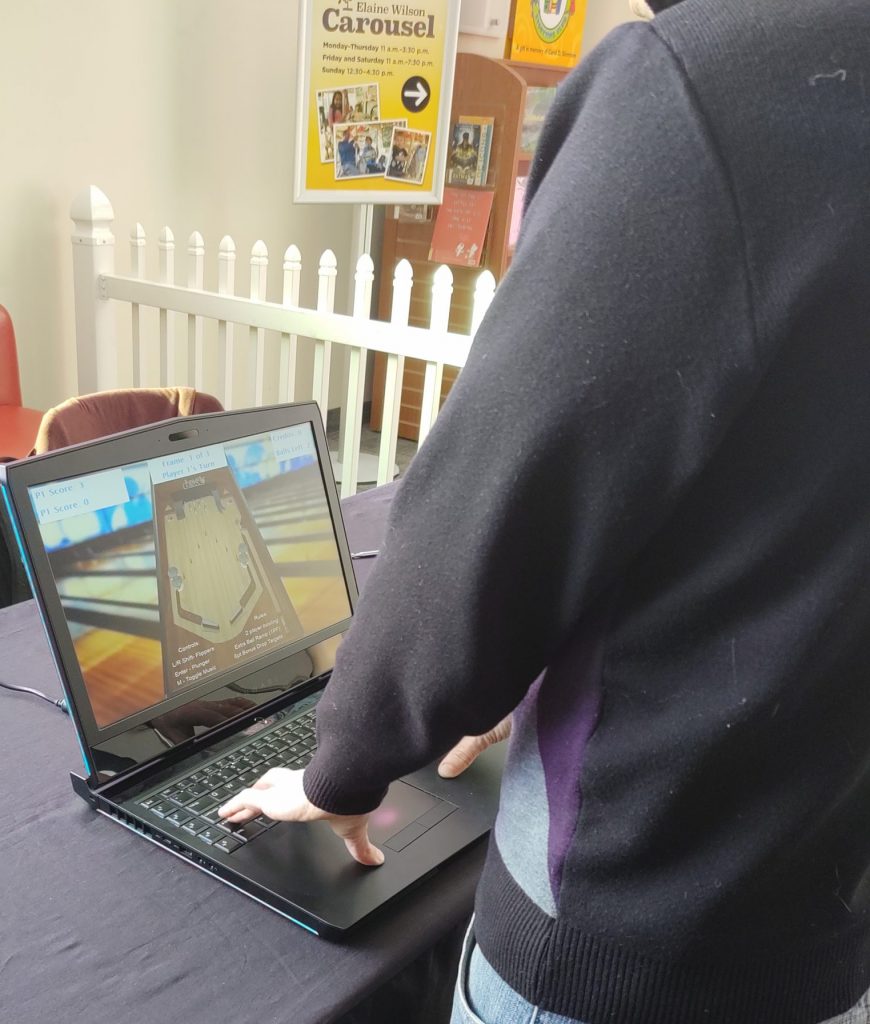
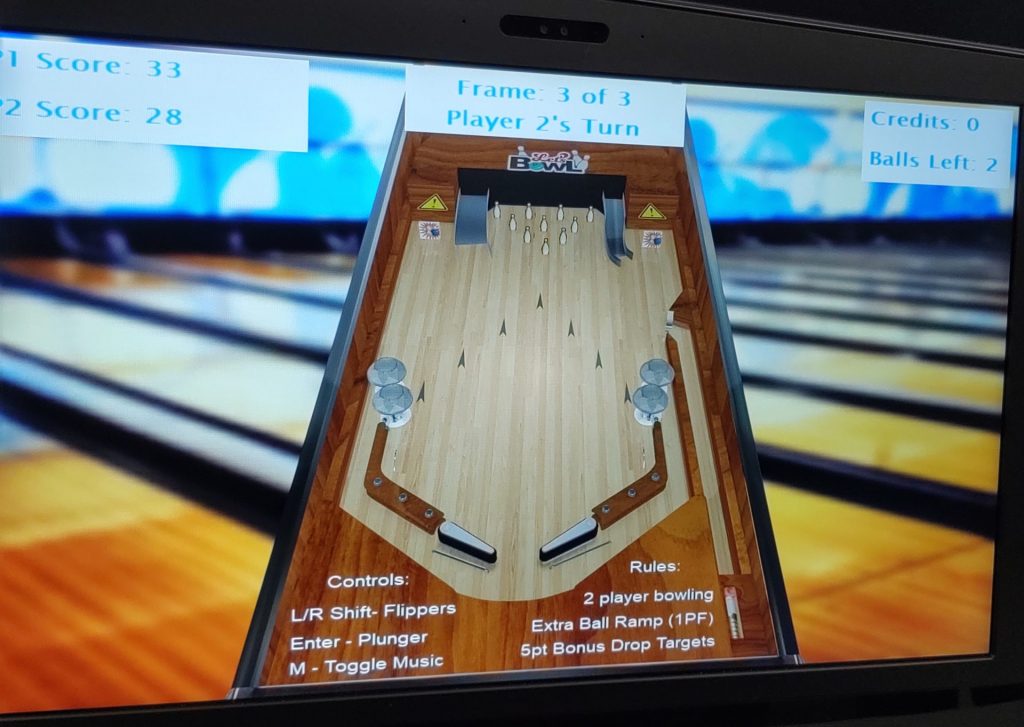
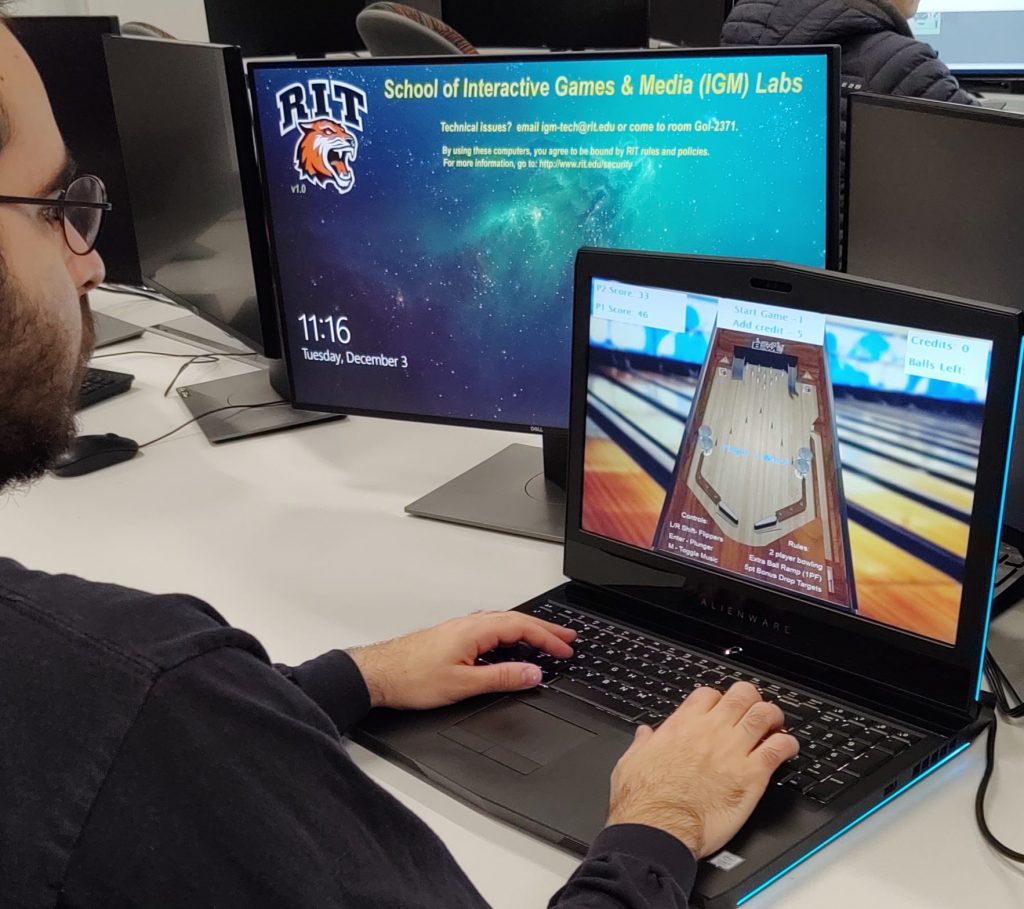
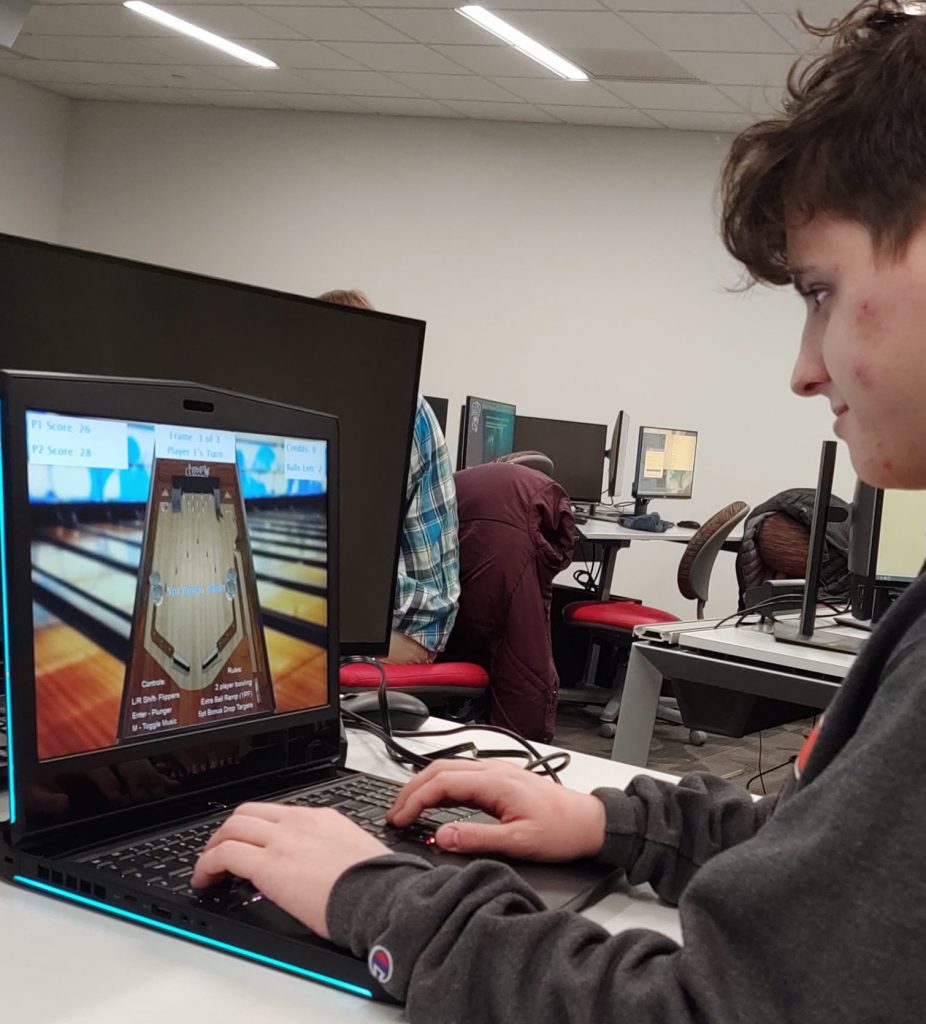
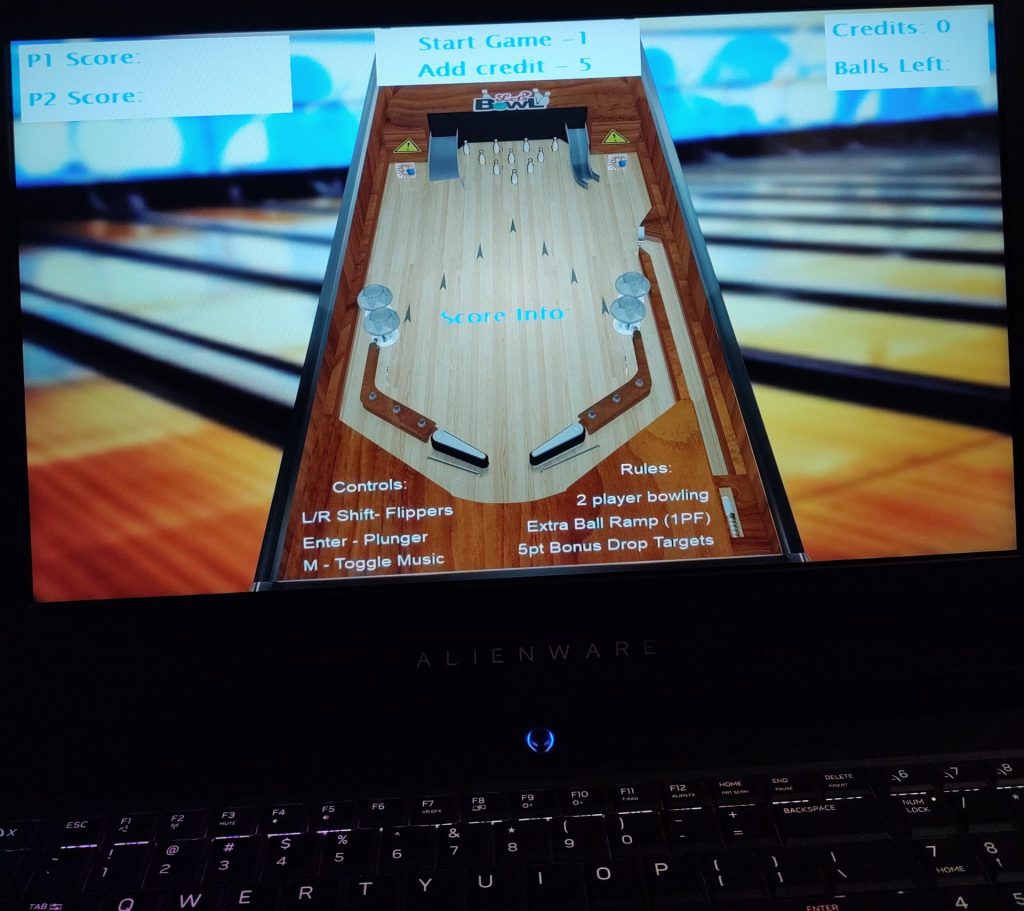
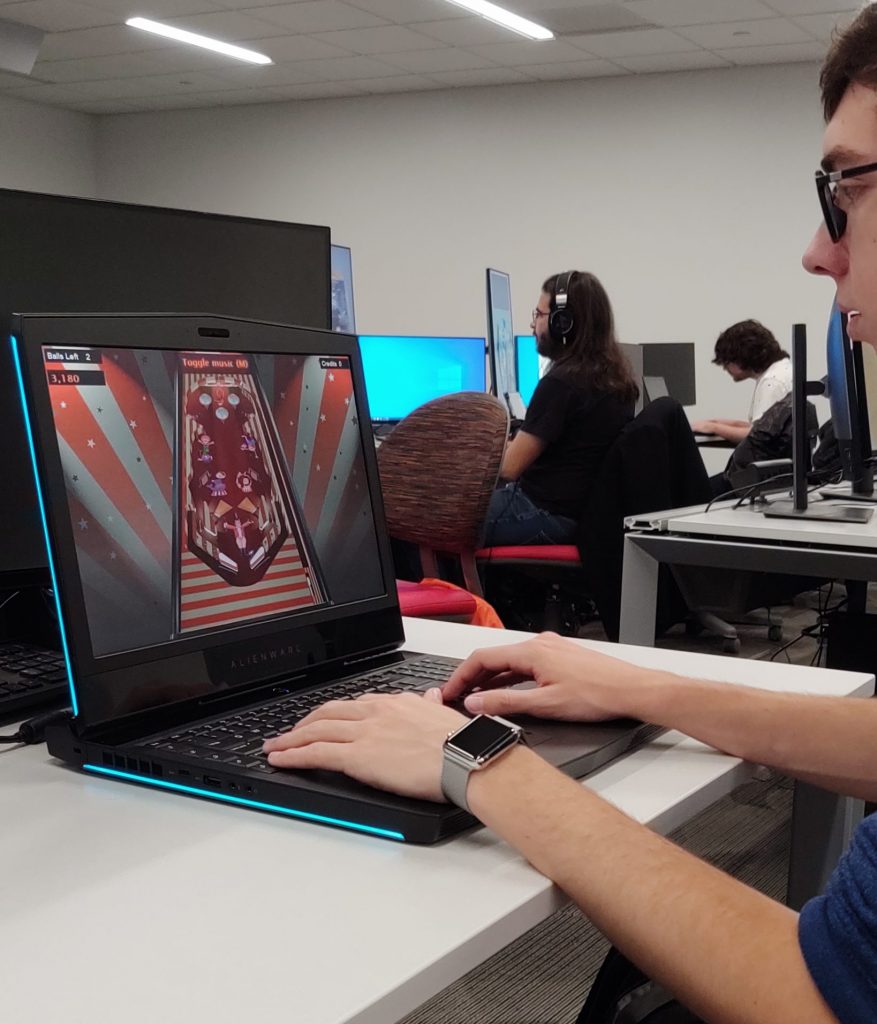
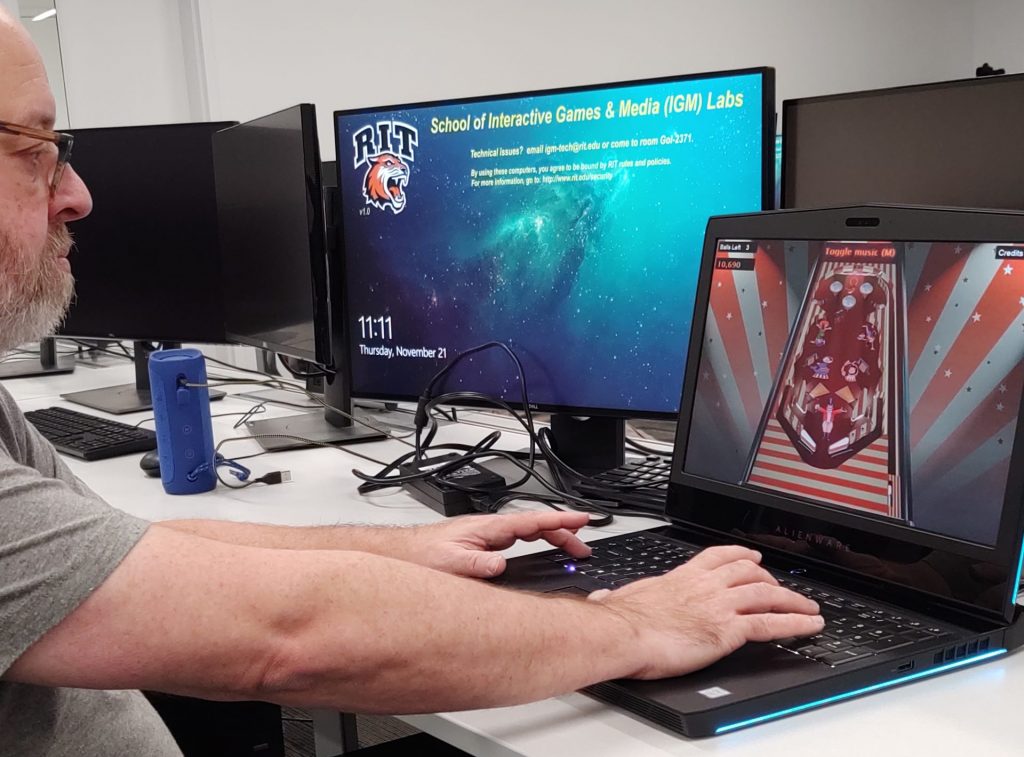
After playing the physical machine, most people moved on to the virtual version. This was when I saw people light up with excitement. Everyone seemed to love how I improved on the physical game. The two player concept that gets lost in the physical version is fairly easy to understand on the computer. I saw families taking turns and playing with each other as they competed. It was very easy to understand the rules as well, so anybody could play. One of the biggest compliments was the sounds I used for the game. Many people thought they fit the game well and made it even more fun to play. The only setback I noticed with the virtual machine was the slight difficulty in understanding how to add a credit and start the game. I thought this feature would be cool, but it seemed to be more confusing in the long run. Besides that, the overall playtest went great. I met some nice people and families that shared our passion in Pinball. I look forward to showing off my machines to others when I go home for the holidays!

Pinball Alley v2: Advanced Virtual Playtest

Today, in class, we playtested the final products of our advanced virtual designs. For my design, I remodeled my advanced physical design into a virtual design that worked better. This design focused on the theme of bowling and used drop targets for pins, had bowling sound effects, and even had a playable two player game.

Making my advanced design was much easier after gaining some experience with Visual Pinball. I started by setting up the initial layout of pinball components, which came from my design drawing. After that, I worked on the drop target pins and the bowling game logic. This logic wasn’t too hard to script, but it did take some time and was more advanced than my previous scripting. Once the game itself worked, I added sound effects, scoring, and images. For this machine, I decided to put my best effort into the look of the machine and I wanted players to feel like they were playing a legit game. After seeing the end result, I would say that my goal was achieved and the machine worked really well in resembling a bowling alley.

While playtesting in class, I received some feedback about the theme, playability, and implementation of my design. Most of the comments I received were in regards to my theme. Everyone seemed to like the bowling pinball game, as well as the sounds, which they said went well with the machine. The two player aspect was fun for most of the playtesters and made the game more appealing because it introduced a challenge between players. They also mentioned that the implementation of the design worked well, such as the pins. They did mention, however, that it would be cooler if the pins could fall on top of one another. But with limitations of the software, this would be too difficult to implement. Regardless, my machine turned out to be a success and I’m glad the class liked it.

If I had to redo my advanced virtual design, I wouldn’t change too much. The whole point of this design was to resemble my advanced physical machine and improve upon the idea using Visual Pinball’s various tools. I believe I achieved this goal perfectly, however, if I had to change something, I’d work a bit more on the bowling score calculation. For the scoring of the game, I focused on a simpler version of bowling, since I capped the game at 3 frames (otherwise it felt too long). However, If I were to go back, I’d do some research on the scoring behind bowling and try to implement that in my own way through scripting. This would make the game feel more realistic. I would also go back and find more reliable sound effects for the machine, since I struggled a bit with finding sounds that fit the machine the way I wanted them too (even though the class liked them). Other than that, I enjoyed the time I spent using all the skills I learned in class to make this final machine. I hope I can use these skills again and I’ll definitely experiment more with Visual Pinball in the future!

References

Bowling Floor Image: https://i.imgur.com/qa2h9W8.png

Back Glass Image: https://starlitebowling.com/wp-content/uploads/2017/03/Starlite-Background-1.jpg

Polished Wood Image: https://i.pinimg.com/originals/89/b4/f2/89b4f216bc39b79db3cdb20a2b03eb11.jpg

Bowling Pin Image: https://cdn.shopify.com/s/files/1/1840/8513/products/bowling-pin-classic-sports-cremation-urn.jpg?v=1565542302

Bowling Explosion Image: https://cdn.clipart.email/babb868e78a598d5d0df43a8a855993f_smartness-bowling-ball-and-pins-clip-art-clipart-skittle-pencil-in-_1188-1300.jpeg

Black Material Image: https://colourlex.com/wp-content/uploads/2017/04/Spinel-black-painted-swatch-47400-opt.jpg

Ball Material Image: https://t1.rbxcdn.com/d2a9c95ee07a5fd244a89c542df112f2

Bowling Arrow Image: https://www.trzcacak.rs/myfile/detail/16-164662_arrow-scalable-vector-graphics-clip-art-black-arrow.png

Warning Image: https://images-na.ssl-images-amazon.com/images/I/41tChfmsyvL._SX342_.jpg

Let’s Bowl Image: https://i.pinimg.com/originals/5c/61/d4/5c61d4830ee96e9a27dbfab3557ec103.png

Bowling Ambiance Sounds: https://www.freesfx.co.uk/Category/Bowling/467

Strike/Spare Sound: https://freesound.org/people/Raclure/sounds/458869/

Bonus Sound: https://freesound.org/people/Joao_Janz/sounds/482653/

Extra Ball Sound: http://soundfxcenter.com/video-games/super-mario-bros/8d82b5_Super_Mario_Bros_1_Up_Sound_Effect.mp3

Buzzer Sound: https://www.myinstants.com/instant/portal-2-buzzer/

Strong Choice – Pinball Alley

My choice for the Strong Museum was to bring my advanced pinbox as well as my improvement of it, which was my advanced virtual machine. I chose to bring these two because I feel that they show all that I’ve learned while attending the class. I used my skills developed over repeatedly making pinboxes to lead up to this advanced design. I also really love my idea for the bowling game and how it shows the diversity of pinball itself.

Each machine plays off the other main idea. I wanted a machine that resembled something I was truly passionate about, which ended up being bowling. The physical machine uses a similar design layout, however, it works a lot less than my virtual machine. Therefore, I want to show each of them at the Strong so people who play them can get an idea of my thought process. They will also be able to see the improvement of the idea as I moved from physical to virtual.

Cirque Du Pinball: Simple Virtual Playtest

Today, in class, we playtested the final products of our simple virtual designs. For my design, I was going for a circus theme that used the basic tools that Virtual Pinball gave to us. I added drop targets, spinners, bumpers, as well as lights/sounds that were decorated according to how a circus might look.

Making my simple virtual design was not as simple as it would seem. A lot of my time on the machine was spent researching how to use Virtual Pinball. Despite the in-class tutorial and the forums, there is very limited material on the software, especially when it comes to scripting. However, the software itself allowed me to do things that the physical pinbox did not. For example, I was able to add lights, bumpers, and drop targets that worked very well. I used scripting to program them, which took some time, but worked out in the end. For example, I was able to play a clown laughing sound after all the drop targets to a side were hit. Little things like this took time, but made the machine more unique than my physical machines. After programming score and functionality, I focused on adding decorations and sound that fit a circus theme, bringing it all together.

While playtesting in class, I received some feedback about the theme, playability, and implementation of my design. Although only a few people managed to play my machine, most of them liked the visual appeal. The sounds and art fit the theme well and it made the machine more fun to play. With that said, playing the game was just as appealing, but there were a few setbacks. The drop targets seemed to be difficult for players to hit and the ball would often get stuck bouncing between bumpers. Although I intended this area to be a trap to gain score, the implementation could have been a little better. Other than that, the design worked really well in Visual Pinball.

If I had to redo my simple virtual design, I wouldn’t change much. My design changed a bit from the start, but it worked very well as a simple game to just have fun with. However, if I had to change something, I would probably make the machine a bit more simple. I put a lot of time into the machine and added some features which were probably not necessary for the requirements of this design. For example, I added the ability to add credits and start the game. I also put a lot into the details of the machine. All of this looked nice in the end, but it was much more advanced than I had initially hoped. Nevertheless, I had fun making it and I look forward to using what I learned on my advanced virtual design!

References

Circus Playfield Image: https://www.google.com/url?sa=i&source=images&cd=&cad=rja&uact=8&ved=2ahUKEwjkts7H_OTlAhXFm-AKHSH2DXcQjRx6BAgBEAQ&url=https%3A%2F%2Fwww.istockphoto.com%2Fphotos%2Fcircus-tent&psig=AOvVaw3xVqfJJQbohutAXyxCj7gr&ust=1573658292863644

White Material: https://www.google.com/url?sa=i&source=images&cd=&ved=2ahUKEwiBweiz_-TlAhUBmeAKHXrfDyIQjRx6BAgBEAQ&url=https%3A%2F%2Fwww.amazon.com%2FPrism-Backdrop-Ravelli-Background-pre-shrinkage%2Fdp%2FB001C6SYR2&psig=AOvVaw2GRKuU4BGi5kYqZBXynvbF&ust=1573659176489747

Striped Material: https://cdn11.bigcommerce.com/s-8715e/images/stencil/1280×1280/products/124200/371235/PSD101__34336.1566493794.jpg?c=2?imbypass=on

SpotLight Image: https://www.google.com/url?sa=i&source=images&cd=&ved=2ahUKEwj5xJK9jeXlAhVvg-AKHcD1AkEQjRx6BAgBEAQ&url=https%3A%2F%2Fwww.pinterest.com%2Fpin%2F510314201510754597%2F&psig=AOvVaw1YzCFFykjaX9ujar2RhtEL&ust=1573662950059096

RingMaster Image: https://www.google.com/url?sa=i&source=images&cd=&cad=rja&uact=8&ved=2ahUKEwiEtrOdpuXlAhWNct8KHfunDNoQjRx6BAgBEAQ&url=https%3A%2F%2Fwww.kissclipart.com%2Fring-master-png-clipart-the-ringmaster-circus-b0h8yw%2F&psig=AOvVaw2VExZ9pmyymFU741OB59L_&ust=1573668654011638

Seal Image: https://encrypted-tbn0.gstatic.com/images?q=tbn:ANd9GcTTn5C6-gODl-x92qVzb29TzkSJc4lzQcCyS04z0o_YOboXYV82dw&s

Lion Image: https://previews.123rf.com/images/comodo777/comodo7771402/comodo777140200002/26051484-carnival-lion.jpg

Clown 1 Image: https://pixy.org/src/74/thumbs350/742650.jpg

Clown 2 Image: https://pixy.org/src/58/thumbs350/581751.jpg

Cannon Image: https://www.clipartwiki.com/clipimg/detail/259-2594951_download-cartoon-circus-cannon-png-images-background-cartoon.png

Letter C: https://images.yaoota.com/XANYP7uN6xxyTEINUIEoZSXBP5A=/trim/yaootaweb-production-ng/media/crawledproductimages/8a8682b8e5bd7d93da6325cad86160620deffe2b.jpg

Letter L: https://images-na.ssl-images-amazon.com/images/I/61Xue5hPgnL._SX466_.jpg

Letter O: https://images-na.ssl-images-amazon.com/images/I/61I7o3q%2BlGL._SX466_.jpg

Letter W: https://images.yaoota.com/JDpa5o9r2SWxa8hC_IIvwm9uUVk=/trim/yaootaweb-production-ng/media/crawledproductimages/905f9d916990e6c32ced209abcb596c0f1cd48d9.jpg

Letter N: https://as1.ftcdn.net/jpg/01/61/76/92/500_F_161769244_K0FiGcGRoB2iGtdk8kfJENaVqcagU5zf.jpg

Circus Music: https://archive.org/details/78_entry-of-the-gladiators_fucik-laurendeau-ringling-brothers-and-barnum–baileys-ba_gbia0000455b

Cannon Sound: https://www.freesoundeffects.com/free-sounds/cannon-10077/

Clown Sound: https://retired.sounddogs.com/previews/17/mp3/704046_SOUNDDOGS__ca.mp3

Sad Trombone Sound: https://freesound.org/people/Benboncan/sounds/73581/

Pinball Alley v2 – Advanced Virtual Design

My advanced virtual design is called Pinball Alley v2. The goal for this advanced virtual design is to improve my physical advanced design. I want to create a virtual machine that resembles an actual bowling lane. The machine will be simple in layout, but will have a more advanced scoring system and some extra mechanics for added play. Inspiration for this idea came from my love for bowling and my last physical machine. The physical machine implemented my idea pretty well, but there were flaws when it came to the scoring system and drop targets. I wanted to improve and make a virtual design that felt like a competitive game of bowling between two players. All these ideas led me to the advanced virtual design below.

After reanalyzing my physical idea, I determined ways to make my virtual design better. I would use Visual Pinball’s tools and improve upon the elements that didn’t work too well in my pinbox. I decided to use actual drop targets for my pins, providing a better bowling experience. There would still be a system for returning the ball using kickers and an open playfield for ball control. However, I will make this idea more advanced by programming two player game play as well as extra ball and such. This will add to the experience of the machine as a whole and move it in a better direction than the physical idea.

For the top of the playfield, I focused on the actual game of bowling. I wanted the top to resemble where the pins would be located on the bowling lane. They would be represented using drop targets and there would be kickers to destroy the ball if it passed the pins. Since drop targets are a tool of the software, they should work much better than my physical design. I decided that I would allow only 3 frames per game, since 10 seemed too long for play. However, to fix the scoring I made spares and strikes worth 10 points (depends on how many balls were used to hit all pins) and 1-9 for anything else. I also added an improved version of extra ball here. The ramp surrounding the pins would resemble a ball return and would give one extra ball per frame. Using it would provide an advantage over your opponent and due to its location, it is much easier to reach than my physical design. Lastly, I added the side bonuses that will provide an extra 5 points to get ahead of your opponent. These are relatively the same, but I can use text info to show the player they received a bonus.

The bottom of the playfield is pretty barren. I left it open because it is important to allow the player ball control as they aim for the pins. However, I did add bumpers to the sides to direct the ball to the flippers, which is an improvement over my physical design. For this specific design, I think it is also important to provide critical information to the player. Since my physical design lacked information, I decided to put it all on the back glass. I will show the current frame, player scores, balls left, as well as game information like extra ball and bonuses. This will make the player experience feel very similar to bowling.

For this design, I was not able to give my presentation because I was traveling. However, I did submit my presentation and heard back from some classmates. The feedback was generally focused on the simple design. Although the design does not look too advanced, I will be programming a lot more for the advanced aspect. This programming will provide a more advanced player experience than my other machines. As I start to build this design, I might change a few things when it comes to physical look of the machine. I like the design, but I want the experience to be unique. I might make the bowling pins surrounded by an overhang like in actual bowling. I might also rearrange the back glass display and write in game rules to make information more readily available. Other than that, I look forward to making my improved and advanced virtual design!

References

Bowling Background: http://www.backgroundsimg.com/picdir/sm/bowling/backgroundsimg-party-bowling-alley-bowling-pins-bowling-oMm44.jpg

Cirque Du Pinball – Simple Virtual Design

My simple virtual pinball design is called Cirque Du Pinball. The goal for my simple virtual design was to test Visual Pinball and the features it provides when making a pinball machine. I decided to focus on a circus theme for this simple design. Inspiration for this concept came from an idea I had on a previous pinball machine. Since Visual Pinball allows the use of lights, sound, and music, I thought that imitating a circus full of music and fun visuals would be a good way to learn what the software has to offer. I also plan to use this design as a starter for my advanced virtual design, which will be an imitation of my physical bowling pinball machine . This will make it easier when I’m working on a more complex machine with the software.

After doing some research into simple pinball designs, as well as circus designs, I came up with the design above. My field will be relatively simple, but will use most of the components provided by Visual Pinball. I have added bumpers, spinners,and drop targets, each of which will have some sort of circus theme. The field is also pretty open, to allow movement of the ball and an easy way to reach areas where points will be gained.

At the top of my design, I have added bumpers to give the player an area to rack up points. Each bumper will have lights and give the player 100 points on contact. On the left side there will be spinners that give 200 points as well as a wall and bumpers to direct the player back into the scoring zone. This area will be decorated to resemble height based circus activities such as the trapeze and cannons.

To the right of my design, I have added drop targets that spell the word clown. When all the targets are hit, they will give the player 1000 points. Other than that, this side is a duplicate of the left and will also help direct players into the scoring zone. At the bottom of my design, there are default slingshots, which will be decorated for a circus theme.

After giving my presentation, there wasn’t too much feedback in terms of my design. However, there were some items that could be fixed as I move forward. I learned that spinners come in specific forms in Visual Pinball and not the idea I had for my design. In this case, I might move the spinners around and add drop targets to both sides. I also might make the design a bit more advanced by adding a credit system and the ability to start the game. This will aid me when scripting in my final virtual design. Other than that, I like where this design is going and I can’t wait to get it started!

Circus Image: https://occ-0-1068-1722.1.nflxso.net/dnm/api/v6/E8vDc_W8CLv7-yMQu8KMEC7Rrr8/AAAABdMm2NEga7lzgtzzxBqolHT7kXfWBy6yuRww2_0PGi6elhoob1xsUipD3tLZSo6msrI9DJuc-4XAHpE0pRyZ9sHSjZFM.jpg?r=c93

Pinball Alley: Advanced Playtest

Today, in class, we playtested the final products of our advanced designs. For my design, I was going for a bowling theme that used a more advanced scoring system than my previous designs. I used drop targets for the pins and decorated my machine with bowling attire to give the feeling that players are in a real bowling alley.

Building my advanced design took a lot of problem solving and ingenuity. In order for the drop targets to work, I had to line them up properly so that they would remain over the playfield. Keeping them above the playfield would prevent any friction when the ball hits them. In order to properly do this, I attached the drop targets to a roof of cardstock and lifted them off the playfield using side supports. However, the supports were a bit too short, leaving some of the drop targets to scrape against the playfield. To help with this, I added a back support and a bit of fishing line to lift the roof off the playfield. The result worked, it wasn’t perfect, but it was good enough for the time being. To keep the drop targets up when hit, I used magnets, which was pretty neat to implement. The rest of the board came with careful decorating, resulting in a playfield that is much more advanced than my previous designs.

While playtesting in class, I received a lot of feedback about the theme, playability, and implementation of my advanced design. Most people thought the theme of my machine was well established and it really looked like you were bowling on a wooden floor. The game was addicting and knocking down the pins was very satisfying. However, the way the drop targets were implemented made the pins difficult to knockback at times. Other than that, most people seemed to like the concept of my design.

If I had to redo my advanced design, I wouldn’t change very much. The design came out great and it was really fun to make. However, if I had to change one thing it would be the drop targets. Although they came out better than I expected, my current drop targets aren’t the best representation of a bowling game. It’s very difficult to get a strike or spare because there are no pin-on-pin reactions when the ball hits the drop targets. This leads to a less realistic game and negatively affects the scoring system I have in place. To fix this, I’d probably use objects that can be knocked down onto each other and aren’t too difficult to set back up. Other than that, I’m proud of how my advanced design turned out and I look forward to experimenting with the Pinbox in the future!

Wooden Floor Reference: https://invisionhardwooddecor.com/wp-content/uploads/2018/02/hard-maple-hardwood-flooring-natural-select-better-natural-essential-lauzon.jpg

Bowling 7-10 Split Reference: https://www.bowl.com/uploadedImages/Source/Source_Home/Untitled-2(2).jpg

Ball Return Reference: http://www.pintsandpins.com/wp-content/uploads/2012/09/Century-Lanes-Ball-Return.jpg

Baller” Bowling Ball Reference: https://www.bowlerx.com/wp-content/uploads/2019/09/hammer-baller-bowling-ball.png

Flawless” Bowling Ball Reference: https://cdn11.bigcommerce.com/s-e12a1/images/stencil/1000×1000/products/6349/31697/HMR_Flawless_NEW__03705.1545499943.jpg?c=2

Savage Life” Bowling Ball Reference: https://images.bowling.com/large/11955.large.jpg

Bowling Pin Reference: https://www.trzcacak.rs/myfile/detail/114-1143333_png-dlpng-download-image-bowling-pin-clipart-png.png

Blue Bowling Ball Background: http://www.backgroundsimg.com/picdir/sm/bowling/backgroundsimg-tournament-ten-pin-bowling-houston-bowling-center-design-3p90y.jpg

Red Bowling Ball Background: https://us.123rf.com/450wm/tilo/tilo1803/tilo180300018/96841894-stock-vector-bowling-game-strike-over-dark-red-background-red-bowling-ball-crashing-into-the-pins.jpg?ver=6

Bowling Page Border: https://images-na.ssl-images-amazon.com/images/I/41nHsq3A9IL._SX425_.jpg

Pinball Alley – Advanced Pinball Design

My advanced pinball design is called Pinball Alley. The goal for my advanced design was to introduce a more advanced scoring system than my previous designs, as well as some new features. Inspiration for this concept came from my love for bowling. I wanted to introduce the theme of bowling into one of my machines and I decided that I could use bowling’s scoring system to my advantage. I also thought it would be a cool idea to allow more than one player to compete against each other for a higher score, using the scoring system I put in place. Lastly, I was aiming for a higher skill level and using bowling’s scoring helps with that. All of these ideas led me to the advanced pinball design below.

After doing some research into layouts for bowling designs, I eventually came up with the above advanced design. While focusing on the bowling theme, I decided to use the idea of bowling pins as a main focus for my playfield. Drop targets would represent the pins themselves and a ball return pit would aid in the return of the ball after shots. I made sure to keep the playfield pretty open so players can aim their shots. I also have bumpers to help guide the ball during play.

For the top of the playfield, I focused on player scoring methods. At the center is the drop target pins, where players can compete to get a higher pin count as they play a ten frame game of bowling. Each player has two balls (marbles) to use per frame and as long as the ball stays in play, they can keep raising their pin count. They can get 1-9 pins, a strike, or a spare using those balls. I’ve placed a ball return pit behind the pins that aids in the idea of a bowling lane (with bumpers to guide into the pit). I also added special bonus holes for an extra way to score 10 points.

Besides the drop target pins, I’ve added another new feature to my advanced design. On the left side of the playfield is a ball return tunnel. The ball return tunnel will give the player an extra ball if the ball travels through it. This is meant to give players an incentive to travel around the playfield and not focus entirely on the pins. The bonus holes provide a similar incentive. After witnessing its use, I really wanted to try the extra ball mechanic, which was one major reason I decided to use it for my advanced design.

After giving my presentation, there wasn’t too much feedback in terms of my design, many classmates seemed to be interested in the idea. However, there are a few things I might change for my design as I build it. Based on the size of the playboard, I might need to remove some of the center bumpers so players can properly aim the ball around the playfield. Another change may come in the form of scoring. Although I want to focus on a more advanced scoring system, keeping the scoring simple to understand is also important. Therefore, I might set specific values for a spare and strike. I might also set rules to the extra ball and bonus hole mechanic so that players can’t constantly rack up extra balls/points instead of actually playing the main bowling game. Regardless, I believe that this design is much more advanced than my previous designs and I can’t wait to get started!

Bowling Background Reference: http://wallsdesk.com/wp-content/uploads/2016/10/Bowling-HD-Wallpaper.jpg

Paradise Island – Battle Mode Pinball Design

My battle mode pinball design is called Paradise Island. The goal for my battle mode was to introduce a fun and relaxing theme that make players feel as though they are on a tropical island paradise. Inspiration for this idea came from the fact that I wanted the two playfields to transition into one another. What I mean by this is that each field will represent a unique scene of the overall theme I’m going for. This will give each player a unique experience, regardless of the design layout of each side. Eventually, I focused on a tropical beach/tropical water theme for the two sides because I thought implementing these would be very fun and look nice in the end.

After doing some research into layouts for tropical designs, I eventually came up with the above battle mode design. Keeping my tropical paradise design in mind, each playfield will represent one scene of the tropical paradise, either the water or the beach. I made each side relatively similar in design layout because I didn’t want one player to have an advantage over the other. I also added ramps to each side, with points for each entrance, to give players an incentive to travel to the other playfield.

On this side of my battle mode design, I focused on a relaxing tropical beach scene. The studs at the top represent beach balls that the player can hit to get a score of 30. I gave them this score because they are relatively hard to reach and there isn’t much bounce back from them. In the center, I added three spinners with cocktail umbrellas for added fun when they spin. These are ranged from 10-20 points based on positioning. Lastly, I added some bumpers near the bottom to help guide the ball. This side, although not cluttered, will have a lot of design appeal added to give the player many things to look at as they play.

The other side of my battle mode design represents a tropical water scene and is very similar to the first playfield. However, instead of beach balls for studs, it uses rocks/sea shells, which ties into the water aspect of the playfield. Each spinner is decorated with tropical fish as well. To distinguish this playfield from the other, there will be added decoration, which will allow each player to feel as though there is a unique experience to each side, regardless of the similarities.

After giving my presentation, I got very little feedback, however, I did get some comments. One of my classmates asked why I decided to make the battle mode so relaxing. I decided to do this because I have very little experience making pinball machines. If I introduce complex mechanics before I even understand how to make a basic pinball with flippers, it could end in disaster. I also think making the game relaxing fits better with my theme of a tropical island, where you’d vacation to get away from your daily stress. However, I might consider adding simple mechanics to give players more goals while they play. This could be something like hitting cocktail spinners a few times for a bonus or hitting playfield decorations in a specific order. Regardless, I am looking forward to implementing this design at some point in the class!

Tropical Island Reference: https://i.ytimg.com/vi/q0ugLbzdmqc/maxresdefault.jpg

Target Practice: Bagatelle Playtest

Today, in class, we playtested the final products of our bagatelles. For my bagatelle, I was going for a shooting range theme and chose to show it throughout my design. I used cutouts of shooting targets to line the background and created targets to mark the playfield itself. To align with the theme, I designed the background color to have similar colors to a sheet of shooting range paper.

Building the bagatelle itself was a bit of a painstaking process. Since it’s been so long since the last time I’ve worked with arts and crafts, the playfield took longer to make than I had hoped. For example, I struggled with applying the paper backing and the divider walls. However, after some hard work, I managed to implement them the way I had hoped. After adding the background materials, I worked on creating the targets and aligning the pins perfectly around them. This process took a while and required lots of testing, but was worth it in the end.

While playtesting my board, I received a lot of feedback in regards to the theme, playability, and implementation. One of the top comments from my peers was how well my board was themed. They loved the target backboard, as well as the targets, thinking they added a nice touch and tied together the idea I was going for. In terms of playability and implementation, many of my peers mentioned that the game was fun to play. The separate sections divided the game up and made it feel as though you were actually trying to hit the targets. They also mentioned that the implementation of my push pins and bell worked well together, even though the bell wasn’t very loud when the marble knocked into it.

Despite all of the nice comments about my bagatelle, there were a few things that I’d do differently if I had the time. Some of the comments from my peers mentioned the scoring and how some of the targets were harder to hit than the others. If I were to do this again, I’d fix the scoring so it accurately represented the difficulty of reaching each ball catch. Other than scoring, I’d fix the bells and orient them so that they make a louder noise when the marble reaches the center of each target. Regardless of these fixes, I believe my bagatelle came out much better than I could have hoped!

Shooting Range Target Reference: https://i.ebayimg.com/images/g/sBMAAOSwUFtZZ7rR/s-l400.jpg

Shooting Range Enemy Target Reference: https://reviewfinch.com/i/azn/81vztBMXfGL.SX500.jpg

Bullet Hole Reference: https://www.freeiconspng.com/uploads/bullet-holes-png-11.png